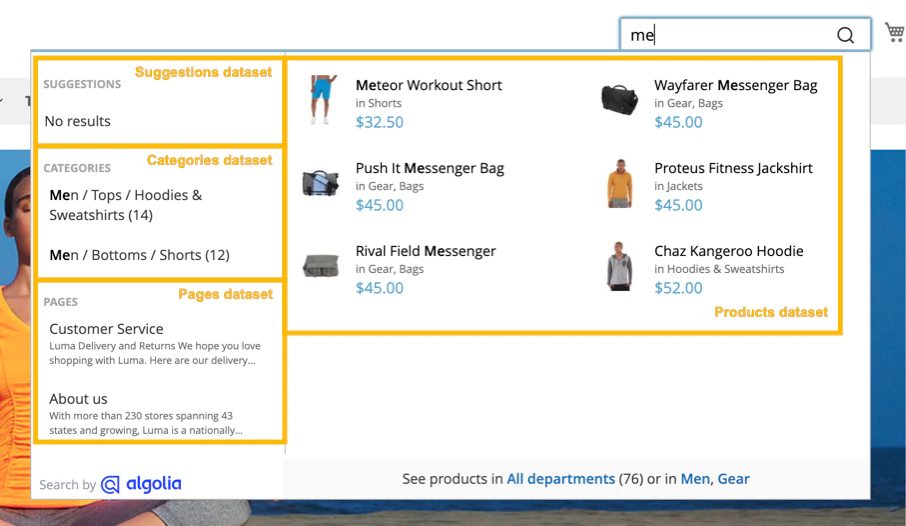
 The Algolia extension comes with default sources.
To change them, go to **Stores > Configuration > Algolia Search > Autocomplete** in your Magento Admin.
You can select these sources:
| Autocomplete source | Description |
| --------------------- | ------------------------------------------------------- |
| `products` | Products from your catalog |
| `categories` | Product categories |
| `pages` | Pages |
| `suggestions` | Suggestions from popular searches |
| `additional_sections` | Additional sections you configured in the Magento Admin |
### Add new sources
To add new sources to the autocomplete menu or change existing ones,
use the `afterAutocompleteSources` hook.
The callback function for `afterAutocompleteSources` must return the complete sources array.
For example:
```js JavaScript icon=code theme={"system"}
algolia.registerHook(
"afterAutocompleteSources",
function (sources, algoliaClient) {
// Add or modify sources, then return them
return sources;
},
);
```
The callback for `afterAutocompleteSources` accepts two parameters:
| Parameter | Type | Description |
| -------------- | ------------------------------------------- | --------------------------------- |
| `sources` | Array of [sources](#sources-data-structure) | Data for autocomplete items |
| `searchClient` | Search client | Initialized Algolia search client |
If you need access to other objects,
such as `algoliaAnalytics`,
use RequireJS to define them as dependency for your `algoliaHooks` implementation.
#### Sources data structure
A minimal configuration for your source object might look like the following:
```js JavaScript icon=code theme={"system"}
{
sourceID: 'my-custom-source',
indexName: 'my_custom_index',
templates: {
item({item, html}) {
return html`
The Algolia extension comes with default sources.
To change them, go to **Stores > Configuration > Algolia Search > Autocomplete** in your Magento Admin.
You can select these sources:
| Autocomplete source | Description |
| --------------------- | ------------------------------------------------------- |
| `products` | Products from your catalog |
| `categories` | Product categories |
| `pages` | Pages |
| `suggestions` | Suggestions from popular searches |
| `additional_sections` | Additional sections you configured in the Magento Admin |
### Add new sources
To add new sources to the autocomplete menu or change existing ones,
use the `afterAutocompleteSources` hook.
The callback function for `afterAutocompleteSources` must return the complete sources array.
For example:
```js JavaScript icon=code theme={"system"}
algolia.registerHook(
"afterAutocompleteSources",
function (sources, algoliaClient) {
// Add or modify sources, then return them
return sources;
},
);
```
The callback for `afterAutocompleteSources` accepts two parameters:
| Parameter | Type | Description |
| -------------- | ------------------------------------------- | --------------------------------- |
| `sources` | Array of [sources](#sources-data-structure) | Data for autocomplete items |
| `searchClient` | Search client | Initialized Algolia search client |
If you need access to other objects,
such as `algoliaAnalytics`,
use RequireJS to define them as dependency for your `algoliaHooks` implementation.
#### Sources data structure
A minimal configuration for your source object might look like the following:
```js JavaScript icon=code theme={"system"}
{
sourceID: 'my-custom-source',
indexName: 'my_custom_index',
templates: {
item({item, html}) {
return html`
${components.Highlight({ hit: item, attribute: "name" })}
${item.sku}
${this.getColorHtml(item, components, html)}
${this.getCategoriesHtml(item, components, html)}
${this.getPricingHtml(item, html)}
 For more information, see [JavaScript mixins](https://developer.adobe.com/commerce/frontend-core/javascript/mixins) in the Adobe Commerce documentation.
## Custom Algolia module
To help you build your mixins faster,
try the `Algolia_CustomAlgolia` extension which installs a set of starter templates for your customizations.
For more information, see [Create a custom extension](/doc/integration/magento-2/guides/create-a-custom-extension#customalgolia).
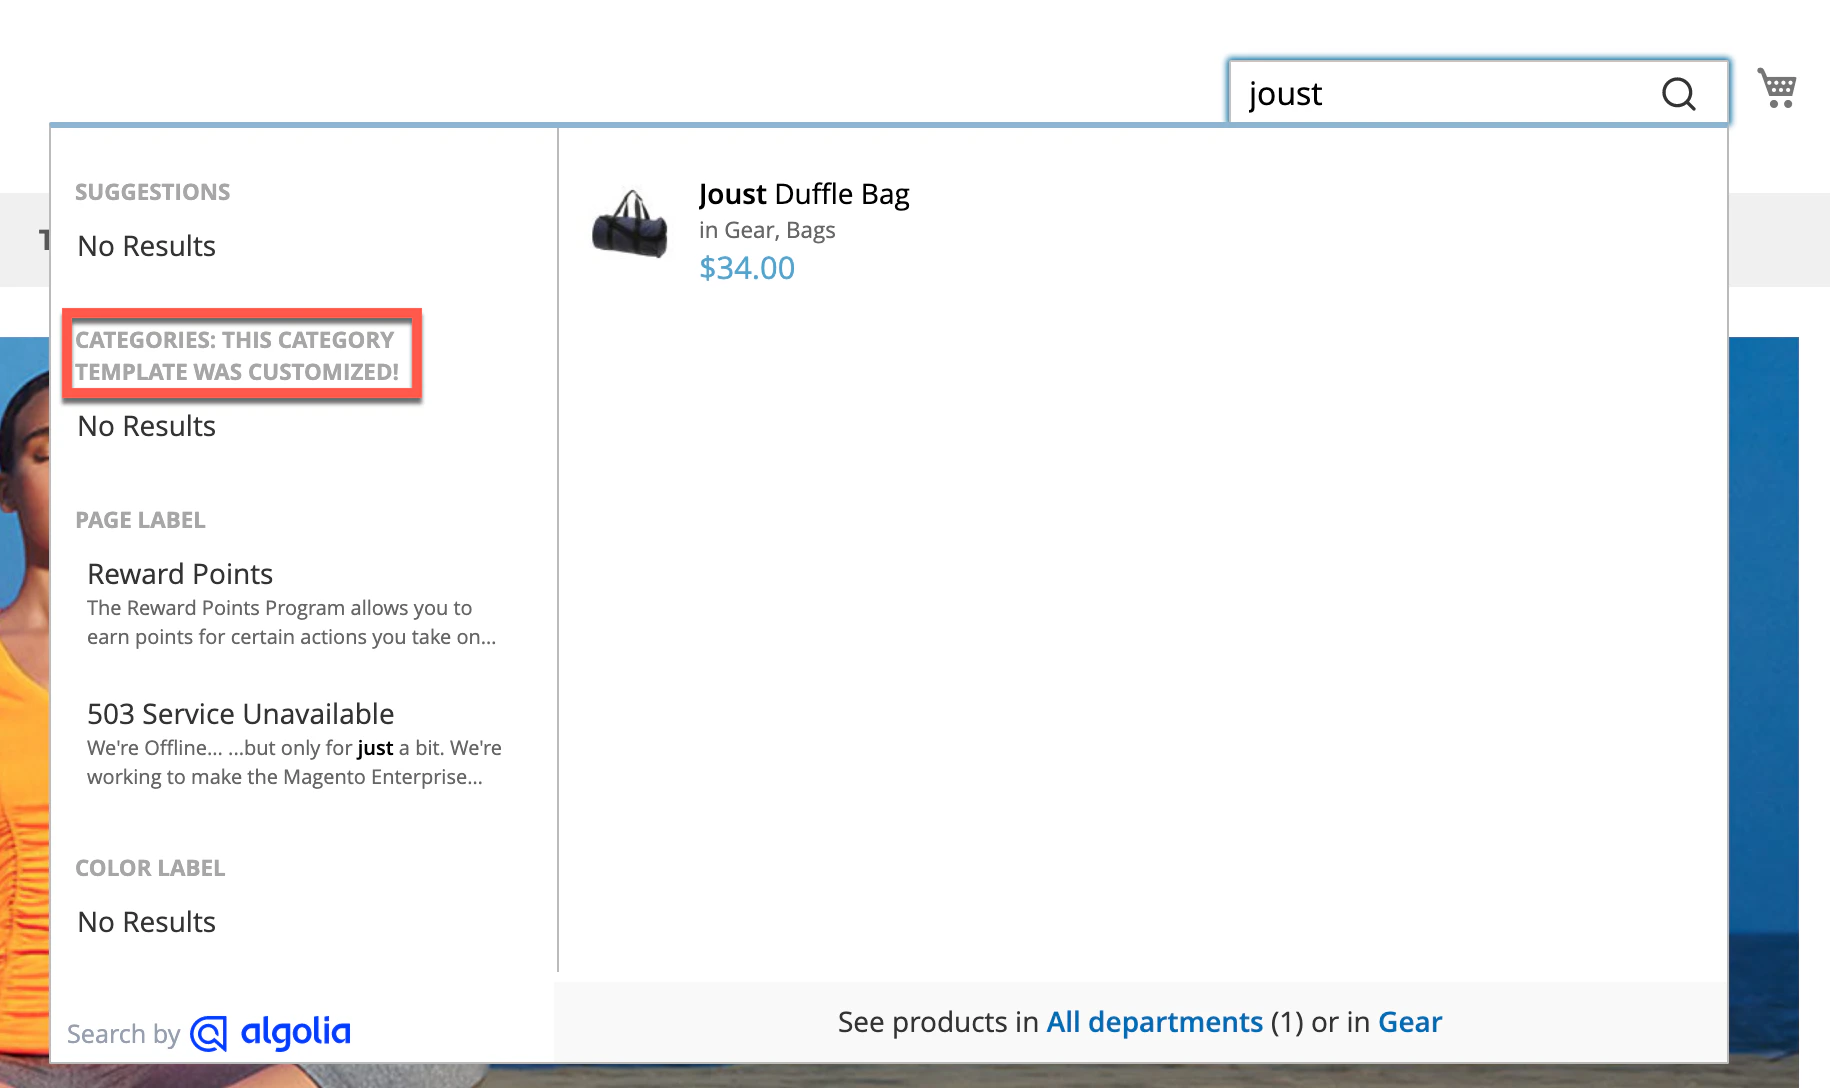
## Styling
To keep the autocomplete menu open when making changes, turn on the debug mode.
To enable the debug mode, go to **Stores > Configuration > Algolia Search > Autocomplete > Enable autocomplete menu's debug mode**.
For more information, see [JavaScript mixins](https://developer.adobe.com/commerce/frontend-core/javascript/mixins) in the Adobe Commerce documentation.
## Custom Algolia module
To help you build your mixins faster,
try the `Algolia_CustomAlgolia` extension which installs a set of starter templates for your customizations.
For more information, see [Create a custom extension](/doc/integration/magento-2/guides/create-a-custom-extension#customalgolia).
## Styling
To keep the autocomplete menu open when making changes, turn on the debug mode.
To enable the debug mode, go to **Stores > Configuration > Algolia Search > Autocomplete > Enable autocomplete menu's debug mode**.
 ### Debouncing
*Debouncing* waits to send a
### Debouncing
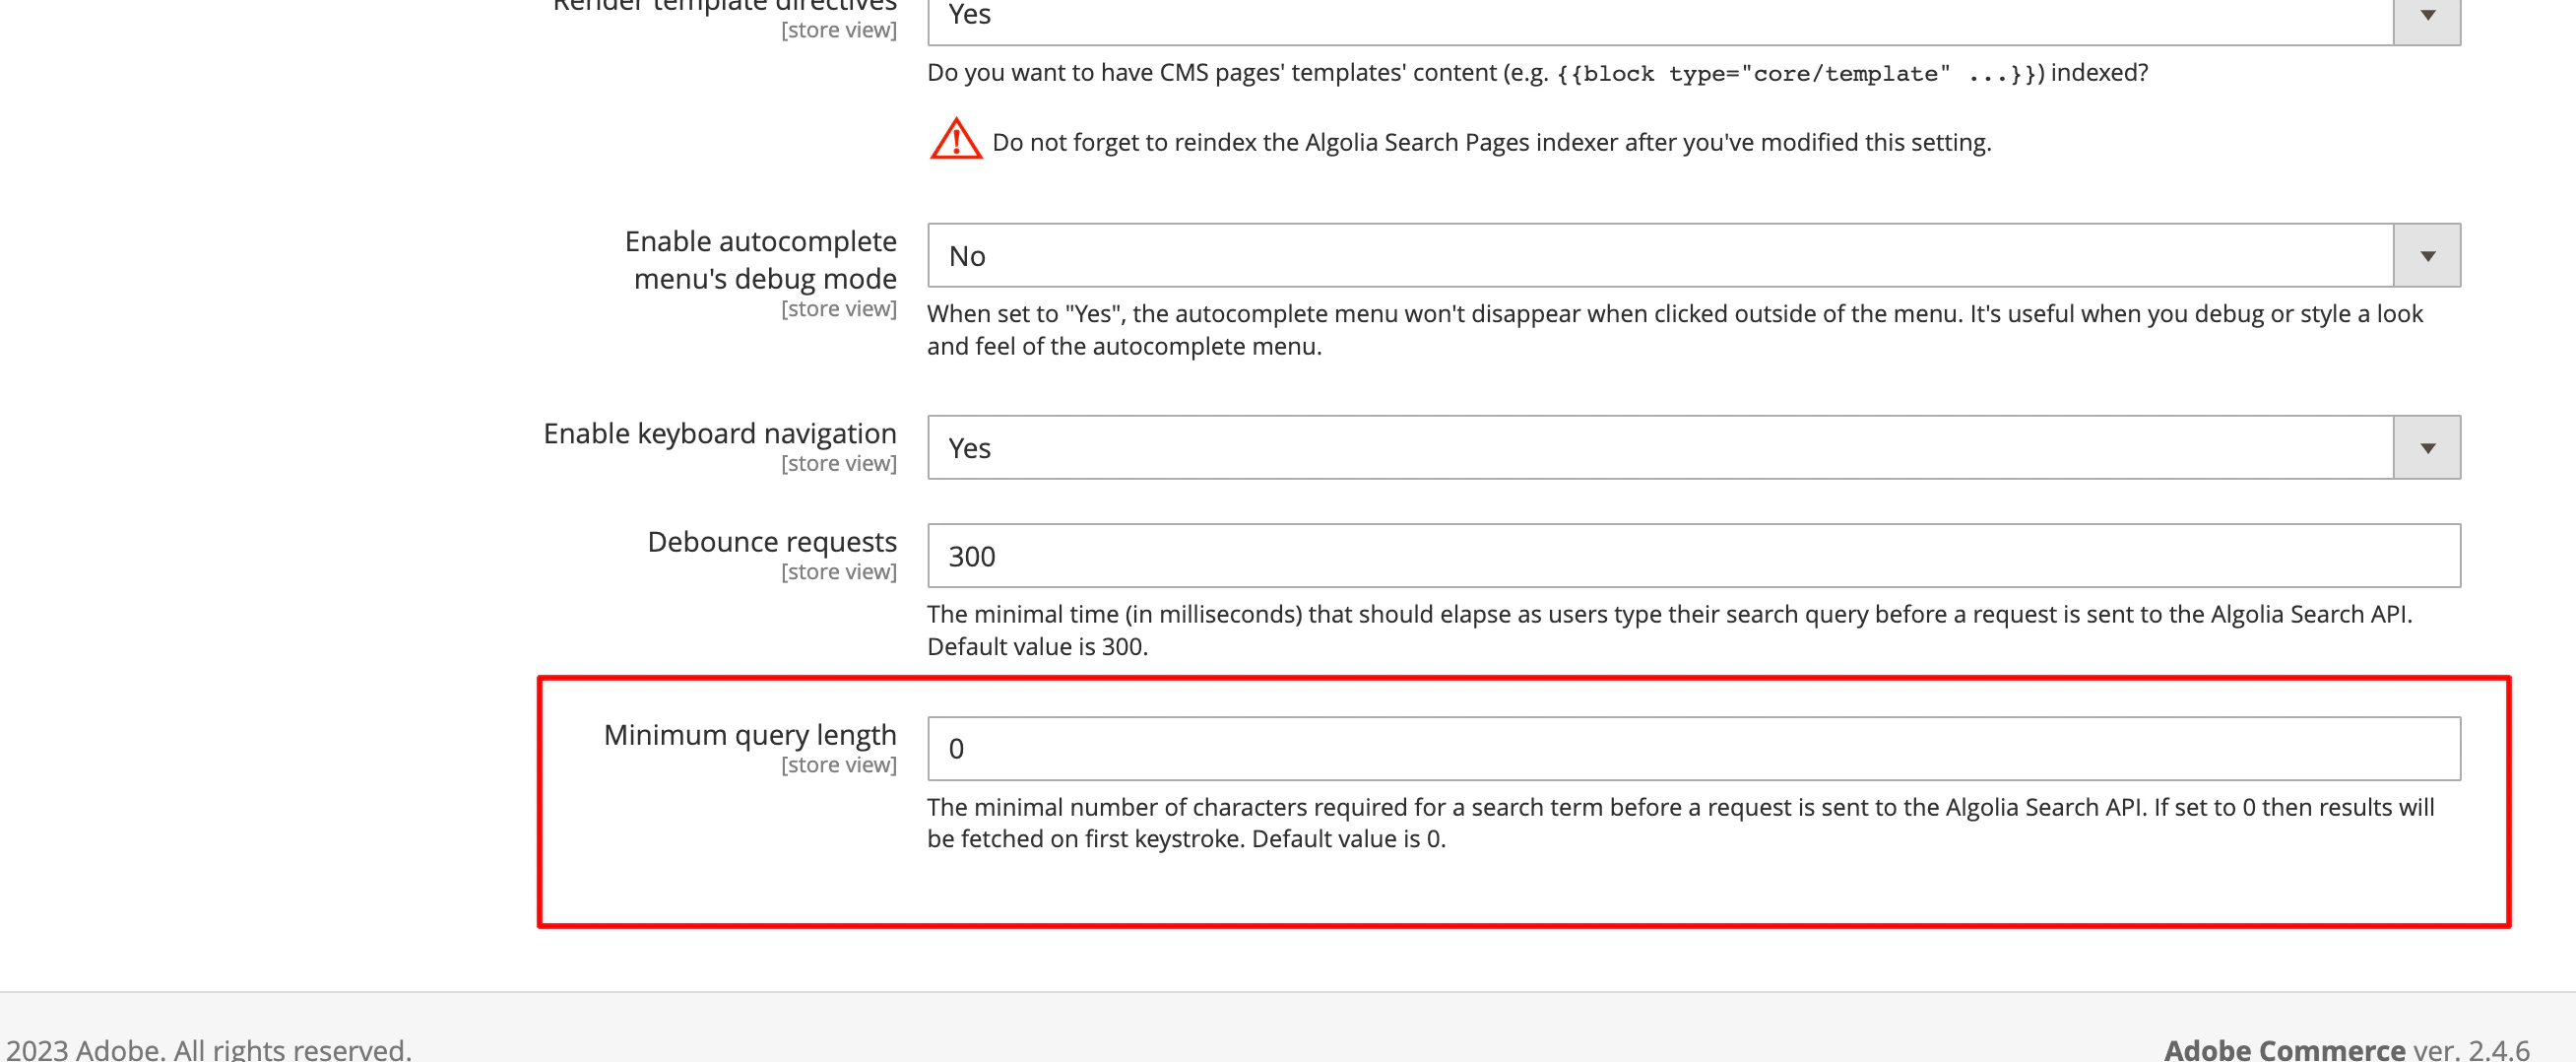
*Debouncing* waits to send a 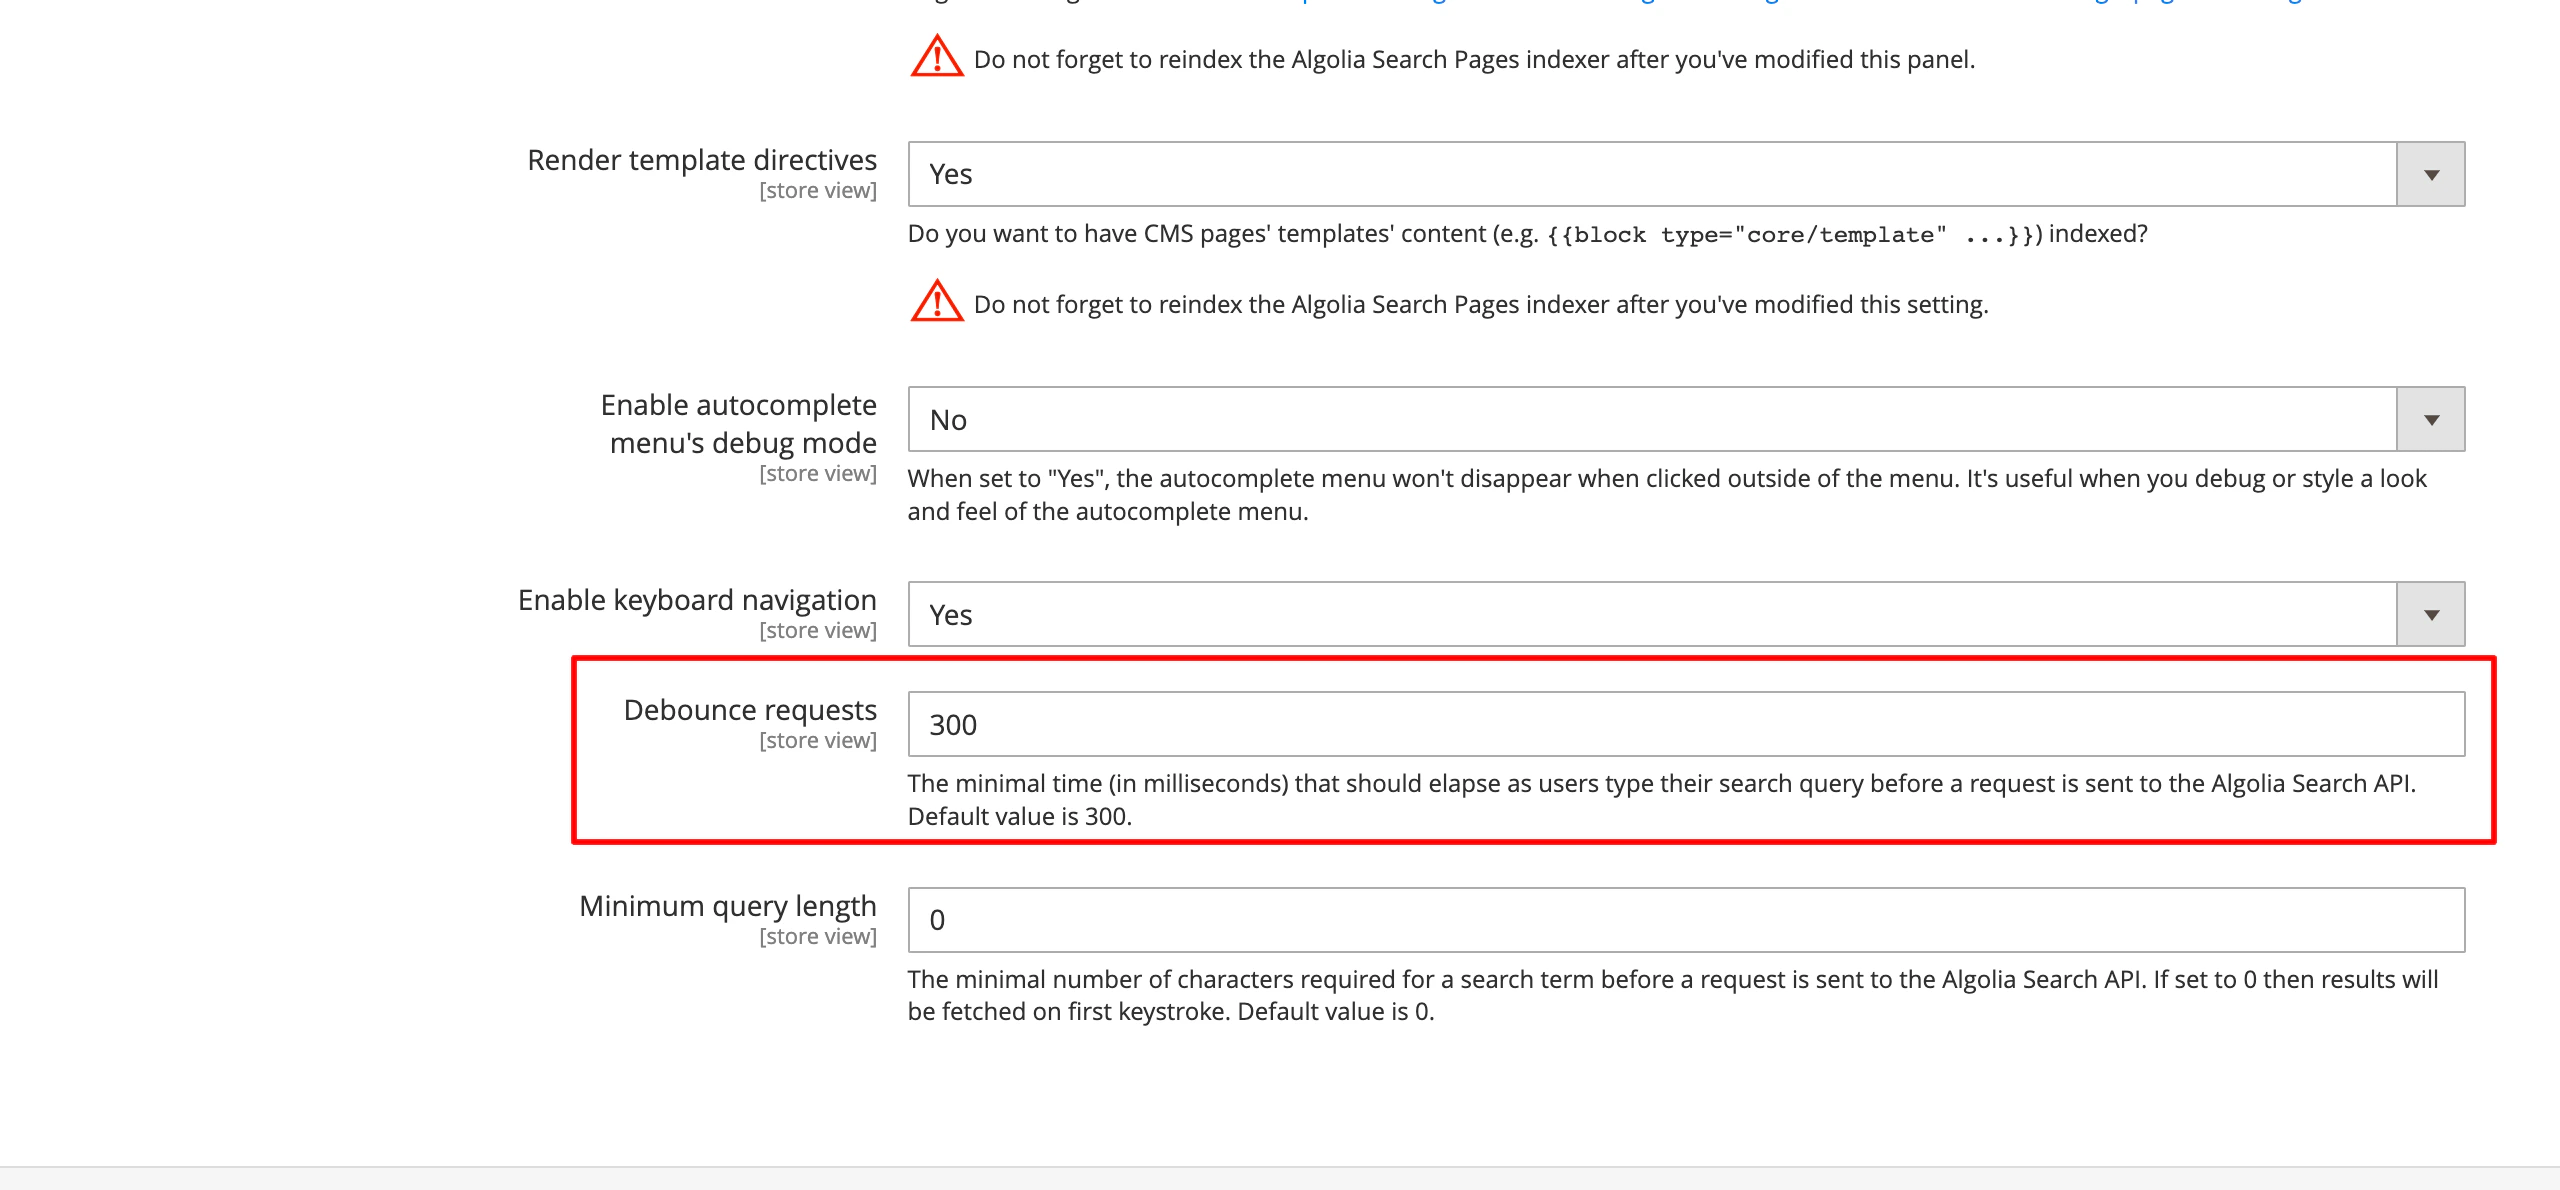 #### Minimum query length
The **Minimum query length** setting defines how many characters users have to enter before triggering a search.
If you set it to 0, searches are triggered from the first keystroke.
#### Minimum query length
The **Minimum query length** setting defines how many characters users have to enter before triggering a search.
If you set it to 0, searches are triggered from the first keystroke.
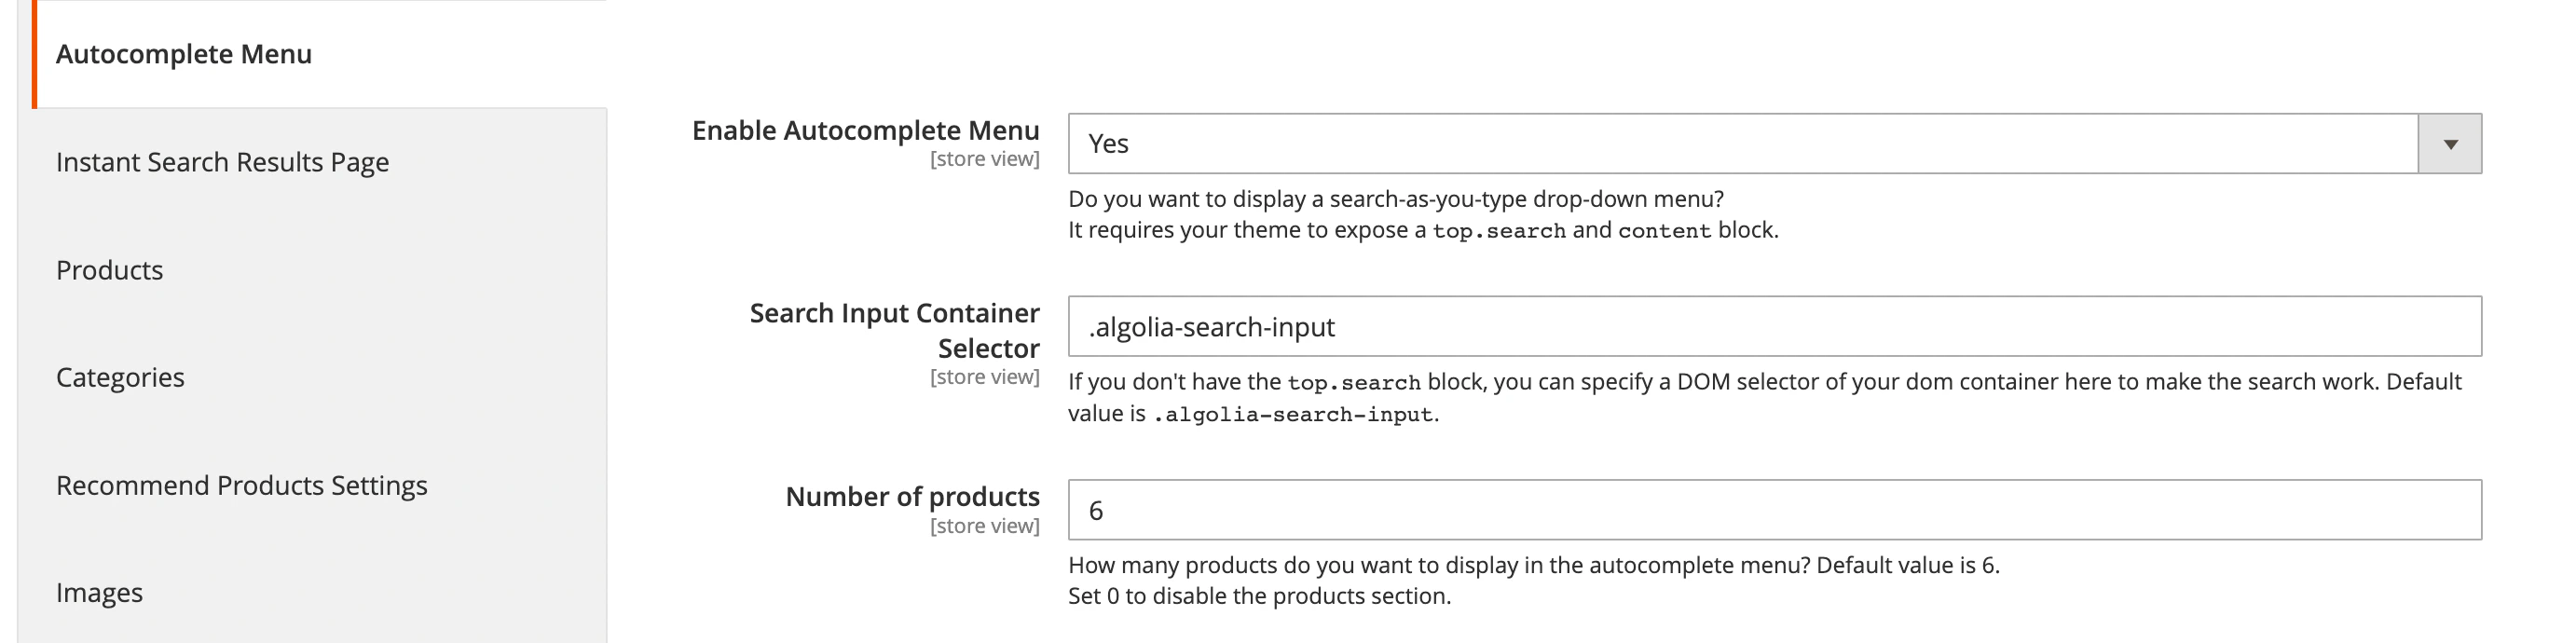
 ### Custom theme
By default, the extension overrides the `topSearch` block of the template.
If you're using a custom theme without the `topSearch` block,
update the DOM selector for the search input.
Go to **Stores > Algolia Search > Autocomplete Menu** in the Magento Admin, and change the **Search Input Container Selector** setting:
### Custom theme
By default, the extension overrides the `topSearch` block of the template.
If you're using a custom theme without the `topSearch` block,
update the DOM selector for the search input.
Go to **Stores > Algolia Search > Autocomplete Menu** in the Magento Admin, and change the **Search Input Container Selector** setting:
 ## Console error after reindexing
If you see the "can't read property 'autocomplete' of undefined" error after reindexing, this indicates the extension's templates weren't rendered.
1. Since the templates are rendered into the `before_body_end` block, ensure the theme renders this block.
2. If the block *is* rendered, confirm that symlinks are enabled in Magento's configuration.
Enable this in the administration section by going to **System > Configuration > Advanced > Developer**.
## Console error after reindexing
If you see the "can't read property 'autocomplete' of undefined" error after reindexing, this indicates the extension's templates weren't rendered.
1. Since the templates are rendered into the `before_body_end` block, ensure the theme renders this block.
2. If the block *is* rendered, confirm that symlinks are enabled in Magento's configuration.
Enable this in the administration section by going to **System > Configuration > Advanced > Developer**.