> ## Documentation Index
> Fetch the complete documentation index at: https://algolia.com/llms.txt
> Use this file to discover all available pages before exploring further.
# Migrate third-party libraries
> Migrate Algolia's third-party libraries from jsDelivr CDN to Shopify Assets Management.
Shopify apps can't modify theme code directly.
To integrate Autocomplete and InstantSearch,
use the Algolia AI Search & Discovery app's **App Embed** and **App Blocks**.
For more information, see:
* [Manual theme configuration](/doc/integration/shopify/getting-started/quick-start#manual-theme-configuration)
* [Shopify Algolia configuration](/doc/integration/shopify/sending-and-managing-data/algolia-config)
If you installed the Algolia AI Search & Discovery app *after* **November 8, 2018**,
your assets are managed by the Shopify CDN.
If you installed the app *before* November 8, 2018,
consider migrating the assets from jsDelivr to the Shopify CDN.
Depending on your implementation, you can migrate:
* Automatically, in the Shopify admin
* Manually, if you have a custom implementation
## Automatic migration in the Shopify admin
To automatically migrate the third-party libraries, reinstall Algolia into your theme.
This overrides the third-party libraries and scripts with up-to-date versions.
If you changed or customized your theme by editing the scripts provided by the Algolia AI Search & Discovery app,
proceed with a manual migration.
**Otherwise, you will lose your changes**.
To automatically update the Algolia dependencies of your theme,
go to your Algolia AI Search & Discovery app's settings and follow these steps:
1. Open the **Display** tab.
2. Click **Install to a new theme**.
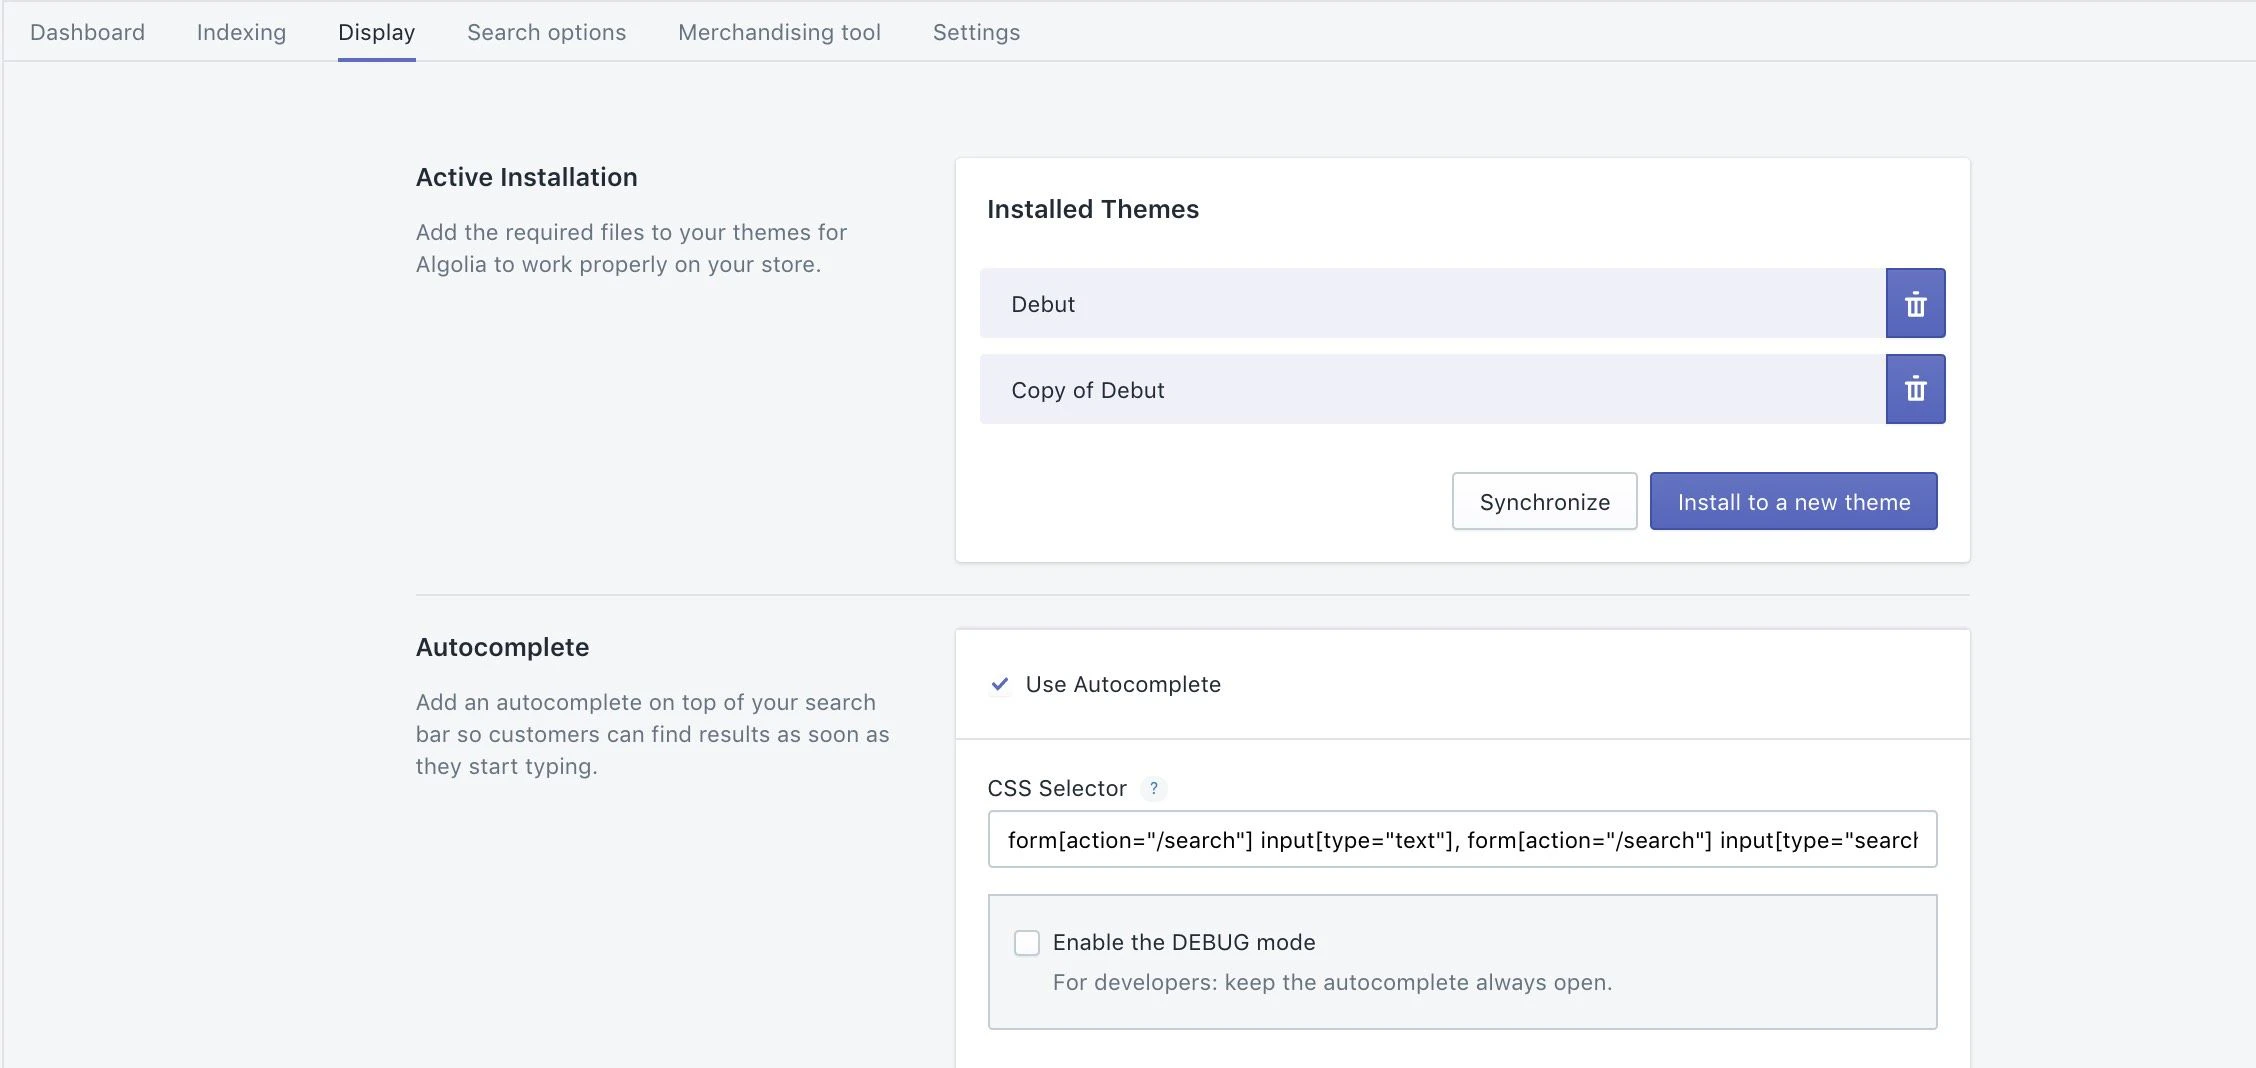 3. Select the theme you want to update.
A migration notice shows more information.
3. Select the theme you want to update.
A migration notice shows more information.
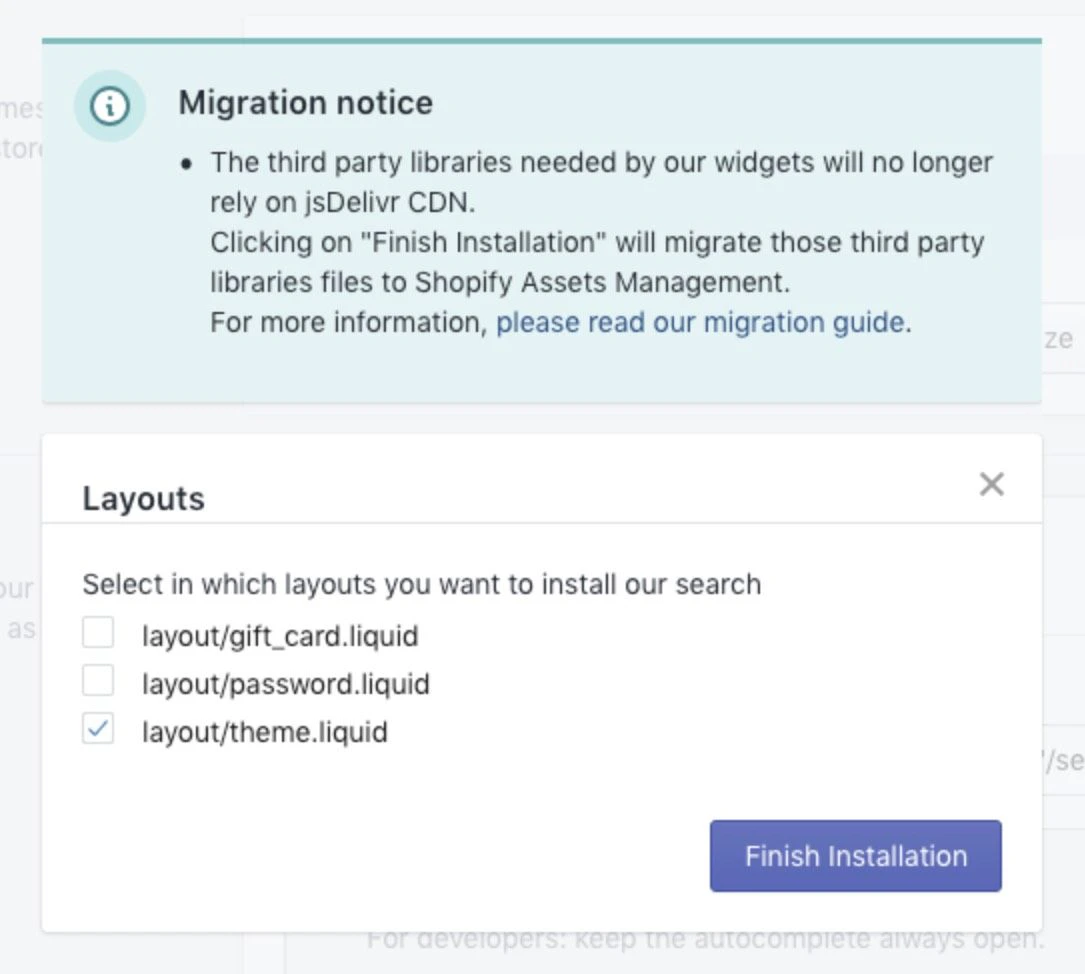 4. Click **Finish installation**.
## Manual migration
If your shop has a custom theme or relies on non-standard versions of external libraries,
you have to manually update your theme.
### Migrate libraries in your theme
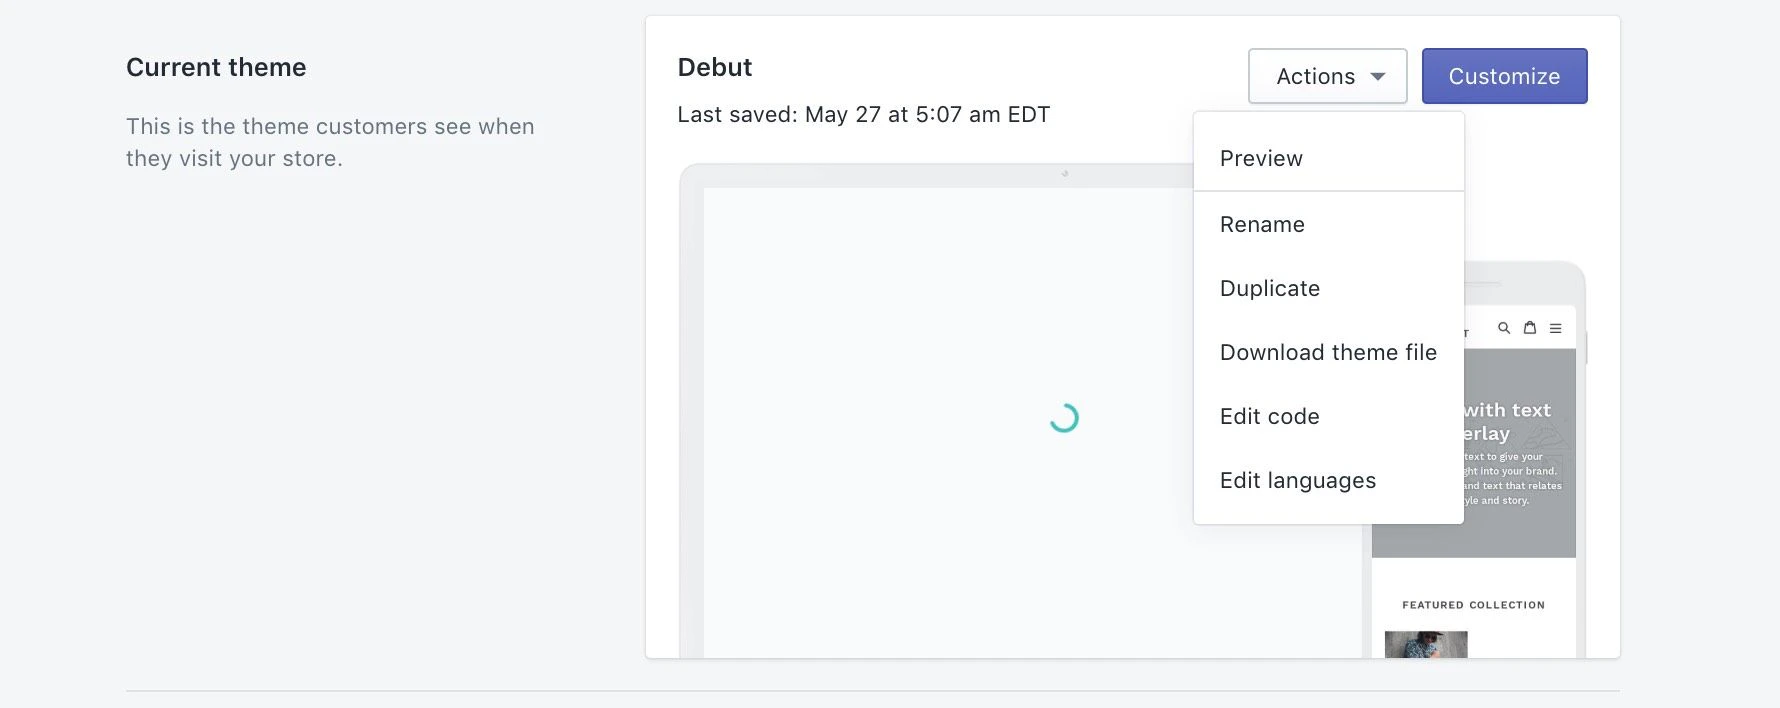
1. Open the theme code editor.
4. Click **Finish installation**.
## Manual migration
If your shop has a custom theme or relies on non-standard versions of external libraries,
you have to manually update your theme.
### Migrate libraries in your theme
1. Open the theme code editor.
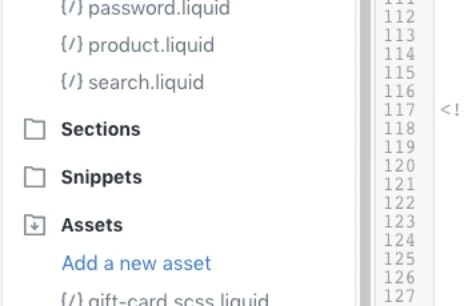
 2. Open the `layout/theme.liquid` file.
3. For each asset with a `jsdelivr.net` URL:
1. Open the URL in your browser, and copy the content.
2. Click **Assets > Add a new asset**, and select **Create a blank file**.
Use the same filename as the opened file.
3. Paste the copied content in the newly created asset.
2. Open the `layout/theme.liquid` file.
3. For each asset with a `jsdelivr.net` URL:
1. Open the URL in your browser, and copy the content.
2. Click **Assets > Add a new asset**, and select **Create a blank file**.
Use the same filename as the opened file.
3. Paste the copied content in the newly created asset.
 4. After creating assets from each `jsdelivr.net` URL,
update their associated URLs in the `theme.liquid` file.
Change `{{ '//cdn.jsdelivr.net/folder/filename.js' | script_tag }}` to `{{ 'filename.js' | asset_url | script_tag }}`.
`filename.js` is the name of the newly created asset.
5. Save the file.
Make sure to **maintain the file order**.
### Migrate third-party web fonts
The InstantSearch widget uses the Font Awesome icon pack,
which uses custom web fonts that are hosted on the jsDelivr CDN.
To migrate the libraries to the Shopify CDN, follow these steps:
1. Download the following files and name them as specified:
* [`algolia_dependency_fontawesome-webfont.eot`](https://cdn.jsdelivr.net/fontawesome/4.4.0/fonts/fontawesome-webfont.eot?v=4.4.0)
* [`algolia_dependency_fontawesome-webfont-ie-fix.eot`](https://cdn.jsdelivr.net/fontawesome/4.4.0/fonts/fontawesome-webfont.eot?#iefix\&v=4.4.0)
* [`algolia_dependency_fontawesome-webfont.woff2`](https://cdn.jsdelivr.net/fontawesome/4.4.0/fonts/fontawesome-webfont.woff2?v=4.4.0)
* [`algolia_dependency_fontawesome-webfont.woff`](https://cdn.jsdelivr.net/fontawesome/4.4.0/fonts/fontawesome-webfont.woff?v=4.4.0)
* [`algolia_dependency_fontawesome-webfont.ttf`](https://cdn.jsdelivr.net/fontawesome/4.4.0/fonts/fontawesome-webfont.ttf?v=4.4.0)
* [`algolia_dependency_fontawesome-webfont.svg`](https://cdn.jsdelivr.net/fontawesome/4.4.0/fonts/fontawesome-webfont.svg?v=4.4.0#fontawesomeregular)
2. Create six new assets files, one for each font.
3. In the Shopify Theme Editor, click **Assets > Add a new asset** and select **Upload a file**.
Upload all six files that you previously downloaded.
4. In the Theme Editor, open `algolia_dependency_font-awesome-4-4-0.min.css.liquid`.
Make the following changes:
* Replace all occurrences of `../fonts` with `./algolia_dependency`
* Replace: `./algolia_dependency_fontawesome-webfont.eot?#iefix&v=4.4.0`
with `./algolia_dependency_fontawesome-webfont-ie-fix.eot?#iefix&v=4.4.0`
Save the file.
Your web font files are now hosted on Shopify's CDN.
4. After creating assets from each `jsdelivr.net` URL,
update their associated URLs in the `theme.liquid` file.
Change `{{ '//cdn.jsdelivr.net/folder/filename.js' | script_tag }}` to `{{ 'filename.js' | asset_url | script_tag }}`.
`filename.js` is the name of the newly created asset.
5. Save the file.
Make sure to **maintain the file order**.
### Migrate third-party web fonts
The InstantSearch widget uses the Font Awesome icon pack,
which uses custom web fonts that are hosted on the jsDelivr CDN.
To migrate the libraries to the Shopify CDN, follow these steps:
1. Download the following files and name them as specified:
* [`algolia_dependency_fontawesome-webfont.eot`](https://cdn.jsdelivr.net/fontawesome/4.4.0/fonts/fontawesome-webfont.eot?v=4.4.0)
* [`algolia_dependency_fontawesome-webfont-ie-fix.eot`](https://cdn.jsdelivr.net/fontawesome/4.4.0/fonts/fontawesome-webfont.eot?#iefix\&v=4.4.0)
* [`algolia_dependency_fontawesome-webfont.woff2`](https://cdn.jsdelivr.net/fontawesome/4.4.0/fonts/fontawesome-webfont.woff2?v=4.4.0)
* [`algolia_dependency_fontawesome-webfont.woff`](https://cdn.jsdelivr.net/fontawesome/4.4.0/fonts/fontawesome-webfont.woff?v=4.4.0)
* [`algolia_dependency_fontawesome-webfont.ttf`](https://cdn.jsdelivr.net/fontawesome/4.4.0/fonts/fontawesome-webfont.ttf?v=4.4.0)
* [`algolia_dependency_fontawesome-webfont.svg`](https://cdn.jsdelivr.net/fontawesome/4.4.0/fonts/fontawesome-webfont.svg?v=4.4.0#fontawesomeregular)
2. Create six new assets files, one for each font.
3. In the Shopify Theme Editor, click **Assets > Add a new asset** and select **Upload a file**.
Upload all six files that you previously downloaded.
4. In the Theme Editor, open `algolia_dependency_font-awesome-4-4-0.min.css.liquid`.
Make the following changes:
* Replace all occurrences of `../fonts` with `./algolia_dependency`
* Replace: `./algolia_dependency_fontawesome-webfont.eot?#iefix&v=4.4.0`
with `./algolia_dependency_fontawesome-webfont-ie-fix.eot?#iefix&v=4.4.0`
Save the file.
Your web font files are now hosted on Shopify's CDN.