

This feature isn’t available on every plan.
Refer to your pricing plan to see if it’s included.
Before you begin
- You need an account with a retail media network (RMN) provider, with live campaigns.
- Algolia supports any RMN provider, including Criteo, AdButler, and Zitcha. To add a provider that isn’t listed, contact your customer success manager.
- You need an Algolia composition with Retail Media enabled.
- The product IDs returned by your RMN must match the
objectIDvalues in your index.
Connect your retail media provider
1
Add RMN provider API key
If your provider’s ad request needs an API key or token, store it first.
Go to Data sources > Retail Media > Credentials and click Add:
- Provider: your RMN provider, for example,
Criteo. - Name: a name to select the credential by, for example,
criteo-prod. Use letters, numbers, hyphens, and underscores only. - API key: the key from your provider.
2
Configure your RMN provider connection
Go to Data sources > Retail Media and click New configuration.In API configuration: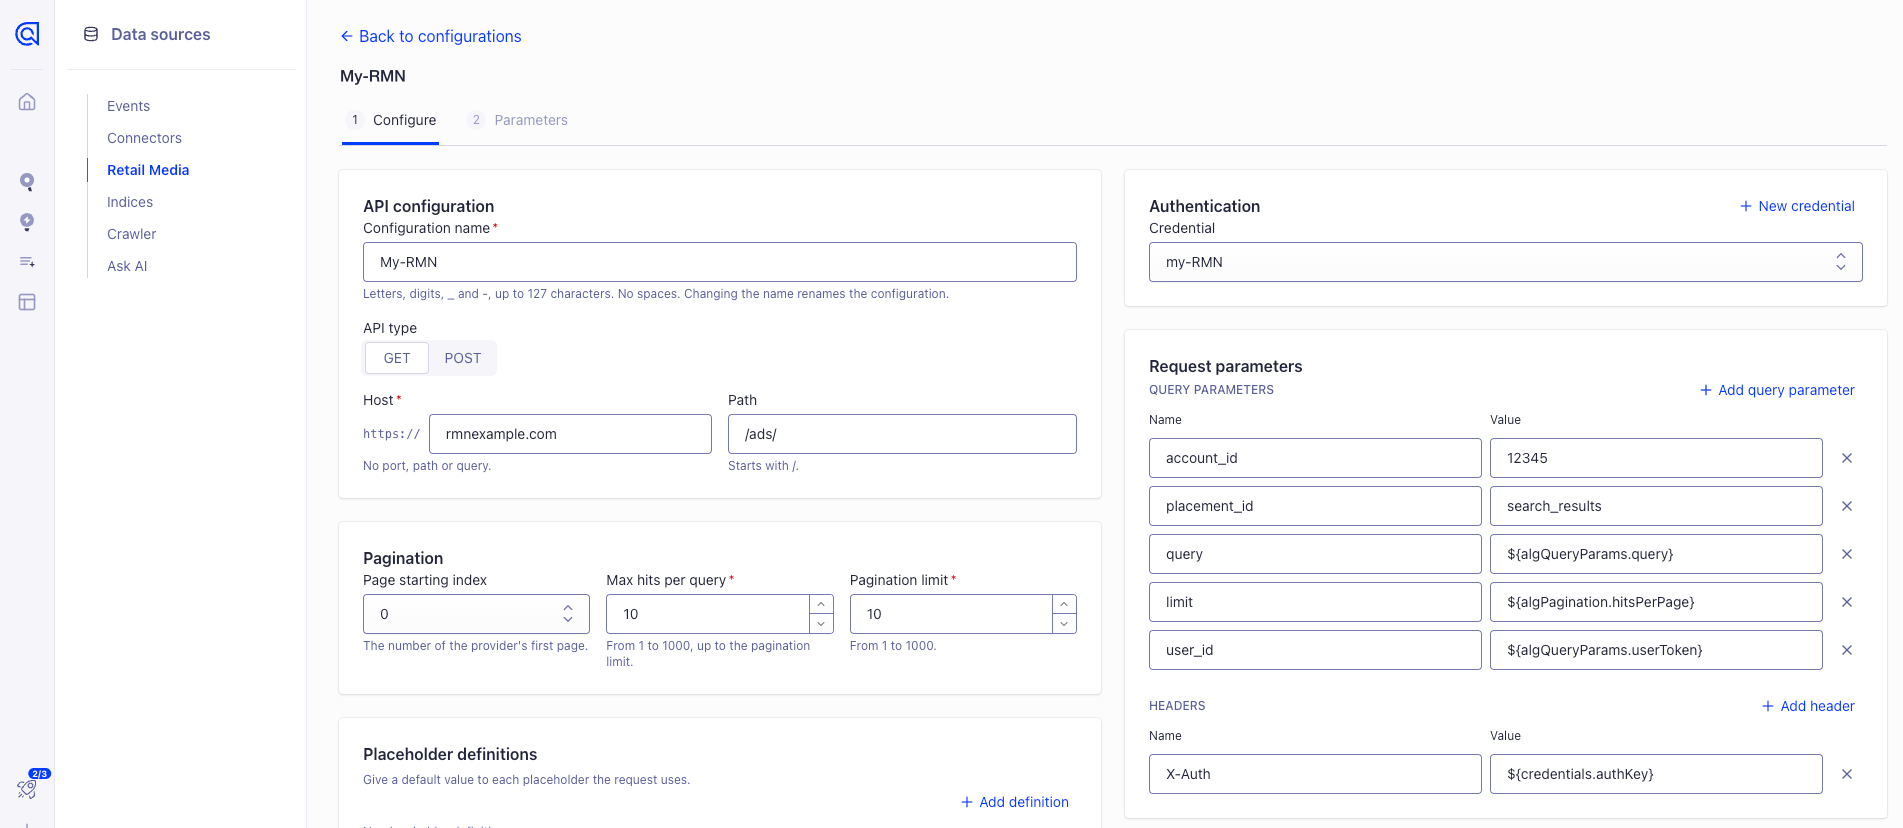
- Configuration name: a name for this connection, used to select it in a Smart Group.
- API type: the HTTP method of your provider’s ad request, usually GET.
- Host and Path: your provider’s ad request endpoint.
${credentials.authKey} placeholder, as described below.In Request parameters, add the query parameters that Algolia sends with every ad request to your RMN.
They tell your provider which ads to return, usually by identifying:- Your account: which retailer’s campaigns to use
- The ad placement: which ad slot the ads are for, for example, search results
- The search: the user’s query, so ads match what they searched for
- The page of ads: which page to fetch and how many ads per page
- The visitor: an anonymous ID for attributing impressions and clicks
To use a value of your own, add it in Placeholder definitions with a default value.Add headers only if your provider requires them, for example, to send the API key in an
Authorization header with ${credentials.authKey} as the value.In Pagination:- Page starting index: the number of your provider’s first page,
0or1. - Max hits per query: the maximum number of ads your provider returns in a single page.
- Pagination limit: the maximum number of ads your provider returns across all pages.
${algPagination.page} and ${algPagination.hitsPerPage} placeholders, to fetch enough ads to fill the group, even after deduplication.
For example, if your provider returns at most 25 ads per page and the group’s quantity is 30, Algolia sends two requests.3
Test the connection
Click Test API configuration.
A successful
2xx response unlocks Next.4
Map the response
Click Next.
In Response mapping, click Add row for each field:
- objectID: the path to the product ID in your provider’s response, for example,
.items[].product_id. These values must match theobjectIDvalues in your index. - metadata: optional fields to pass through with each sponsored hit.
Enter a name of your choice and the path to the field in your provider’s response.
For example, to pass through your provider’s tracking URLs, add a row named
trackingwith the path to those URLs.
Add a Smart Group
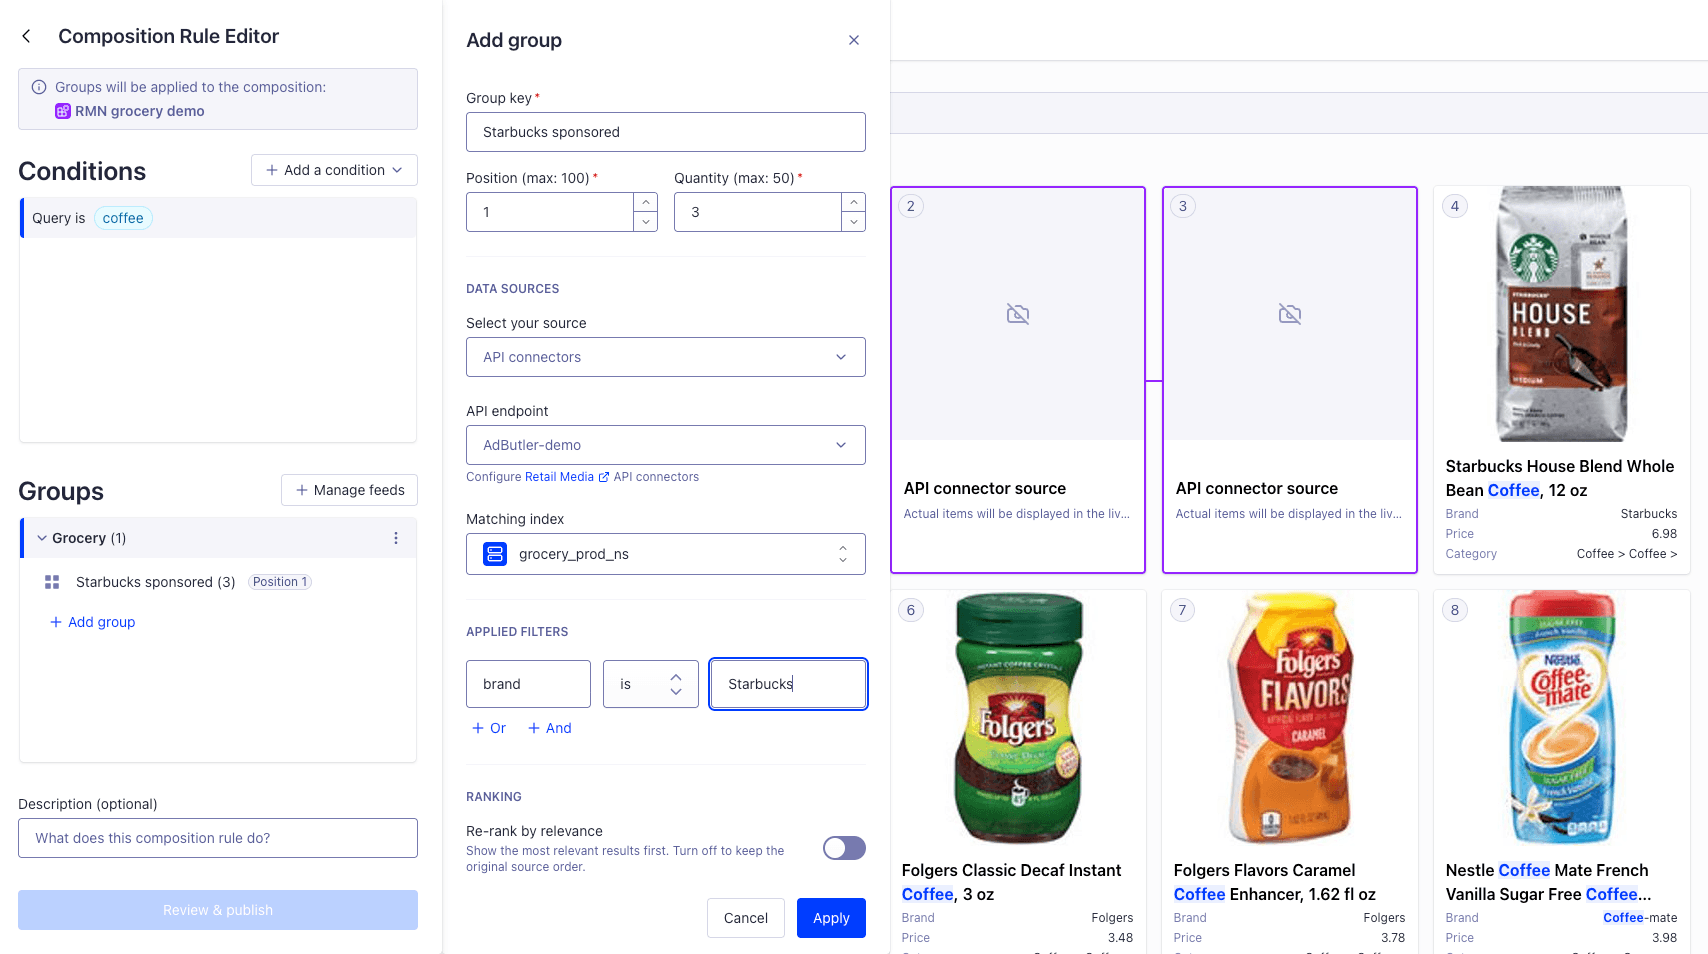
In your composition rule, click Add group:- Source: API connectors, then your configuration
- Matching index: the index your product IDs come from
- Position and Quantity: where sponsored products go and how many
- Filters: optional. Filters apply to the ads your RMN returns, so Algolia removes ads that don’t match, without an error.
Label sponsored hits
Setmetadata.hits.addItemKey to true on the injected item.
Each sponsored hit then includes _extra._injectedItemKey, so your frontend can label it as sponsored.
For more information, see the API reference.
Track impressions and clicks
If you mapped your provider’s tracking URLs as metadata, each sponsored hit includes them in_extra, under the name you chose, for example, _extra.tracking.
To report ad performance to your RMN provider, your frontend must send the tracking events your provider requires.
For example, many providers track when a sponsored product is displayed, when it’s visible on screen, and when users click it.
Some providers generate tracking URLs for each request.
If yours does, don’t cache them or reuse them across requests.