

autocomplete-core
instead of autocomplete-js.
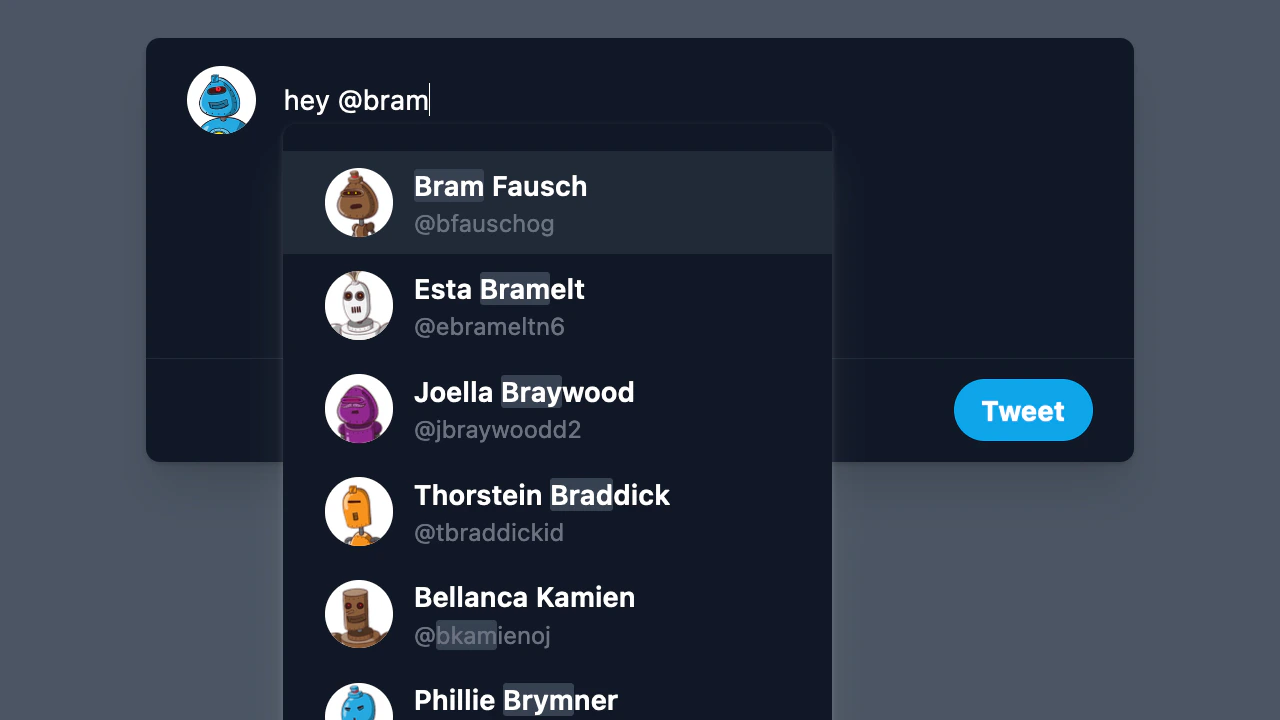
In this solution, you’ll learn how to replicate the Twitter mentions feature.
You can then reuse the same logic to implement hashtags.
This solution uses
autocomplete-core along with React and assumes familiarity with both.Open CodeSandbox
Run and edit the Rich text box with mentions and hashtags example in CodeSandbox.
Explore source code
Browse the source for the Rich text box with mentions and hashtags example on GitHub.
Get started
First, you need to start a new React project. You can use Create React App, Vite with a React template, or bootstrap the project yourself. Then, install the necessary dependencies to build your Autocomplete app:@algolia/autocomplete-coreto build the autocomplete@algolia/autocomplete-preset-algoliato fetch Algolia results and highlight matchesalgoliasearchto interact with the Algolia Search API
Build the autocomplete text box
When usingautocomplete-core,
you’re in control of rendering the entire experience using the Autocomplete state.
1
Create a custom hook
Create a custom hook that instantiates Autocomplete with the passed options and returns the instance and state.
JSX
2
Build the Autocomplete component
Create an
Autocomplete component which consumes the hook and renders the experience.JSX
3
Use the Autocomplete component in your app
In your
App.jsx file,
render the Autocomplete component and pass Autocomplete options as props.JSX
Render the text box
For now, the autocomplete doesn’t return anything. Use theautocomplete and state returned from the hook to build the experience.
JSX
This demo uses a
<textarea> element instead of an <input> as the search input.
The <textarea> element is better for free-form plain text spanning multiple lines.Render the panel
Now that you have a text box, you can display a panel where the suggestions for accounts to mention will show up. First, you can write a component to render accounts. It highlights matches in the account’s name and handle using a customHighlight component which leverages
parseAlgoliaHitHighlight.
JSX
<form> element.
Autocomplete lets you know about its state: the current search status, the collections,
and whether the panel is open.
You can use them to display a loading indicator when the search is stalled,
or the list of matching accounts once collections are available and the panel opens.
JSX
Fetch results
Right now, nothing happens if you type something in the text box. That’s because you’re not returning any results with Autocomplete yet. In theuseAutocomplete hook’s options,
you can implement getSources
to retrieve accounts from your Algolia index.
JSX
Position the panel
You’re now seeing results, but the panel is at the bottom of the text box. When you’re mentioning someone on Twitter, the panel usually moves based on where the text cursor (caret) is. To replicate this behavior, you need to determine the caret’s position and dynamically move the panel as it changes. First, you need to installtextarea-caret, a JavaScript library that retrieves the coordinates of the caret in a text box.
getCaretCoordinates to retrieve the caret position whenever it changes
and reposition the panel accordingly.
JSX
Implement mentions
On Twitter, you can mention someone by typing ”@” followed by their username, which opens an autocomplete panel with as-you-type search results. When you select a user, it replaces what you’ve typed with their correct username, allowing the app to notify them when you send the tweet. Right now, the Autocomplete implementation searches through user accounts, but it sends the entire query. You only want to start searching when you’re writing or editing a mention. Similarly, Autocomplete shouldn’t send the entire query, only the mention. To do so, you need to tokenize the query and find what token is currently being edited.JavaScript
getActiveToken function takes input text and a cursor position and determines,
based on where the cursor is, what’s the active token.
To do so, it splits the input text into tokens (based on space and newlines),
each containing the word and the range it covers,
then returns the active token based on the cursor position.
Now that you have the active token,
you need to determine whether it’s a mention or a simple word.
You can write a predicate function for that.
JavaScript
getSources
to only return results when the active token is a valid Twitter username.
JSX
Select an account
The goal of the mention feature is to help you find a user account and autocomplete on their username. For example, when typing “@obama” on Twitter, the panel opens and presents you with Barack Obama’s account, whose handle is “@BarackObama”. When selecting it, it replaces “@obama” with “@BarackObama” and closes the panel, letting you continue your tweet while ensuring Barack Obama is tagged. You can replicate this feature with Autocomplete usingonSelect.
JSX
Navigate in the text box
Typing isn’t the only action that can occur in a text box. Sometimes you need to go back and edit your text, either by clicking or navigating with the arrow keys. When this happens, the panel should open if the cursor is on a mention and close when it isn’t.JSX
Add styles
You can copy the following CSS snippet in your app to style it.CSS
App.jsx file.
JSX
Next steps
The Autocomplete library is a great way to build dynamic text editing experiences. This solution focuses on social media, but you can use it to create a mention feature for many different use cases such as collaborative apps like Google Docs, email apps like Gmail, chat applications like Slack, internal social networks, and more. To improve this demo, try to:- Reuse the same logic to add hashtags
- Add alternative names, synonyms, or Rules to improve the relevance (for example, to find people by their nicknames)
- Use with
contenteditableto render mentions and hashtags as interactive tokens