Update your search parameters
To connect events to searches, including those from category pages, you must passqueryID when sending search-related events to the Insights API, such as with the clickedObjectIDsAfterSearch method.
To include the queryID in the search response, set clickAnalytics to true.
To identify users, add the userToken parameter.
Update your HTML
Add the following data attributes to your template for Algolia search results within your HTML:data-insights-index. Select a parent DOM element that contains both your filters and hits UI elements to capture events related to both.data-insights-object-id. The unique object identifier for the Algolia hit.data-insights-position. The position in the search results, starting with 1 and taking paginated search results into account.data-insights-query-id. A unique identifier for relating the and event.
data-insights-filter attribute to each filter element (format: ${attribute}:${value}):
Send the user token to Google Tag Manager
Send the appropriate user token to GTM when the user’s browser session changes:JavaScript
search-insights library,
use its onUserTokenChange method to sync the user token with GTM:
JavaScript
onUserTokenChange method is supported in search-insights versions 1.5.0 or later.
Send view events
GTM doesn’t know when users see new search results, as these are rendered client-side on the users’ devices. To inform GTM, you need to manually push view events to the data layer.You can use the Insights option with
InstantSearch.js,
Vue InstantSearch,
or React InstantSearch.
Add the Algolia Search Insights template
Before sending events to the Insights API, add the Algolia Search Insights template to your workspace.-
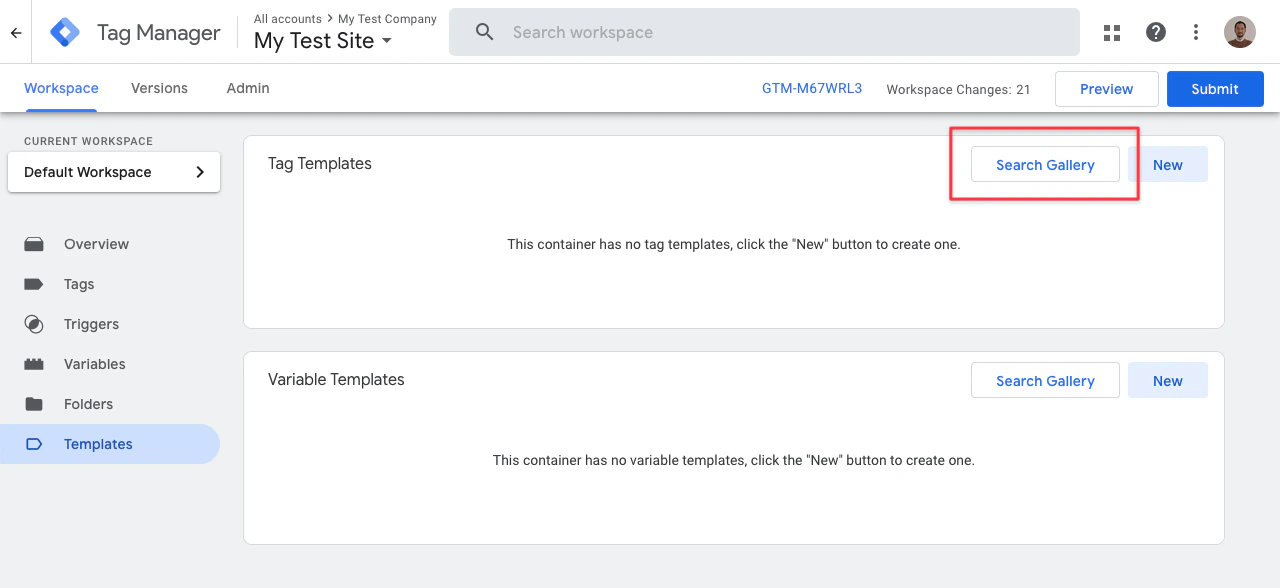
Sign in to your GTM workspace and go to Tag Templates > Search Gallery.
-
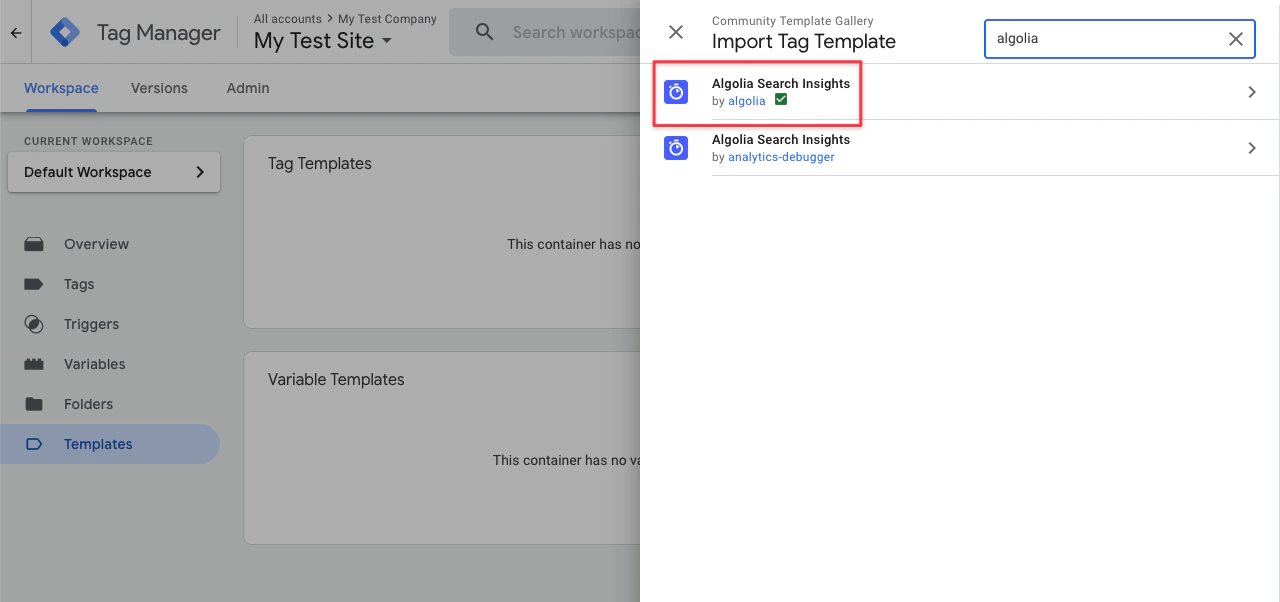
Search for the Algolia Search Insights template (by Algolia).
-
Click Add to workspace and confirm by clicking Add.

-
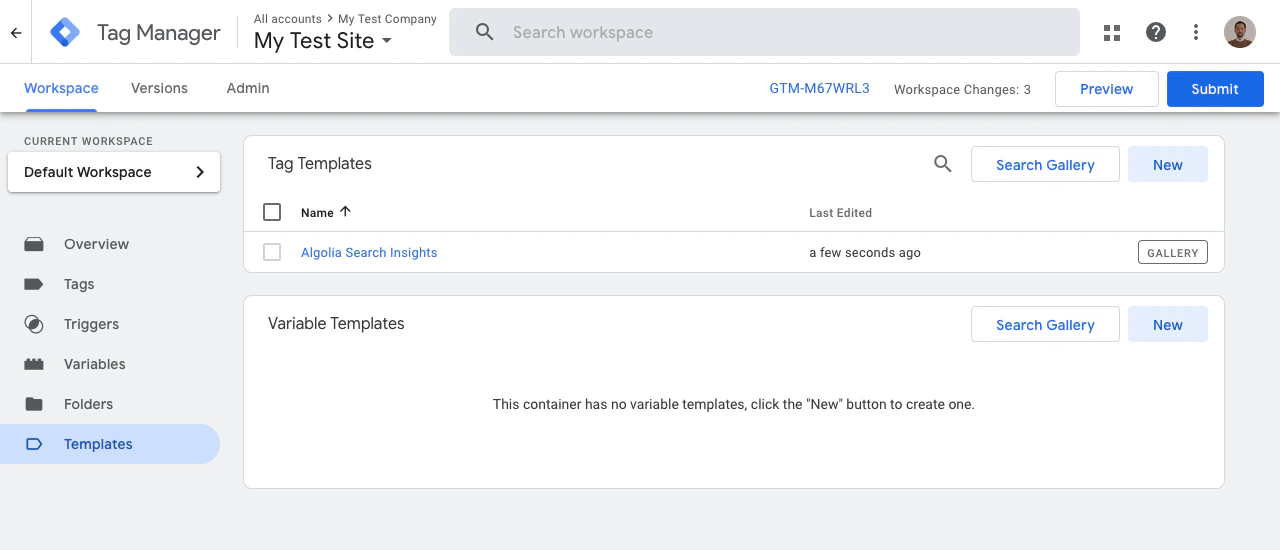
On the Tag Templates page, you should now see the Algolia Search Insights template:
Add variables
Variables are named placeholders for values that are populated when code is run on your website or app.Built-in variables
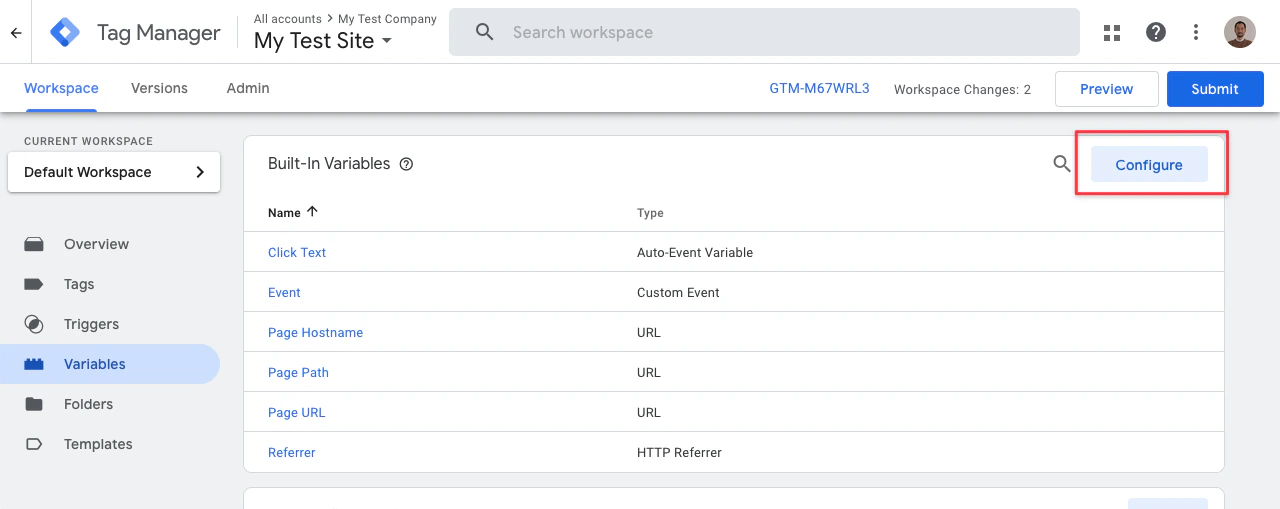
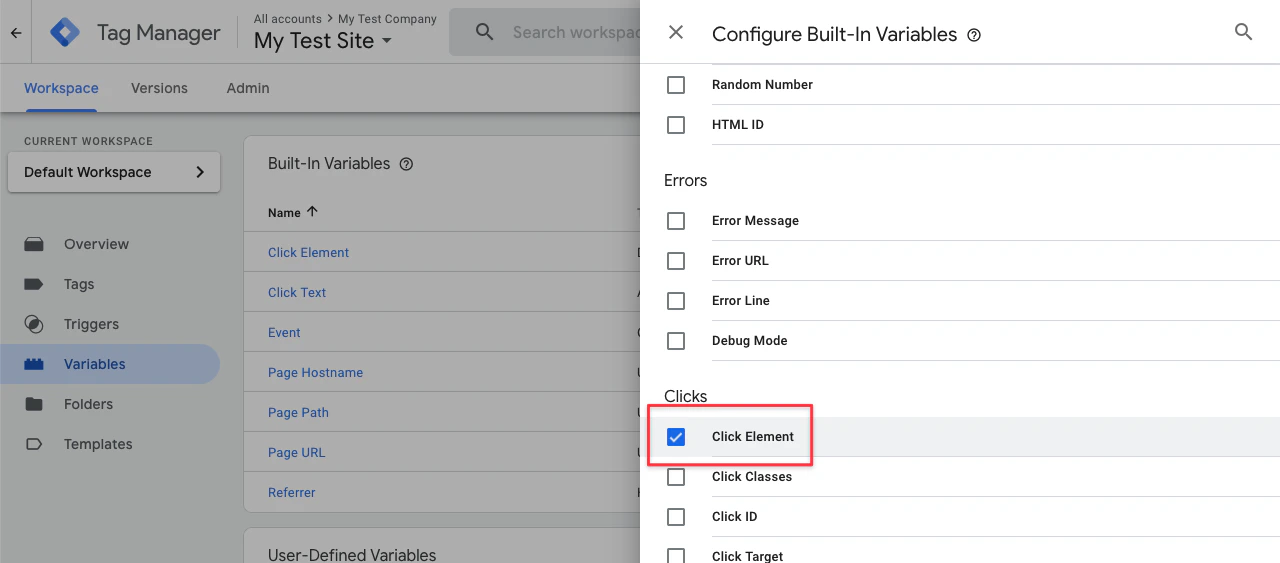
First, add the built-in variable Click Element. This variable is associated with the data from your click events.-
In the Variables section of your GTM workspace, click Configure.
-
In the Configure Built-In Variables dialog, select Click Element.
Algolia Insights User Token
-
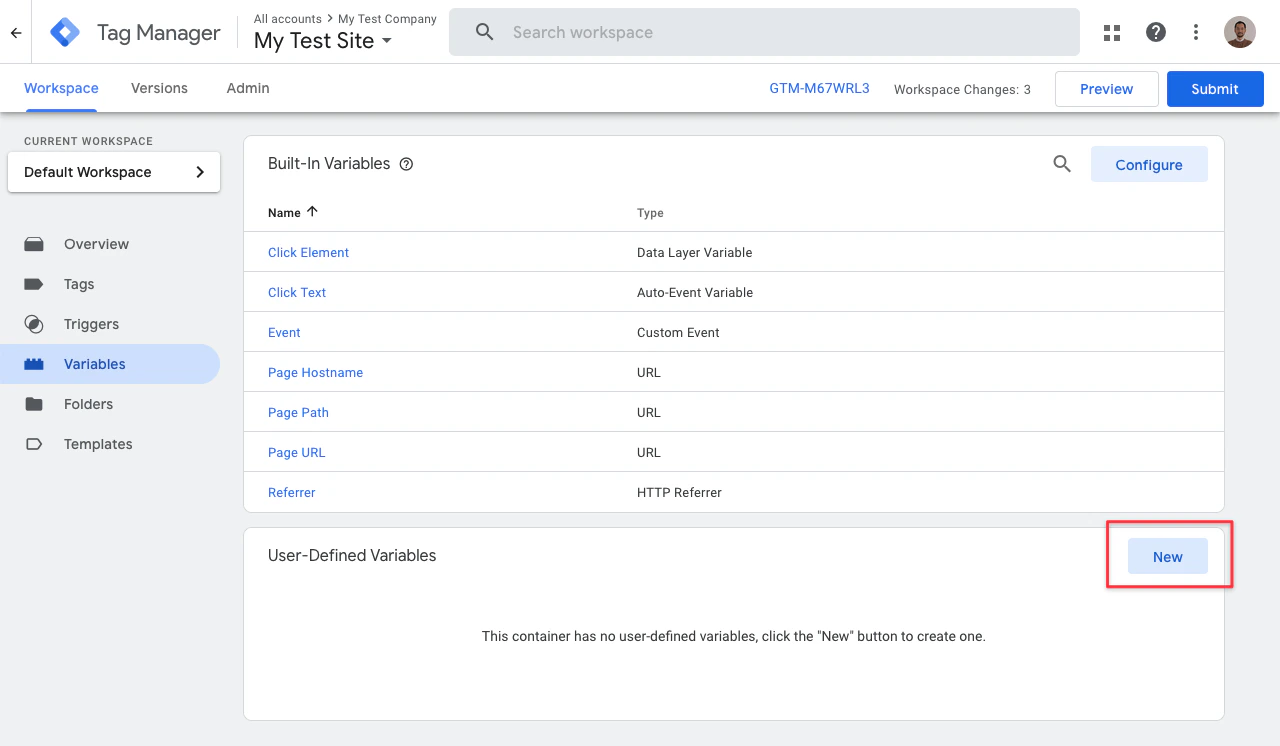
In the Variables section of your GTM workspace, go to the User-Defined Variables section and click New.
-
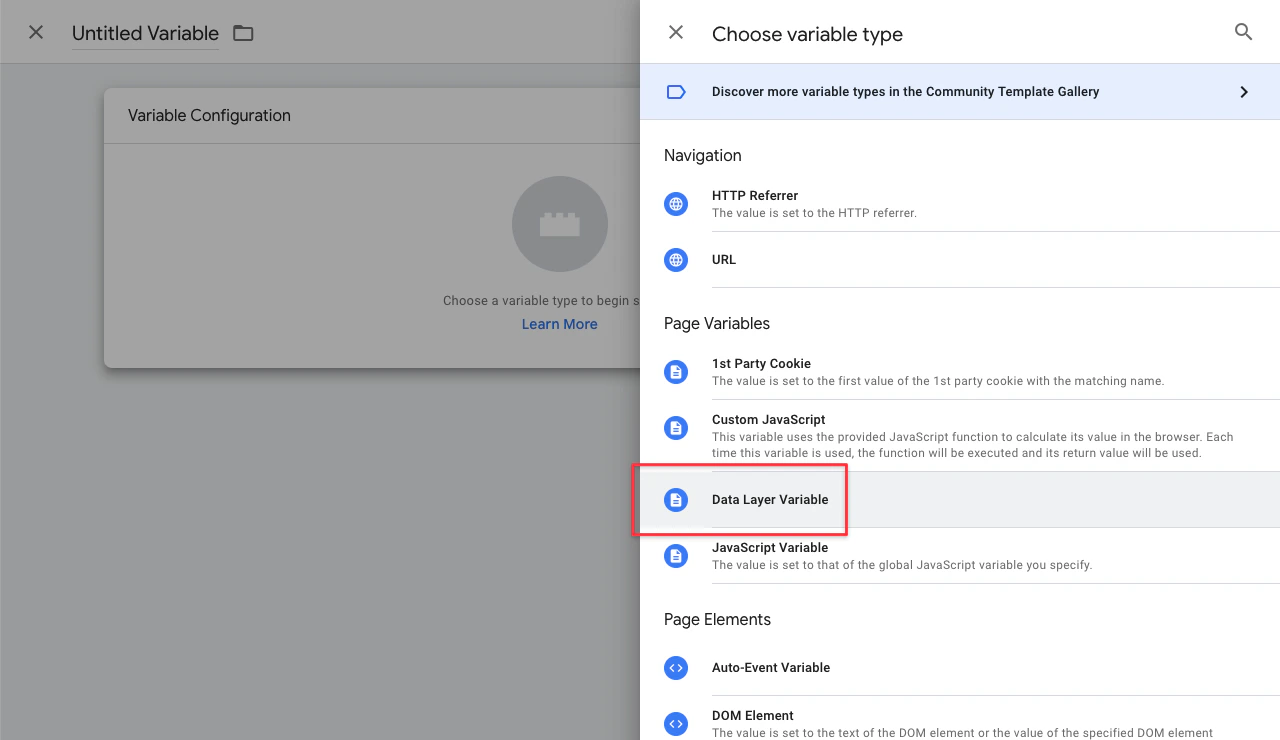
Select Data Layer Variable.
-
Enter
Algolia Insights User Tokenas the variable name andalgoliaUserTokenas the data layer variable name.
Algolia Get Data Attributes
- In the Variables section of your GTM workspace, go to the User-Defined Variables section and click New.
-
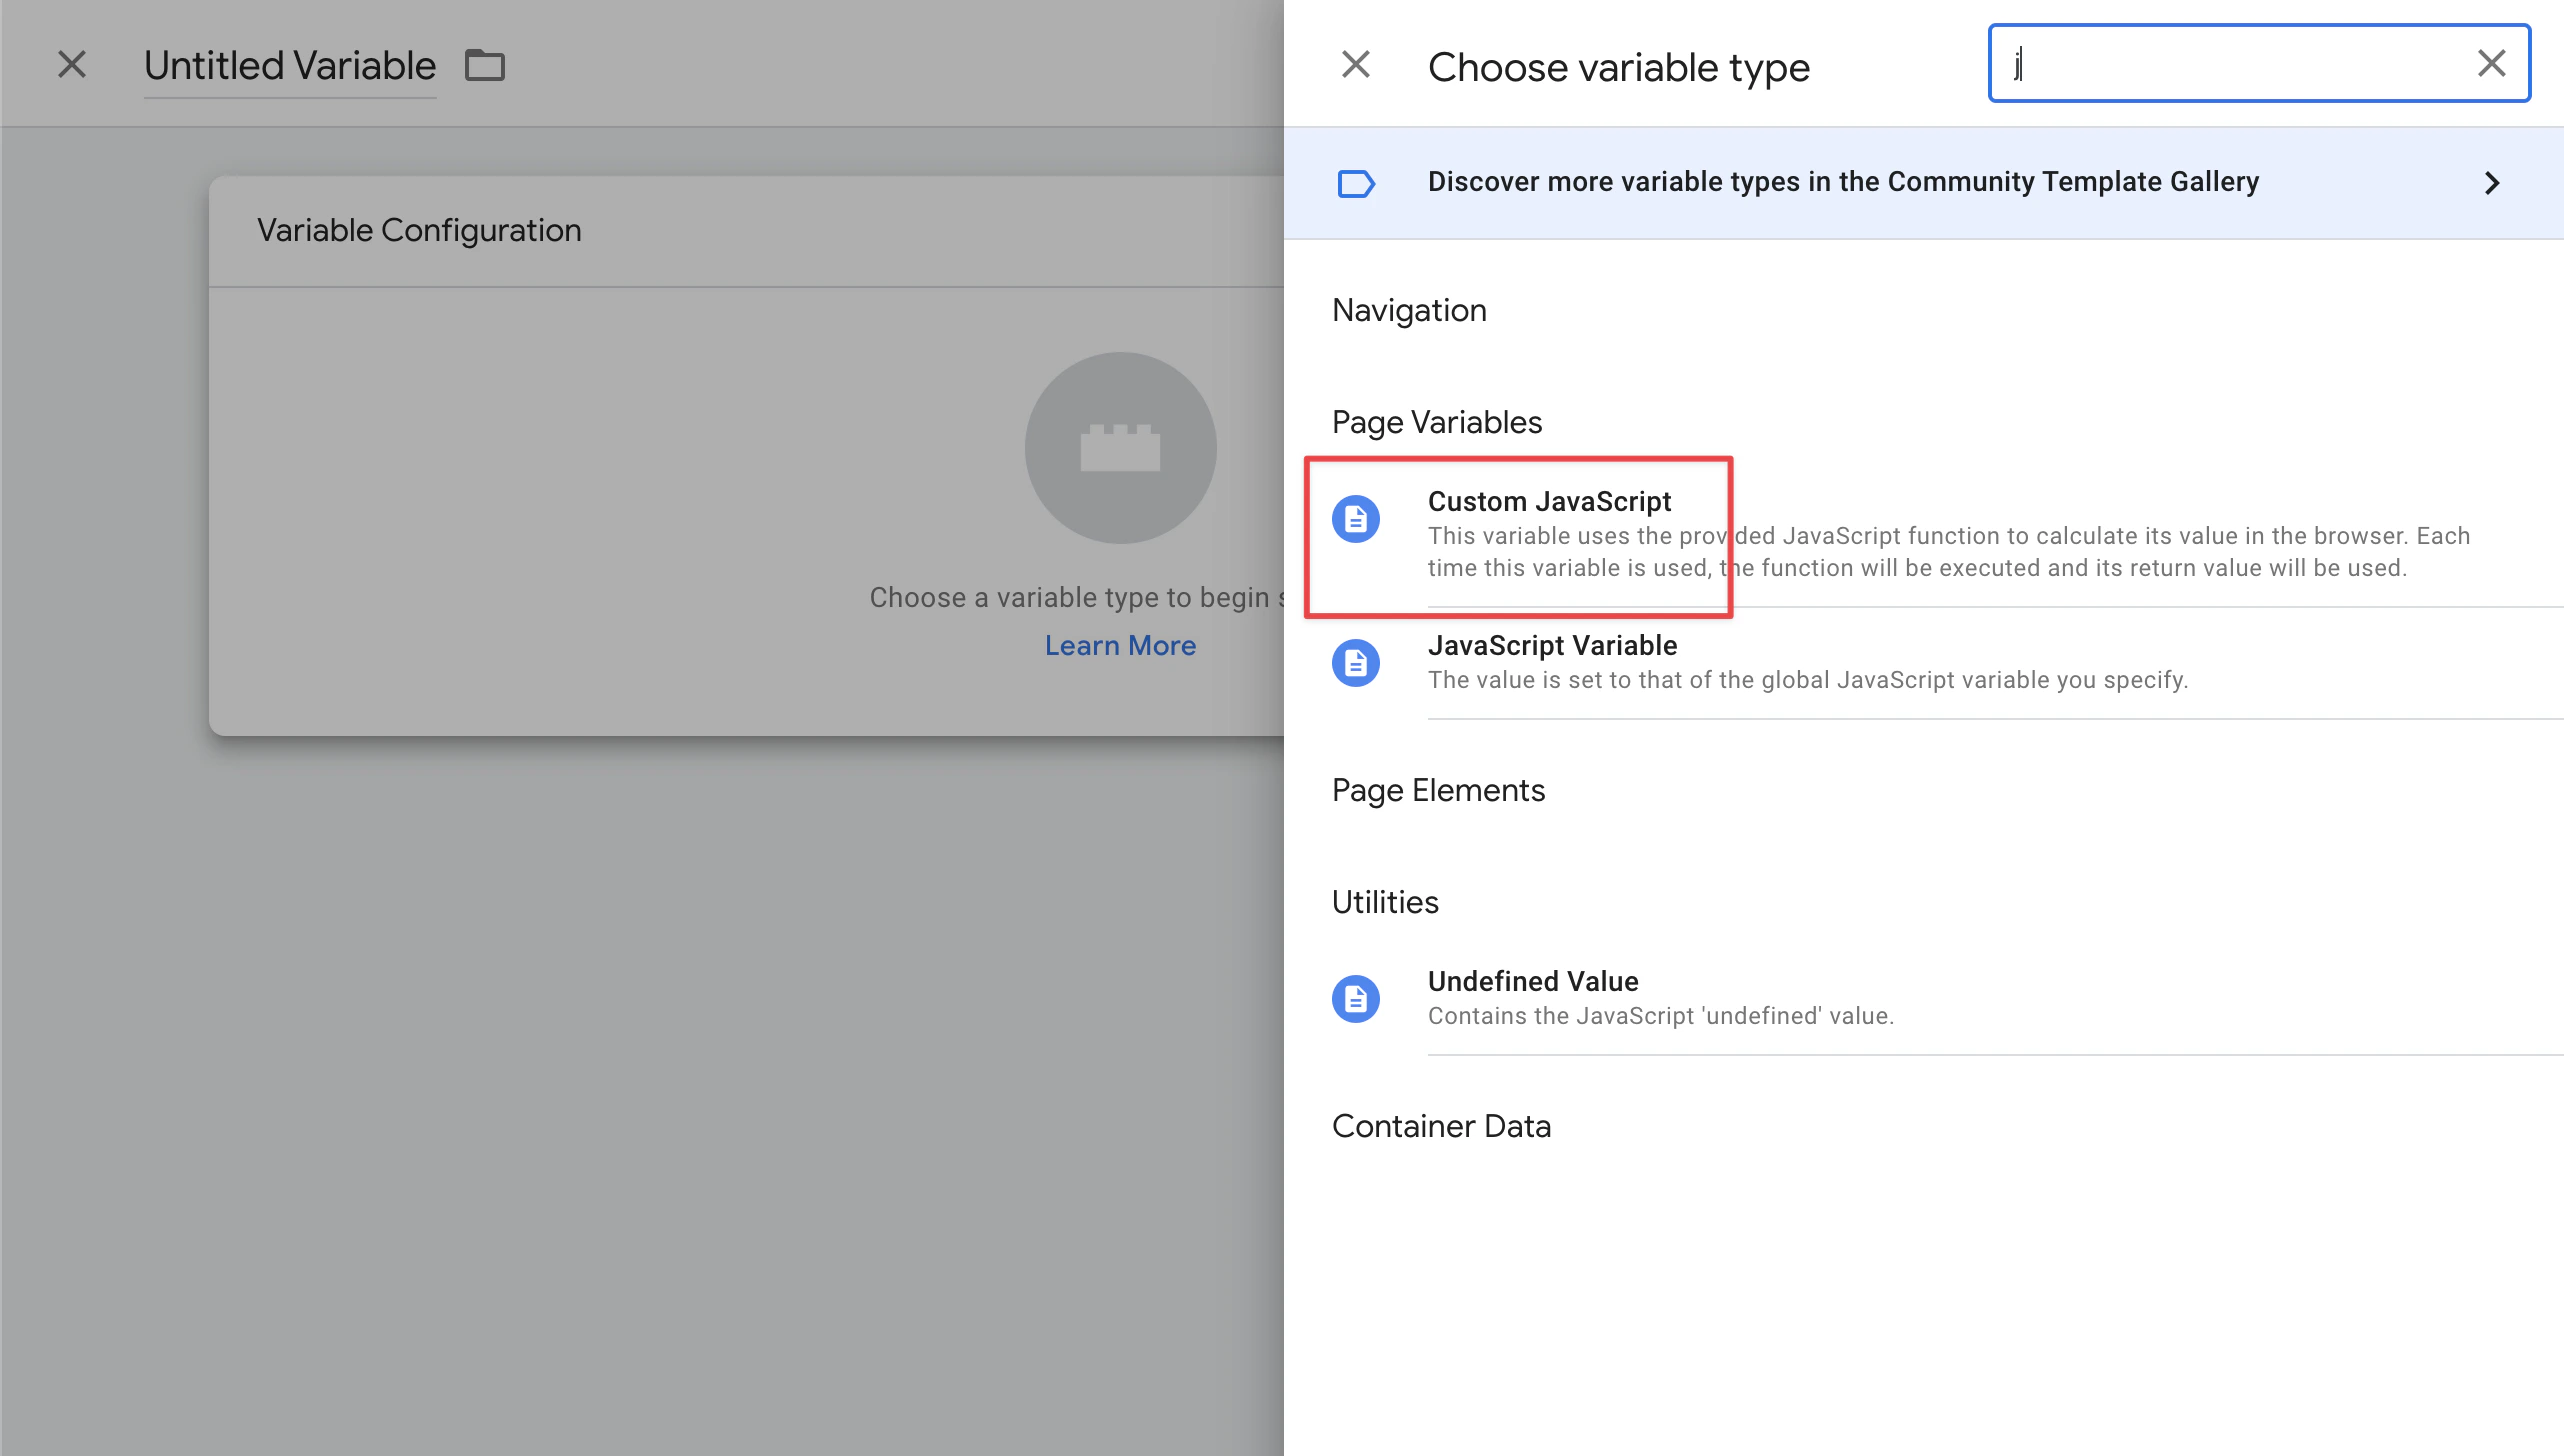
Select Custom JavaScript.
-
Enter
Algolia Get Data Attributesas variable name and add the following JavaScript code:JavaScript
Algolia Insights index
- Add a new user-defined variable.
-
Enter
Algolia Insights Indexas variable name and add the following JavaScript code:JavaScript
data-insights-index attribute.
For example, if you have the following HTML:
HTML
div element with the id index-1 for tracking events:
JavaScript
Algolia Insights ObjectIDs
- Add a new user-defined variable.
-
Enter
Algolia Insights ObjectIDsas variable name and add the following JavaScript code:JavaScript
Algolia Insights Positions
- Add a new user-defined variable.
-
Enter
Algolia Insights Positionsas variable name and add the following JavaScript code:JavaScript
Algolia Insights QueryID
- Add a new user-defined variable.
-
Enter
Algolia Insights QueryIDas the variable name and add the following JavaScript code:JavaScript
Algolia Insights Viewed Filters
- Add a new user-defined variable.
-
Enter
Algolia Insights Viewed Filtersas the variable name and add the following JavaScript code:JavaScript
Algolia Insights Clicked Filters
- Add a new user-defined variable.
-
Enter
Algolia Insights Clicked Filtersas variable name and add the following JavaScript code:JavaScript
Add custom triggers
Triggers listen to selected types of events on your website or app and tell the tags to fire, when a specified event is detected.Add a trigger for view events
To capture the view events you send from your website you must add a custom trigger.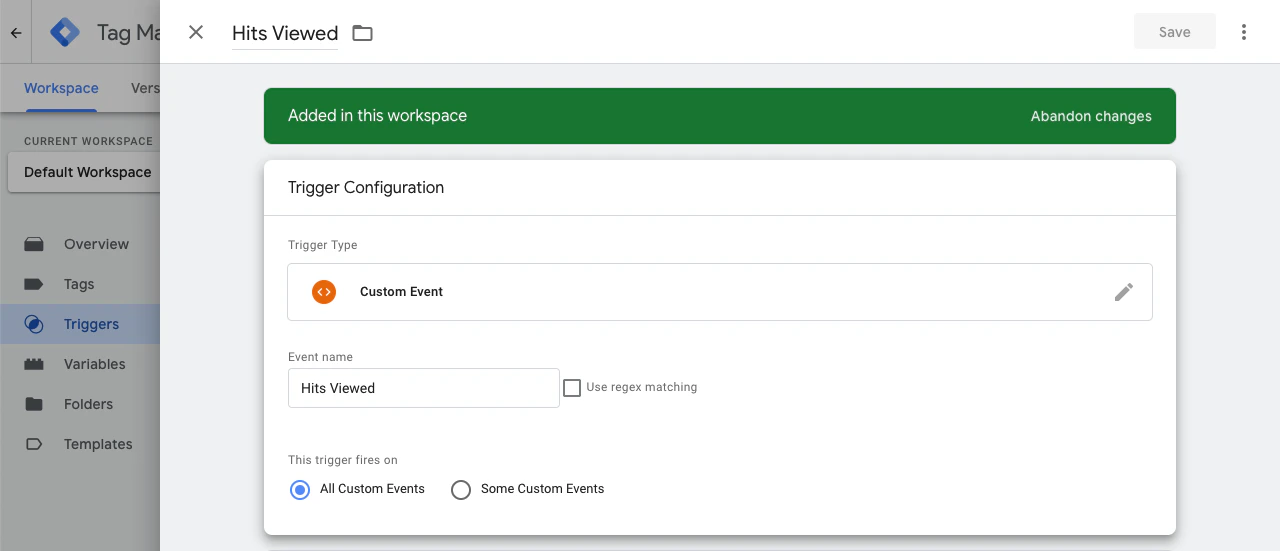
- Trigger name:
Hits Viewed - Trigger type:
Custom Event - Event name:
Hits Viewed
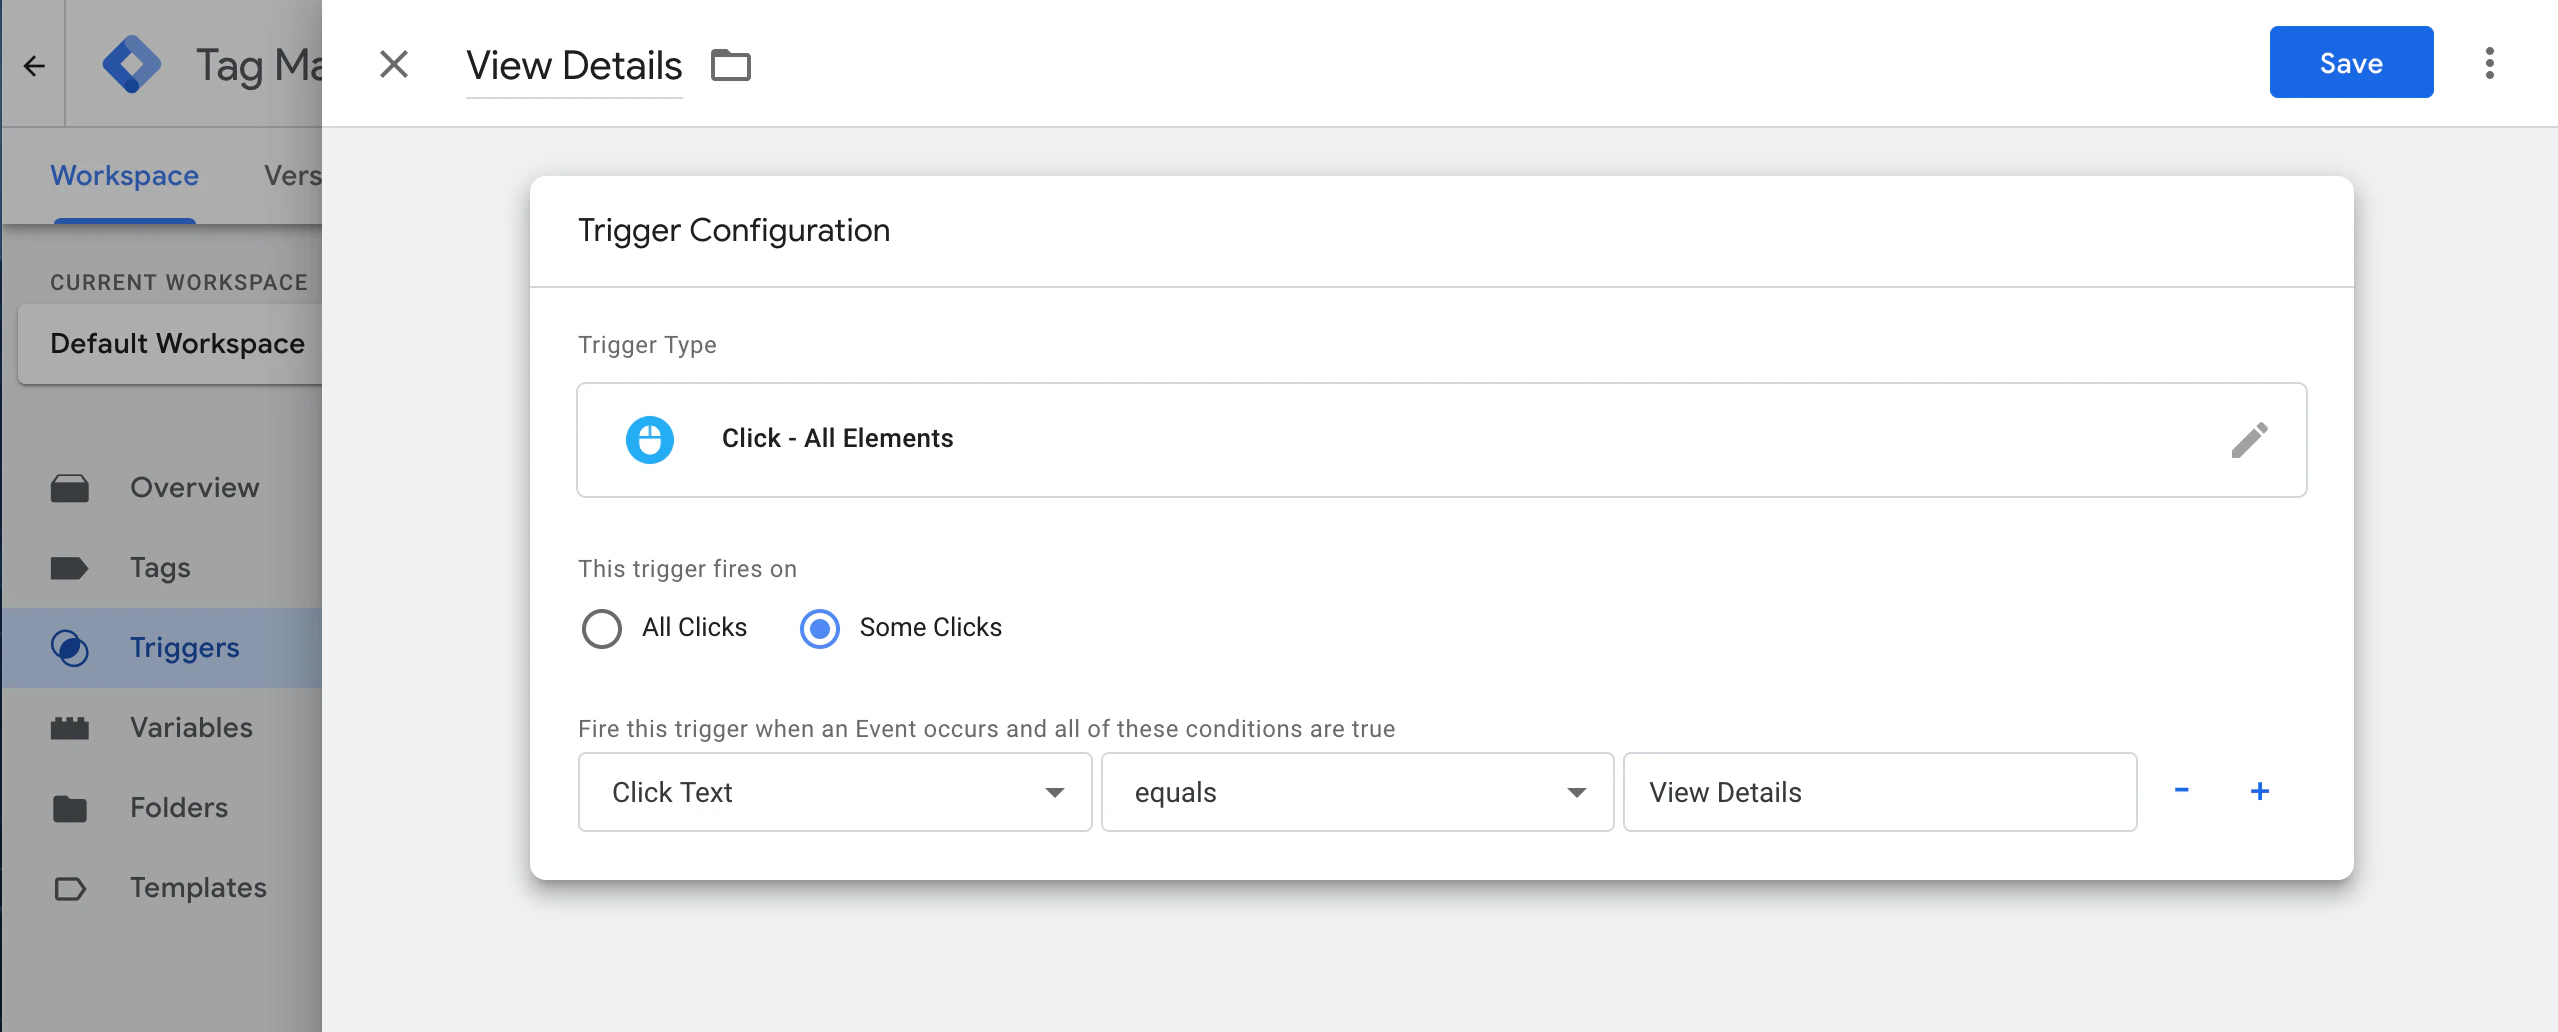
Customize triggers for click events
Click or conversion events come from user actions, such as clicks on DOM elements. Consider this template:HTML
Click - All Elements as the trigger type
and configure the trigger to fire only when the click text matches View Details.
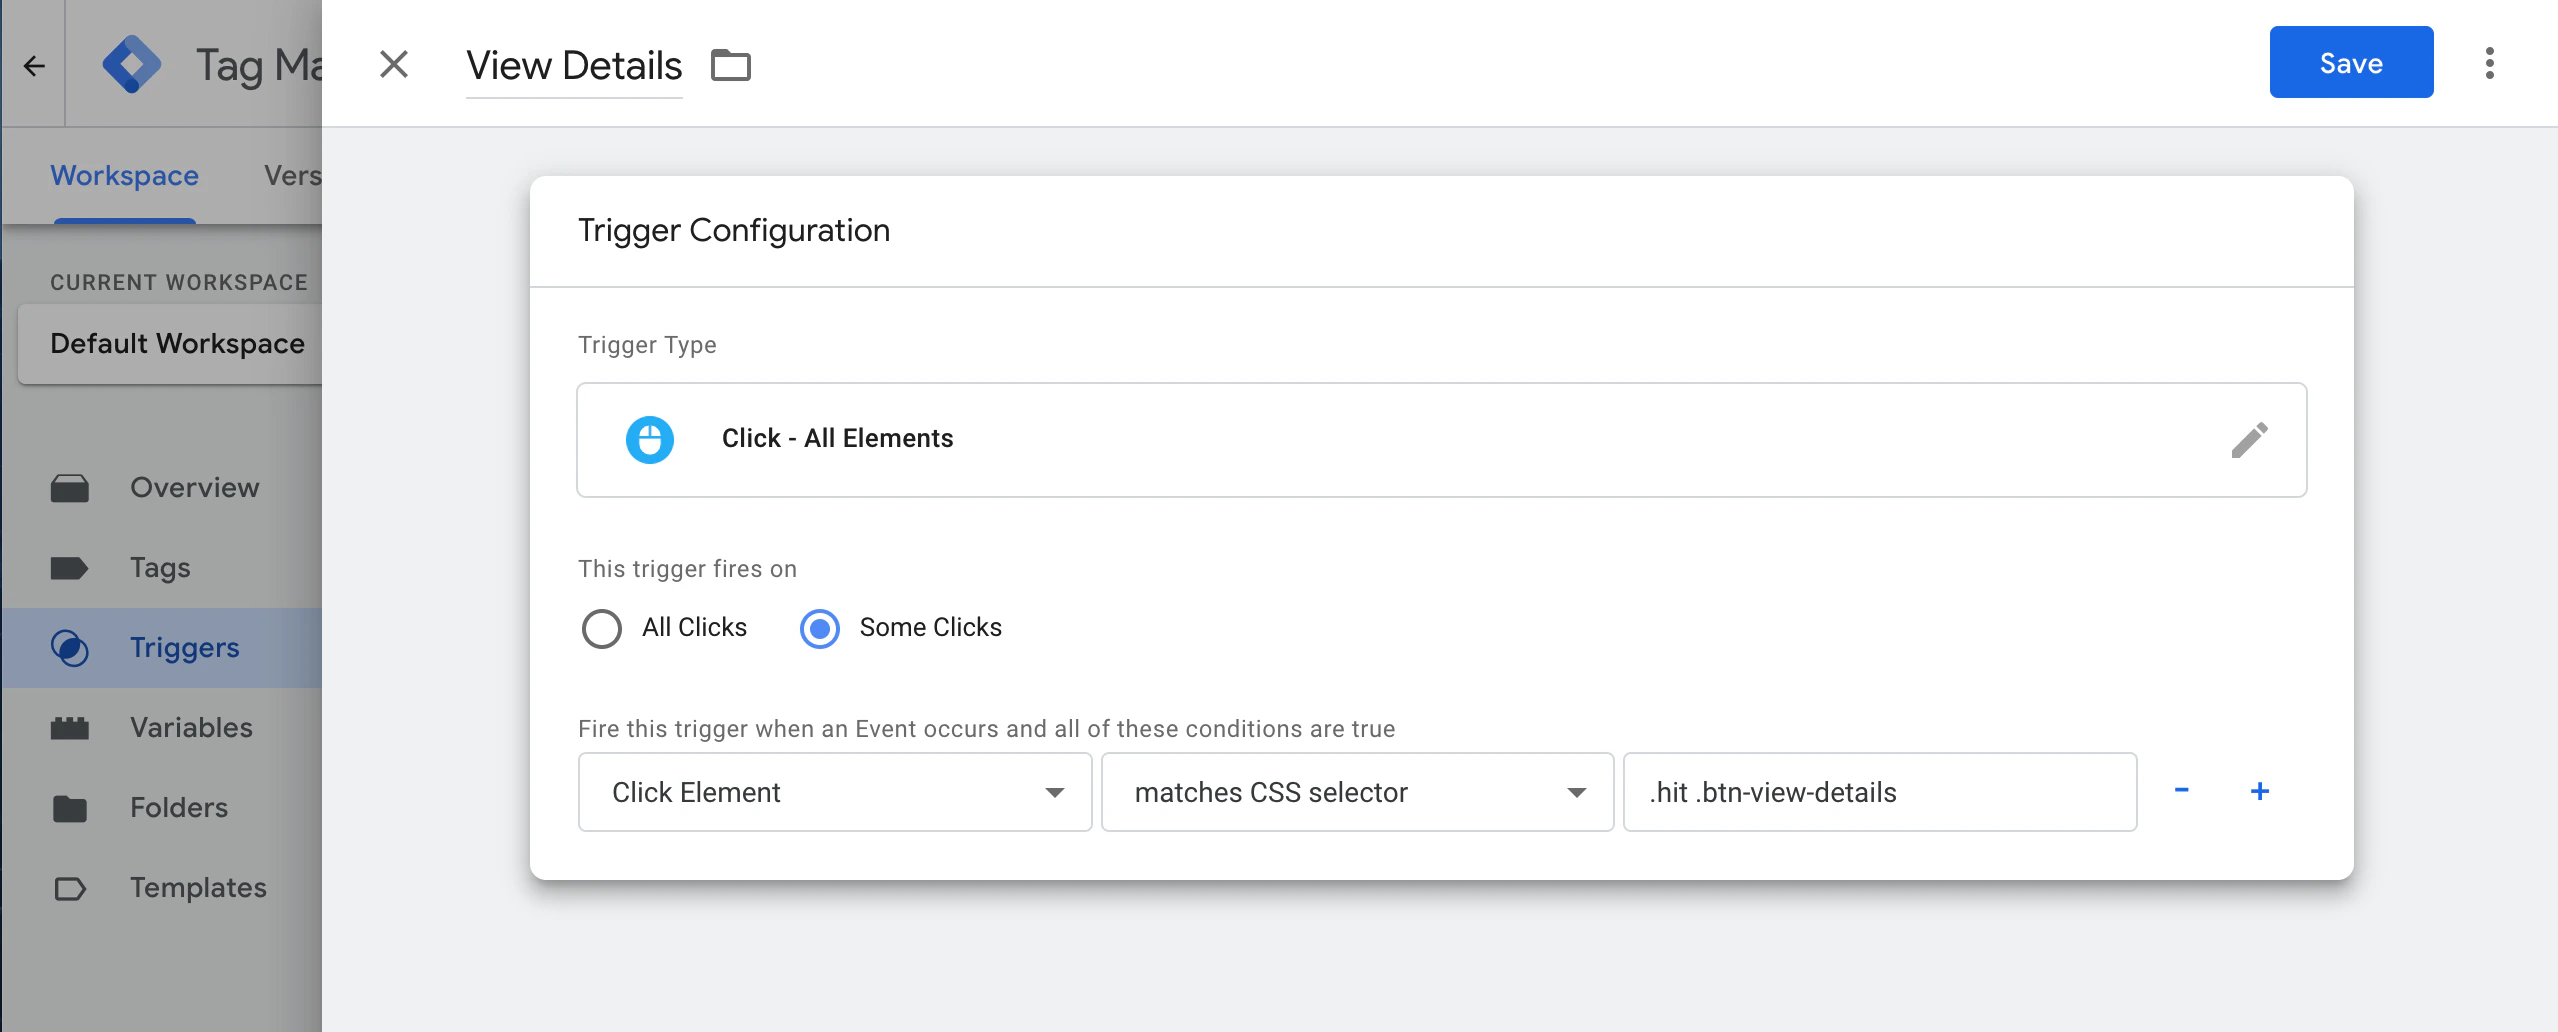
Customize triggers for filters
To track clicked filters, create a trigger that matches the CSS selector of your filter elements. Consider this template:HTML
.ais-RefinementList-labelText.
You must add the data-insights-filter attribute to the element matching the .ais-RefinementList-labelText selector,
or to a parent element at a higher level in the DOM.
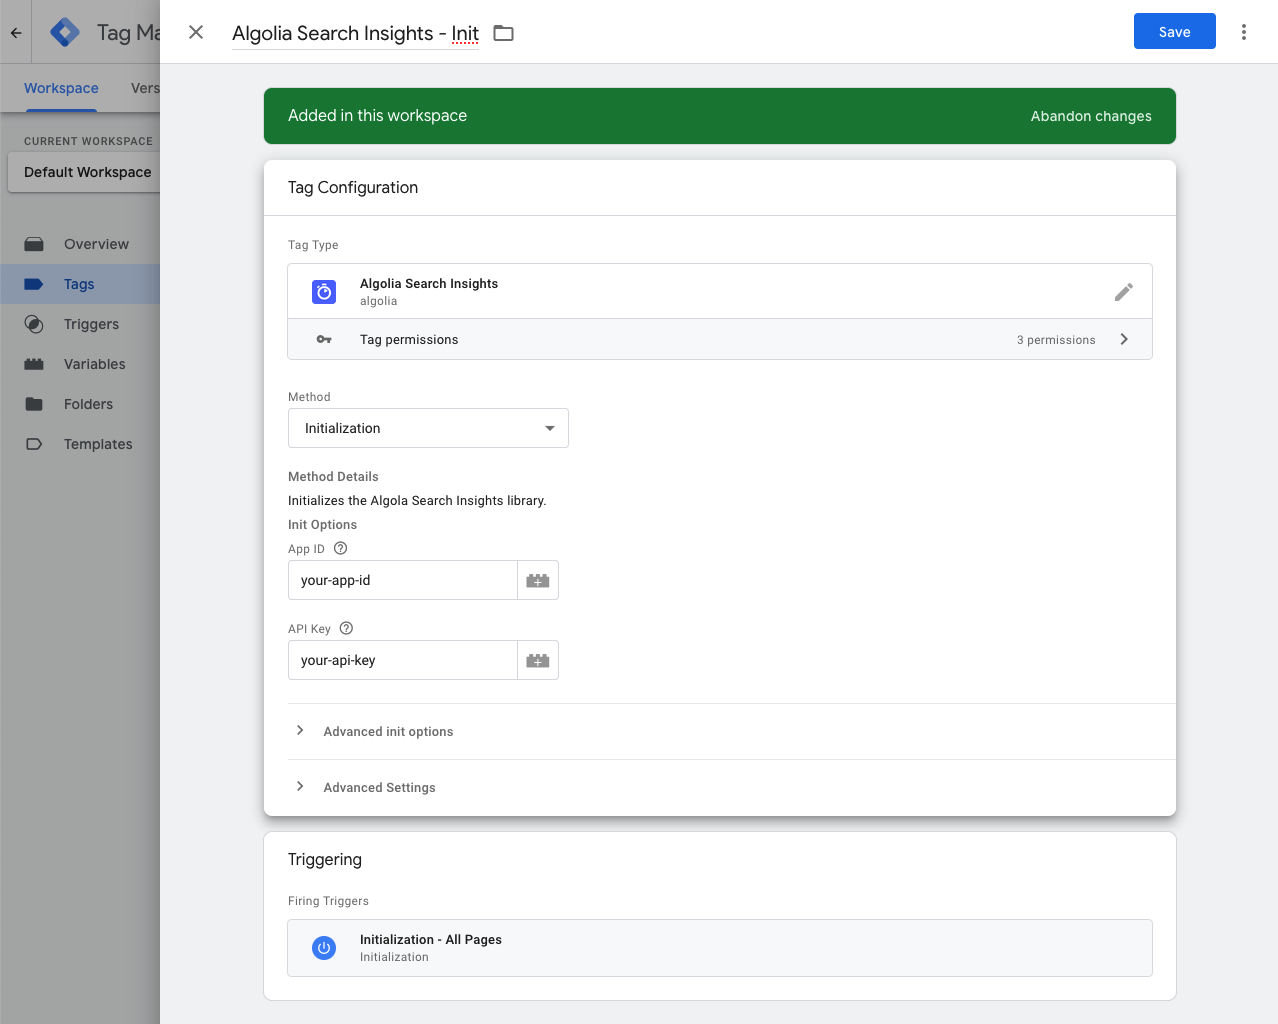
Set up tags
Tags are the functions that run when a trigger is fired. When using GTM with Algolia, each tag corresponds to one method for sending a specific event.Set up your initialization tag
First, you must set up an initialization tag to connect with the Algolia Insights API.- In your GTM workspace, go to the Tags section and select Algolia Search Insights.
- In the Init Options section, enter your Algolia and with search permissions.
-
In the Triggering section, select Initialization—All Pages to trigger this tag on all pages.
Set up view tags for objects
This tag sends a view event to the Algolia Insights API when search results are rendered. It corresponds to theviewedObjectIDs method.
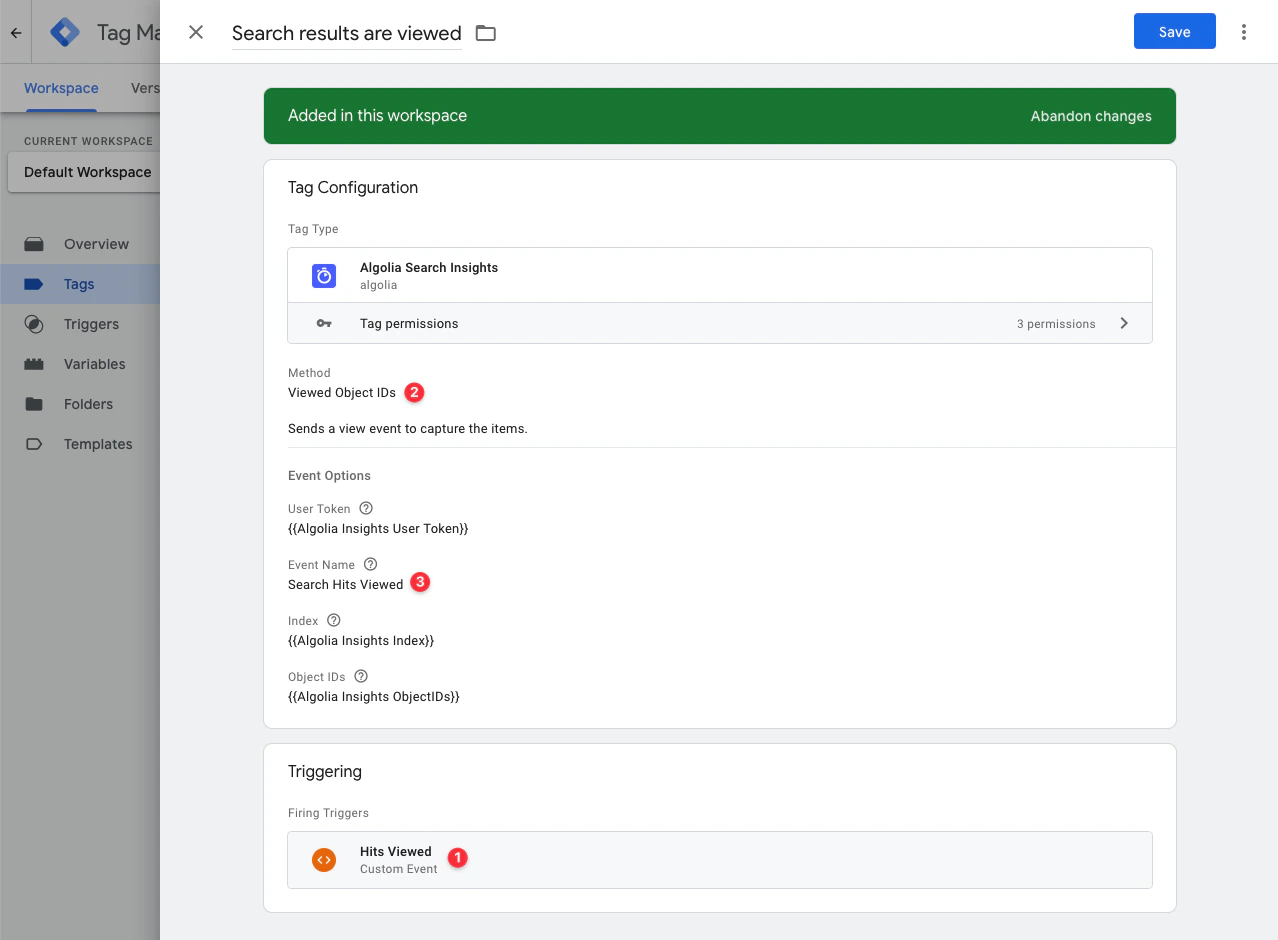
- Trigger:
Hits Viewed - Tag type:
Algolia Search Insights - Tag method:
Viewed Object IDs - Event name: select any name for your events but name your events consistently.
Set up view tags for filters
This tag sends a view event to the Algolia Insights API when a filter is applied to the search query. It corresponds to theviewedFilters method.
Attributes:
- Trigger:
Hits Viewed - Tag type:
Algolia Search Insights - Tag method:
Viewed Filters - Filters:
{{Algolia Insights Viewed Filters}} - Event name: select any name for your events but name your events consistently.
Set up click tags for objects related to search
This tag sends a click event to capture a search query and the clicked items and their positions. It corresponds to theclickedObjectIDsAfterSearch method.
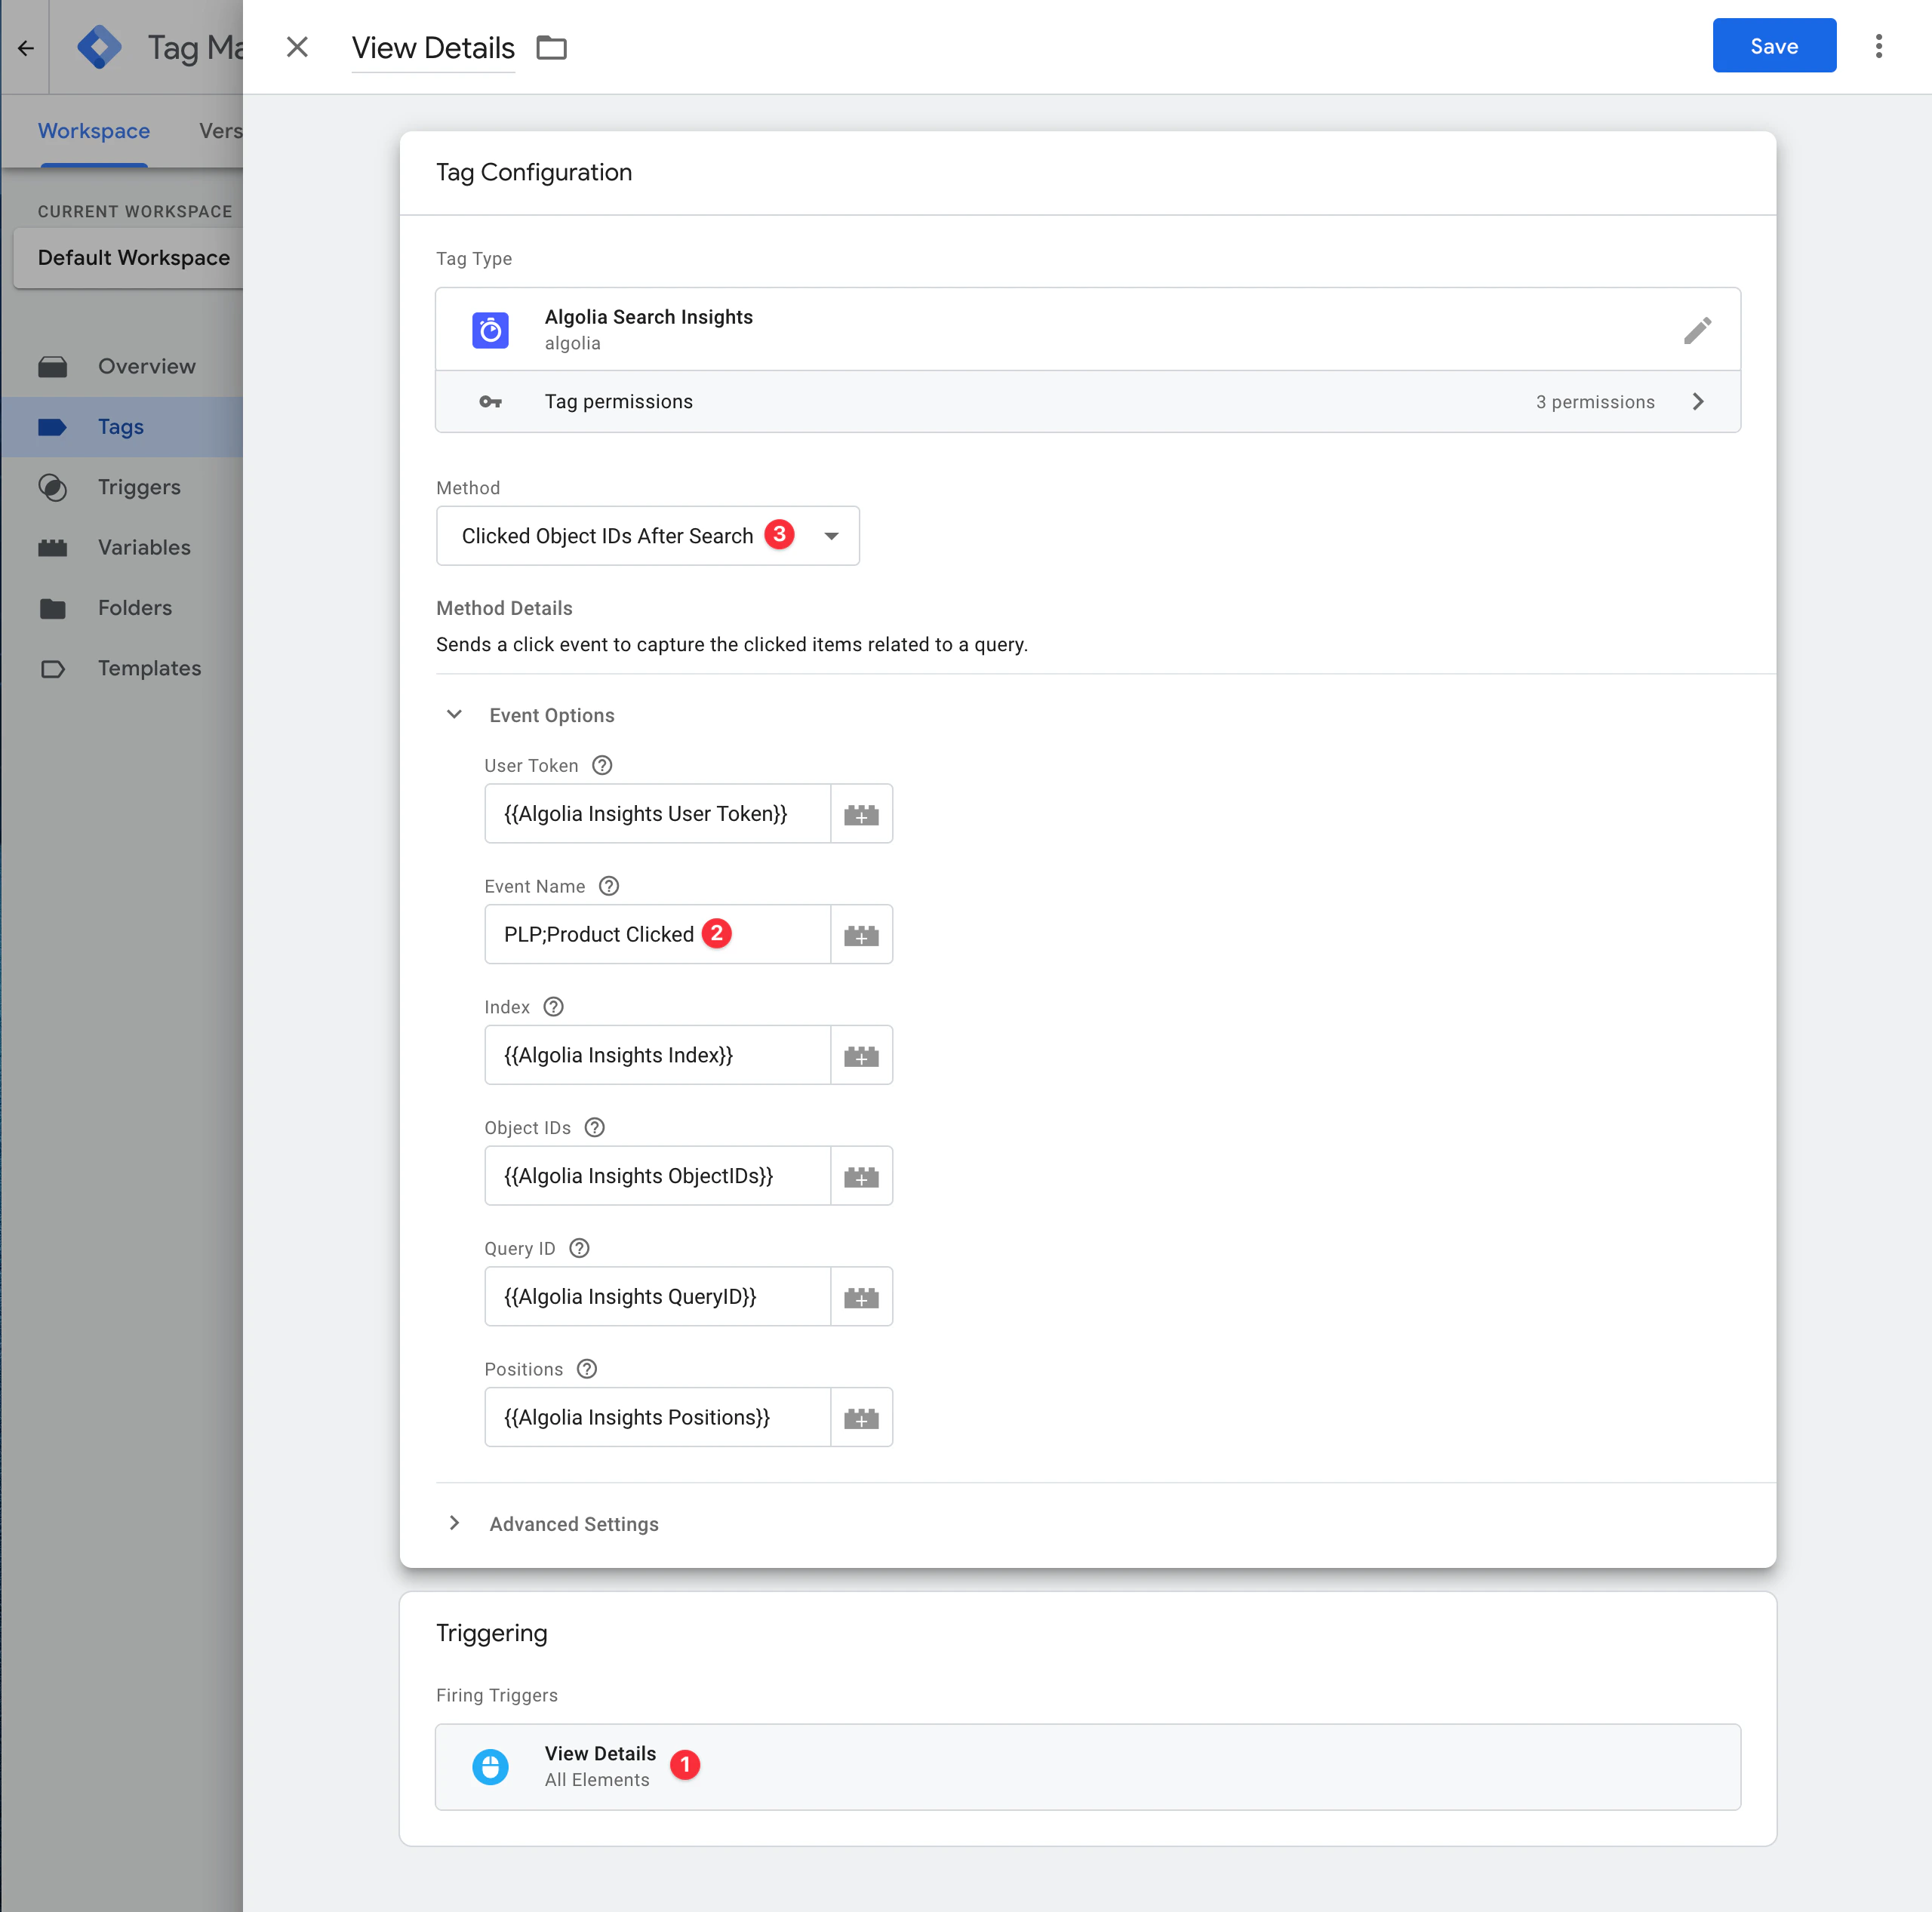
- Trigger:
View Details - Tag type:
Algolia Search Insights - Tag method:
Clicked Object IDs After Search
Set up click tags for objects
This tag sends a click event to the Insights API when users select an item from an Algolia index, regardless of the associated query. This event can be useful on product detail pages or the shopping cart. This tag corresponds to theclickedObjectIDs method.
Attributes:
- Trigger:
View Details - Tag type:
Algolia Search Insights - Tag method:
Clicked Object IDs
Set up click tags for filters
This tag sends a click event to the Insights API to capture selected filters. It accepts the{{Algolia Insights Clicked Filters}} attribute and corresponds to the clickedFilters method.
Attributes:
- Trigger:
View Details - Tag type:
Algolia Search Insights - Tag method:
Clicked Filters
Set up conversion tags
The following tags send a conversion event to the Insights API:- Search-related objects. Captures a search query and the converted items. It corresponds to the
convertedObjectIDsAfterSearchmethod. Set up this tag like the related click tag. - Objects. Captures items, regardless of the associated query. It corresponds to the
convertedObjectIDsmethod. Set up this tag like the related click tag. - Filters. Captures converted filters. It corresponds to the
convertedFiltersmethod. Set up this tag like the related click tag.
Track add-to-cart and purchase events
If you have an ecommerce website, use conversion tags to track add-to-cart and purchase conversion events. This enhances Algolia’s AI and unlocks features such as revenue analytics. Configure the additional event subtype, value, currency, and object data (price, discount, quantity) attributes for add-to-cart and purchase events. To track purchases of multiple items that are associated with different searches, use the Objects tag and specify the query ID values within the object data attribute. For example, if your object IDs list is["product-1", "product-2"], then your object data list might look like:
JSON
Submit your changes and debug your events
After setting up the variables, tags, and triggers, submit your changes. To ensure all variables are set correctly, use Google Tag Assistant.