vendor/algolia/algoliasearch-magento-2/view/frontend/web.
As a starting point for your customizations, use the CustomAlgolia starter code.
Concepts
Frontend events let you run functions (hooks) at specific stages in the lifecycle of the autocomplete menu. You can use them to change the structure of your data, its sources, and the configuration options for your autocomplete menu. For more information, see Frontend custom events. Templates let you control the look of your autocomplete menu with JavaScript template literals.Basic configuration options
| Autocomplete option | Description |
|---|---|
placeholder | Text shown in the search box before users type |
debug | If true, the Autocomplete menu stays open even if you click outside it |
openOnFocus | If true, the Autocomplete menu displays as soon as a user clicks on the search input field |
afterAutocompleteOptions hook.
For example:
JavaScript
Sources
Sources provide the data for items that your users can search for in the autocomplete menu. Specifying multiple sources lets you create a federated search experience.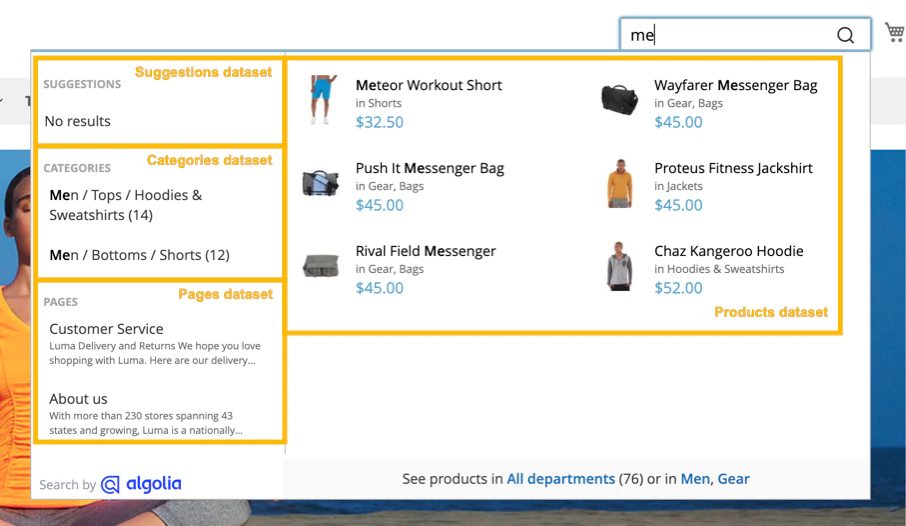
| Autocomplete source | Description |
|---|---|
products | Products from your catalog |
categories | Product categories |
pages | Pages |
suggestions | Suggestions from popular searches |
additional_sections | Additional sections you configured in the Magento Admin |
Add new sources
To add new sources to the autocomplete menu or change existing ones, use theafterAutocompleteSources hook.
The callback function for afterAutocompleteSources must return the complete sources array.
For example:
JavaScript
afterAutocompleteSources accepts two parameters:
| Parameter | Type | Description |
|---|---|---|
sources | Array of sources | Data for autocomplete items |
searchClient | Search client | Initialized Algolia search client |
algoliaAnalytics,
use RequireJS to define them as dependency for your algoliaHooks implementation.
Sources data structure
A minimal configuration for your source object might look like the following:JavaScript
sources array is a JavaScript object with the following properties:
| Property | Type | Required | Description |
|---|---|---|---|
sourceID | String | Required | Unique identifier for your source. Use a sourceID of a built-in source to override it. |
indexName | String | Required | Index name. It’s records will be searchable in the autocomplete menu. To reference a Magento store index, use algoliaConfig.indexName as prefix. |
templates | Autocomplete templates | item template is required | Templates for rendering items (item), no-results display (noResults), a header (header), and footer (footer). |
getItemUrl | function | Function to return the URL for an item for keyboard navigation. | |
transformResponse | function | Function to transform the response from the Algolia API before turning it to Autocomplete items. For more information, see getAlgoliaResults. | |
options | Search parameters | Add or override Algolia search parameters, such as the hitsPerPage parameter. |
Examples
The following example hook adds a new source:JavaScript
JavaScript
Plugins
Plugins extend Autocomplete---for example, by adding new sources. The Magento extension includes the Query Suggestions plugin. This plugin shows popular searches in your autocomplete menu as search suggestions. To add new plugins or change existing ones, use theafterAutocompletePlugins hook.
For example, to add recent searches to your autocomplete menu:
JavaScript
Click events
When a user selects an item in the menu, Autocomplete sends a click event. To track custom events, see Custom frontend events.Keyboard navigation
Keyboard navigation is available in the Algolia extension for Magento Open Source and Adobe Commerce version 3.9.2 or later.

Autocomplete implements the WAI-ARIA combobox pattern.
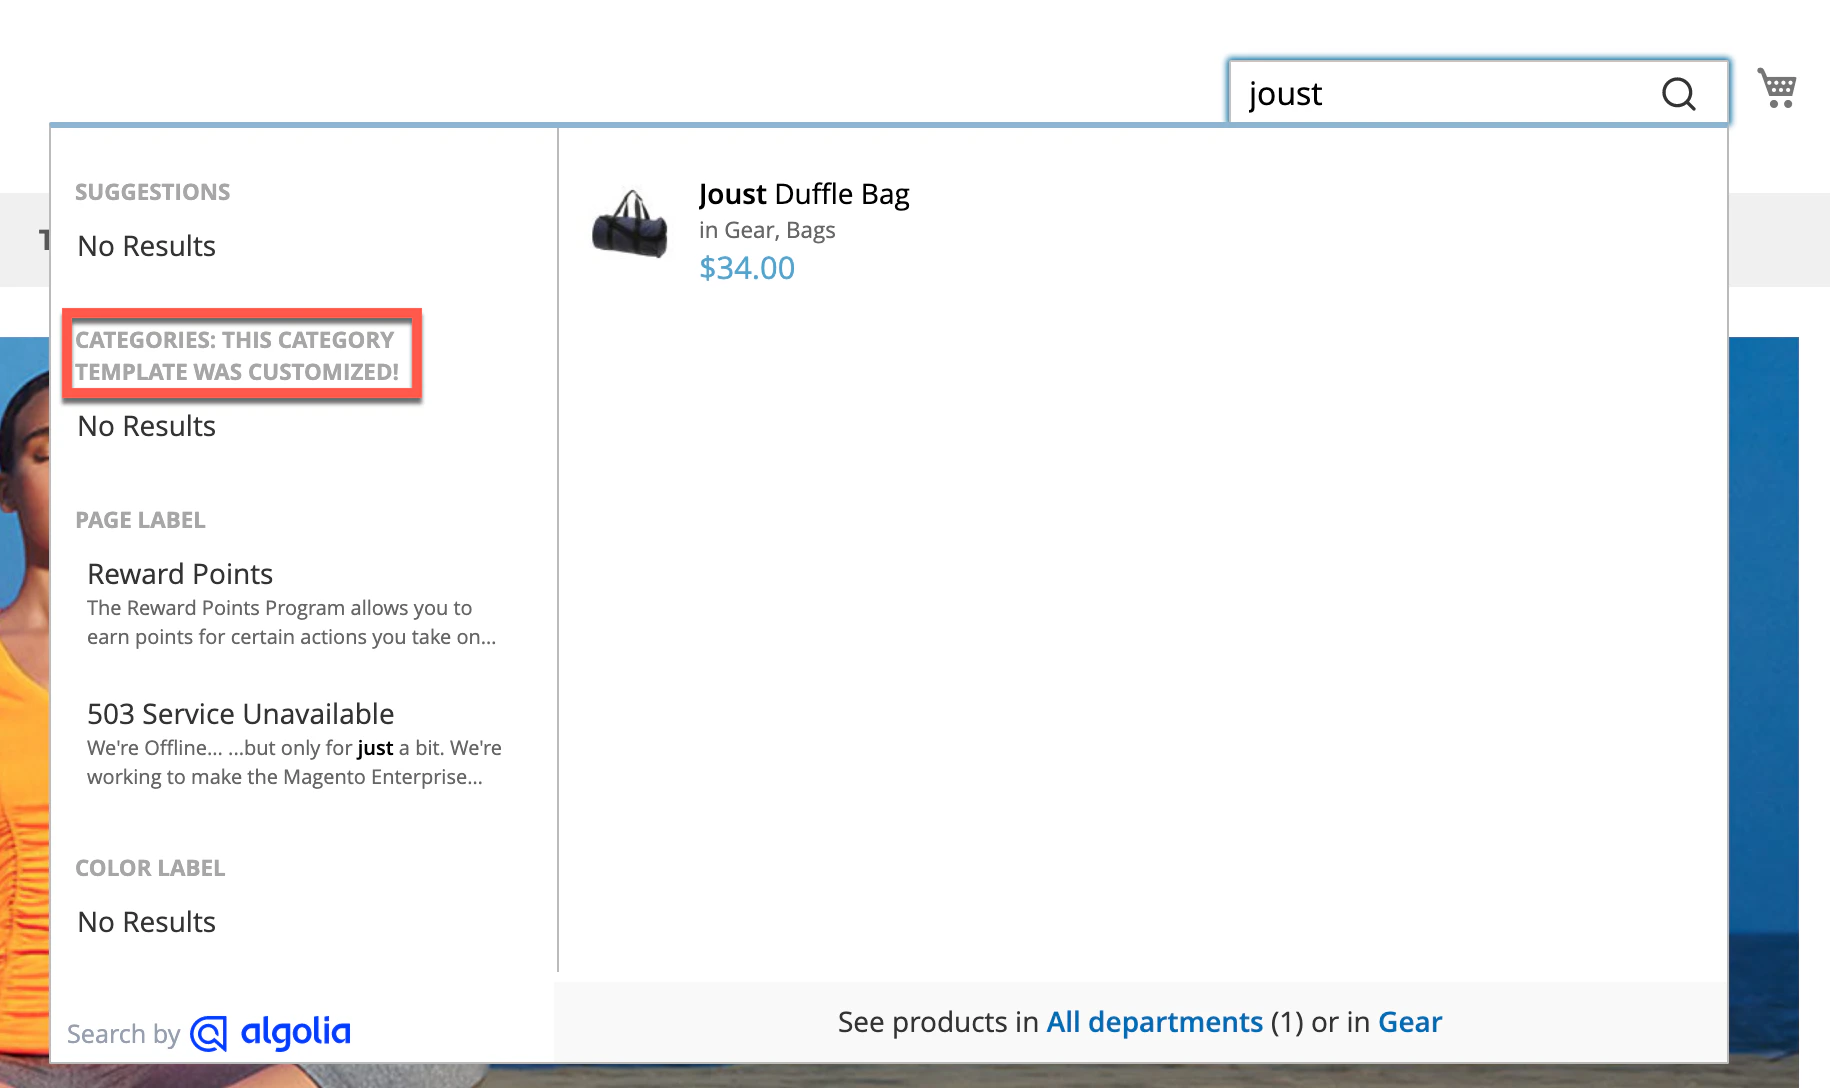
Autocomplete menu templates
When updating templates, keep the changes in your theme directory. Avoid editing the theme files in the extension directory. Follow theme development best practices. To change the appearance of the autocomplete menu, override these templates in your theme:| Template file | Description |
|---|---|
autocomplete.phtml | Autocomplete menu |
products.js | Products |
categories.js | Categories |
pages.js | Pages |
suggestions.js | Search suggestions |
additional-section.js | Additional sections |
web/js/template/autocomplete/ directory.
JavaScript mixins with RequireJS
Mixins let you change the rendering of specific parts of a template without having to override the entire file. To do this, create arequirejs-config.js file in your theme or custom module:
JavaScript
getItemHtml function, leaving other aspects unchanged.
JavaScript
getColorHtml or getCategoriesHtml without editing the getItemHtml function.
Customization with wrappers
You can also extend templates with Magento’smage/utils/wrapper JavaScript module.
Wrappers let you invoke the original template function and include its output with the _super method.
The following example overrides the getHeaderHtml method of the Autocomplete category hit template:
Javascript
Custom Algolia module
To help you build your mixins faster, try theAlgolia_CustomAlgolia extension which installs a set of starter templates for your customizations.
For more information, see Create a custom extension.
Styling
To keep the autocomplete menu open when making changes, turn on the debug mode. To enable the debug mode, go to Stores > Configuration > Algolia Search > Autocomplete > Enable autocomplete menu’s debug mode.
Debouncing
Debouncing waits to send a until the user stops typing for a short time. This reduces the number of API requests and UI updates but it also delays showing results. Debouncing can help users who prefer reduced motion. To change the debounce settings, go to Stores > Configuration > Algolia Search > Autocomplete in the Magento Admin.Debounce requests
The Debounce requests setting defines the delay after the last keystroke before triggering a search. By default, a search is triggered 300 milliseconds after the last keystroke.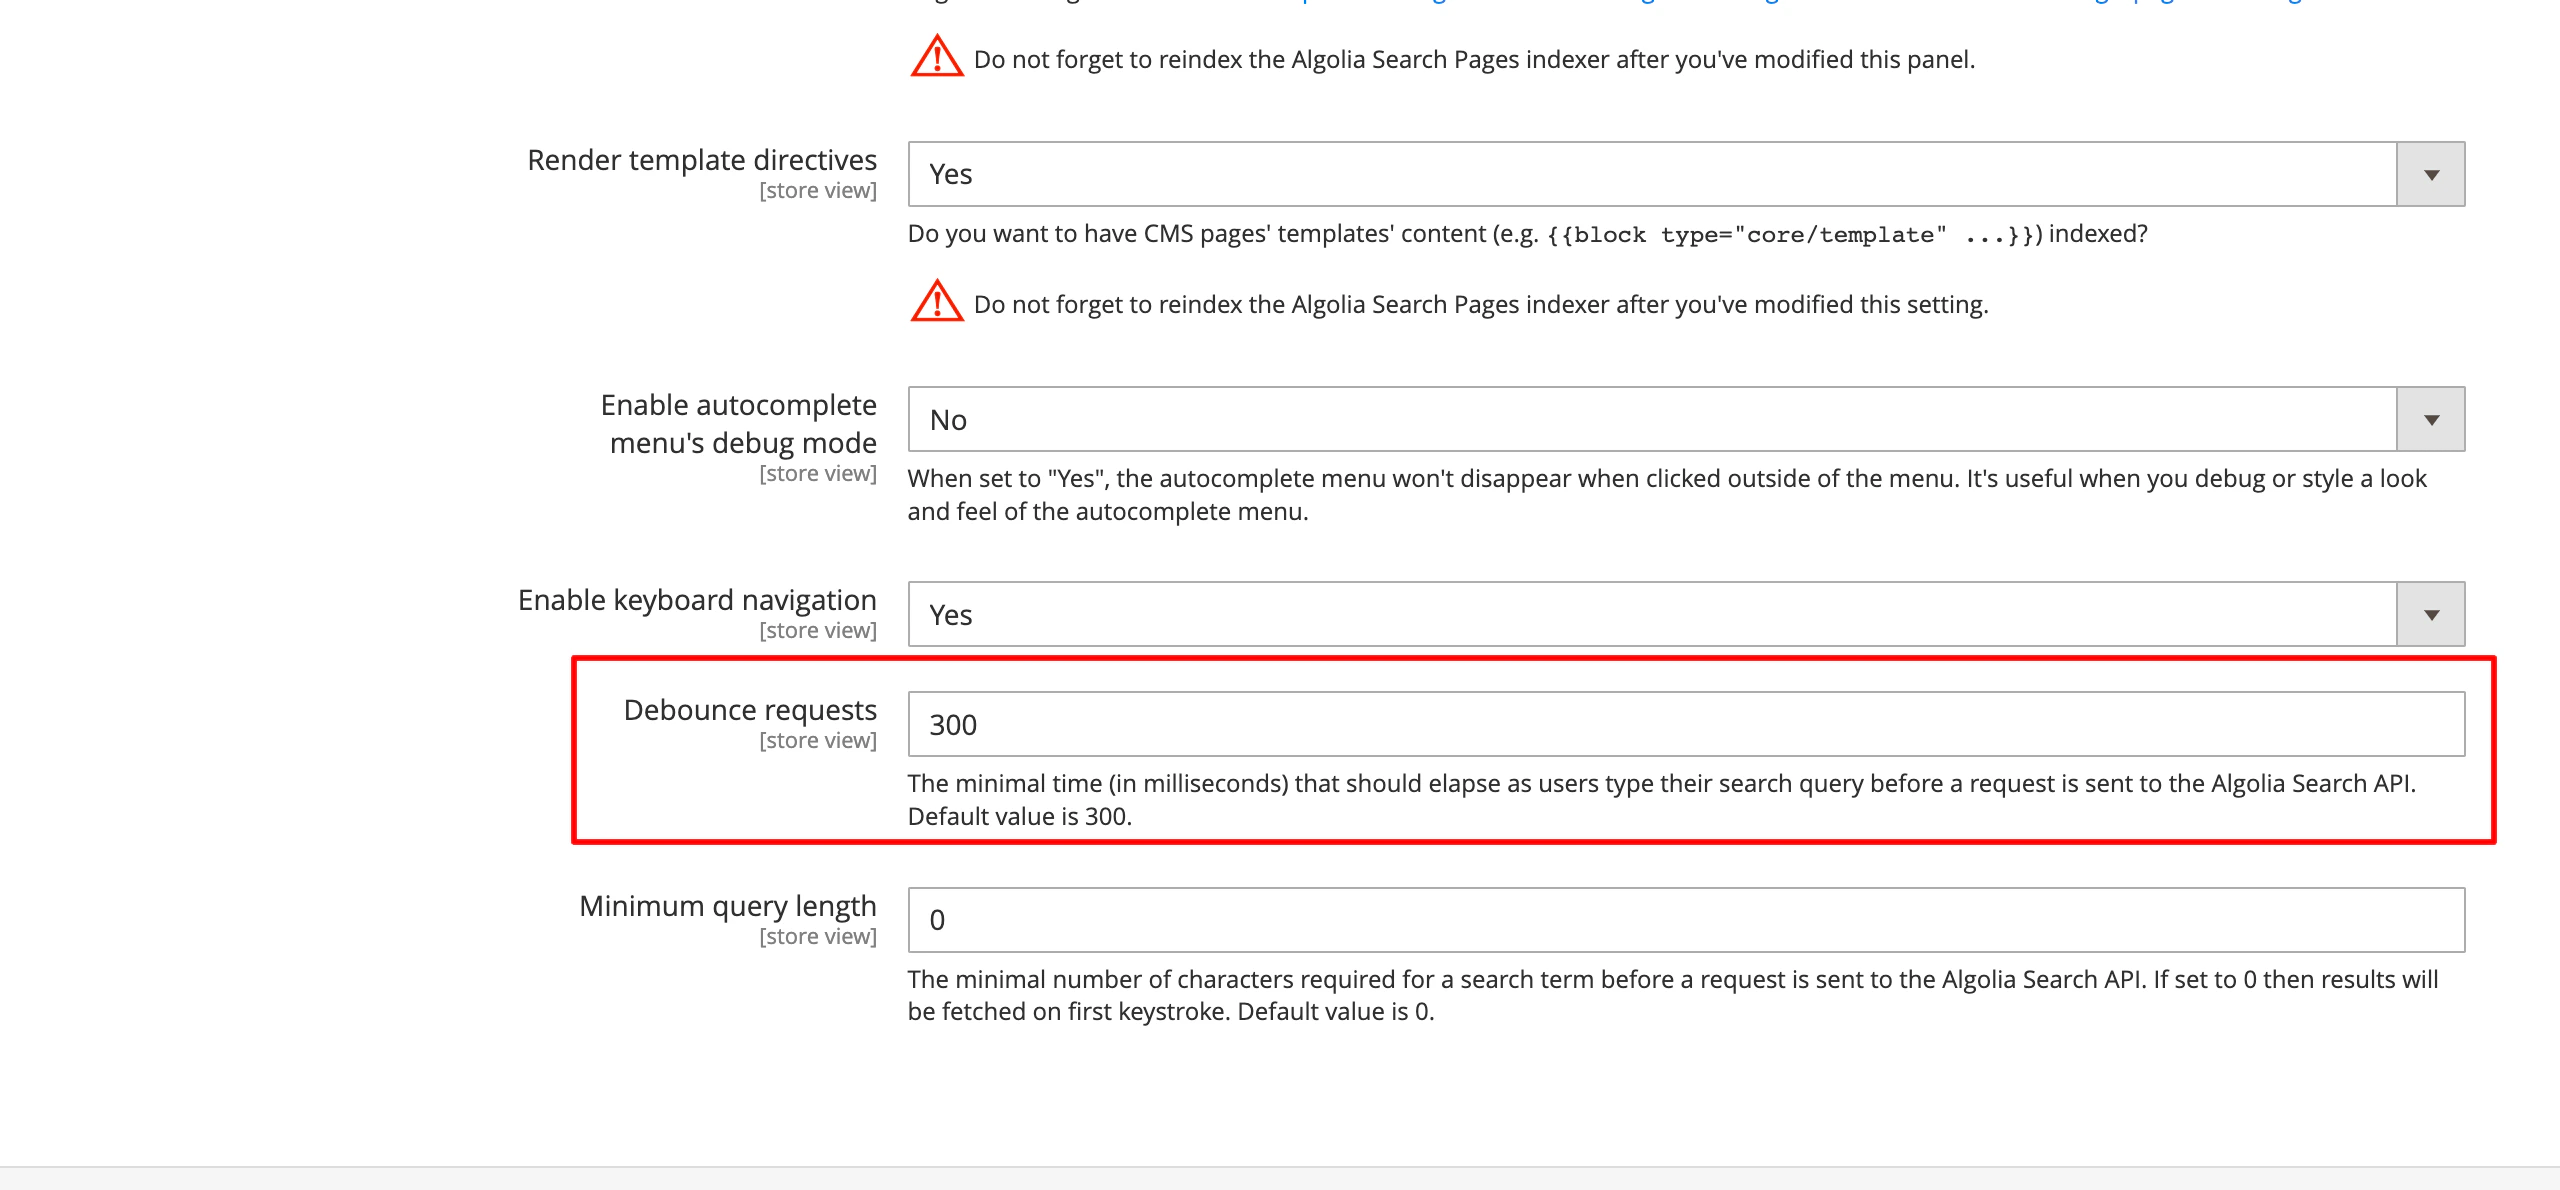
Minimum query length
The Minimum query length setting defines how many characters users have to enter before triggering a search. If you set it to 0, searches are triggered from the first keystroke.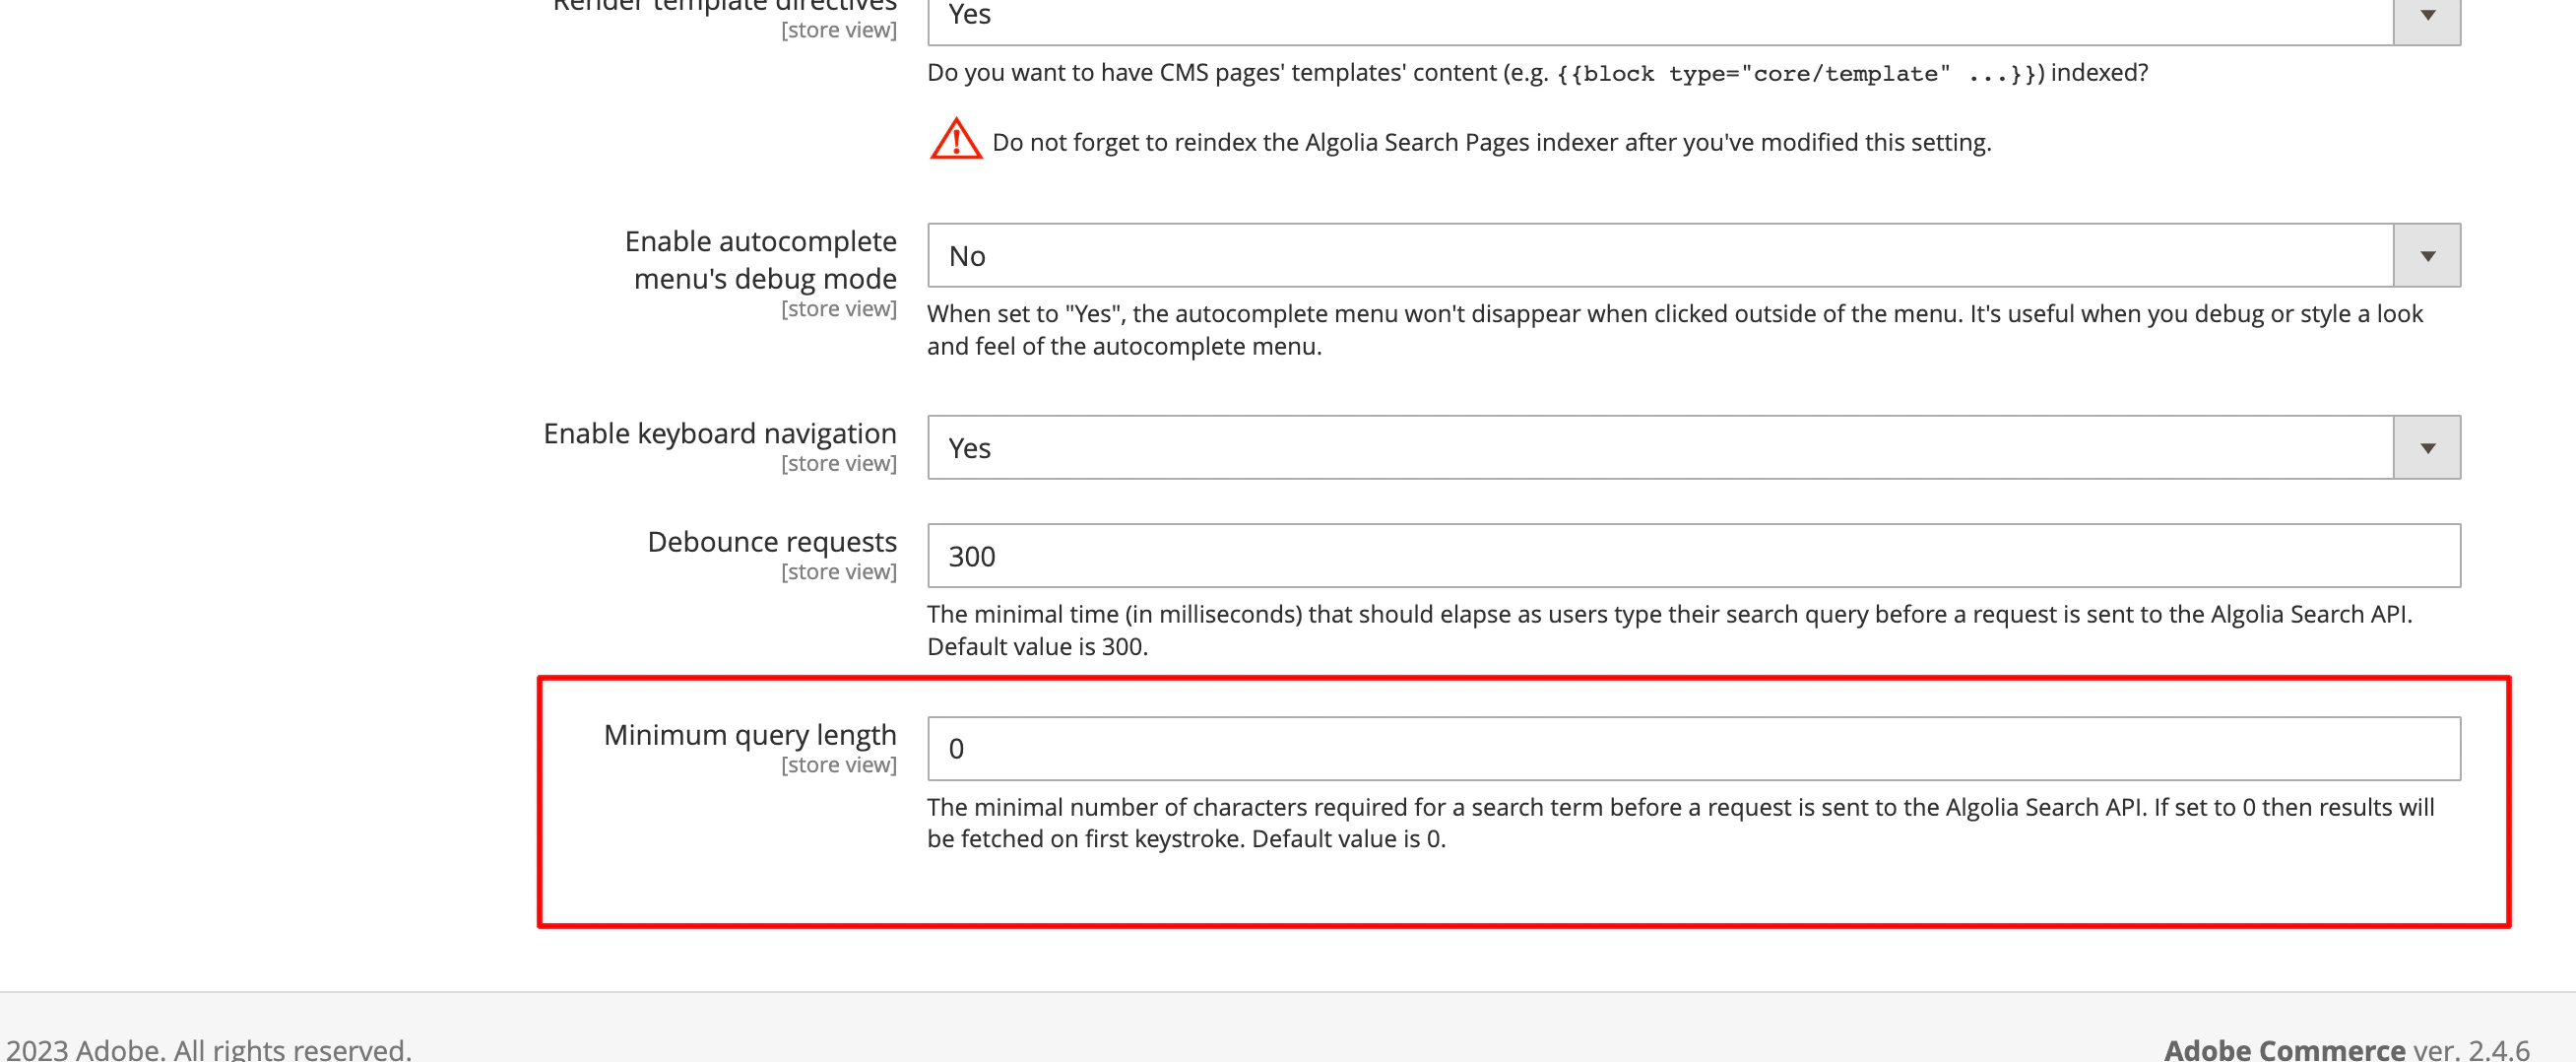
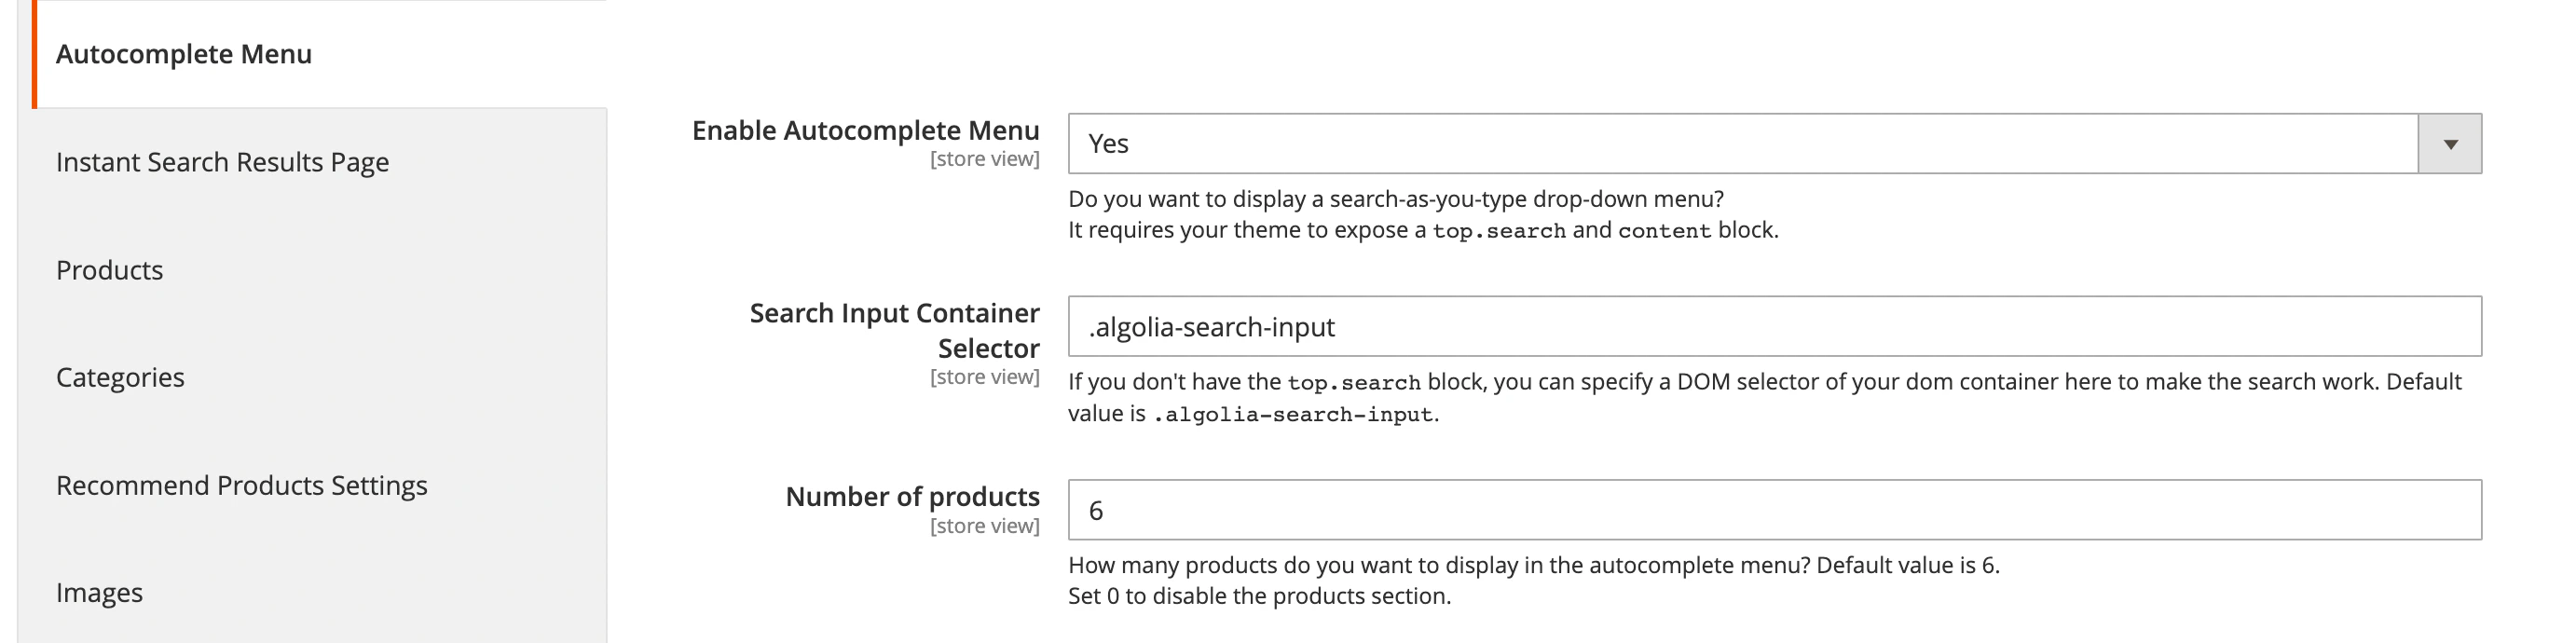
Custom theme
By default, the extension overrides thetopSearch block of the template.
If you’re using a custom theme without the topSearch block,
update the DOM selector for the search input.
Go to Stores > Algolia Search > Autocomplete Menu in the Magento Admin, and change the Search Input Container Selector setting:
Console error after reindexing
If you see the “can’t read property ‘autocomplete’ of undefined” error after reindexing, this indicates the extension’s templates weren’t rendered.- Since the templates are rendered into the
before_body_endblock, ensure the theme renders this block. - If the block is rendered, confirm that symlinks are enabled in Magento’s configuration.