

This feature isn’t available on every plan.
Refer to your pricing plan to see if it’s included.
A new way to merchandise with Magento
Whenever possible, use Merchandising Studio. Avoid the legacy merchandising features in the Algolia extension for Magento. Algolia won’t add new legacy merchandising features to the extension. Merchandising Studio has these benefits over the legacy extension features:- Centralized rule management. This prevents the Magento integration from overwriting rules managed in Merchandising Studio.
-
You can do more than just pinning items such as:
- Boosting and burying attributes
- Dynamic Re-Ranking
- Results filtering
- Sorting strategies
- You can apply several merchandising strategies at once.
Enable Merchandising Studio
To use the Merchandising Studio with Magento, upgrade the Algolia extension to version 3.11 or later.
Version 3.11 also adds support for creating Visual Editor rules for categories in the Algolia dashboard.


categoryPageId.
After making your changes:
- Save your settings in the Magento admin.
- Clear your local Magento config cache by running:
bin/magento cache:flush config - Re-run the full Algolia product indexer:
attributesForFaceting.
Run a full product reindex after turning on visual merchandising support.
If you enable support for visual merchandising in Magento but skip the indexing step,
your category pages won’t load products from the Algolia correctly.
Category page identifiers
Once Algolia has indexed your products with the new category page identifier, configure Merchandising Studio to use this information:-
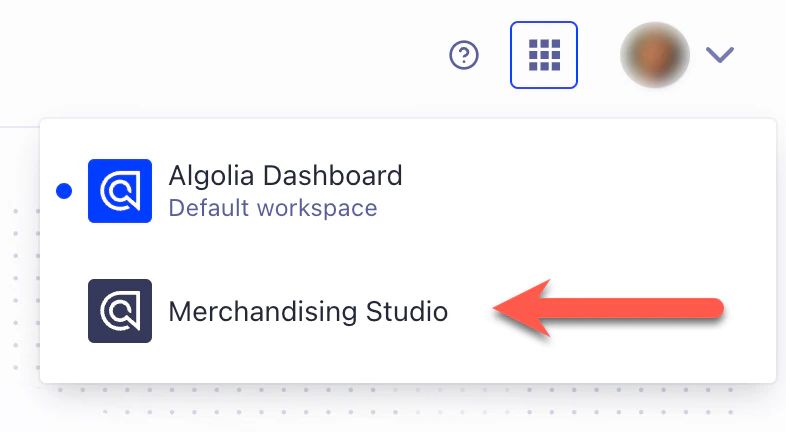
In the Algolia dashboard, select Merchandising Studio in the top right.
-
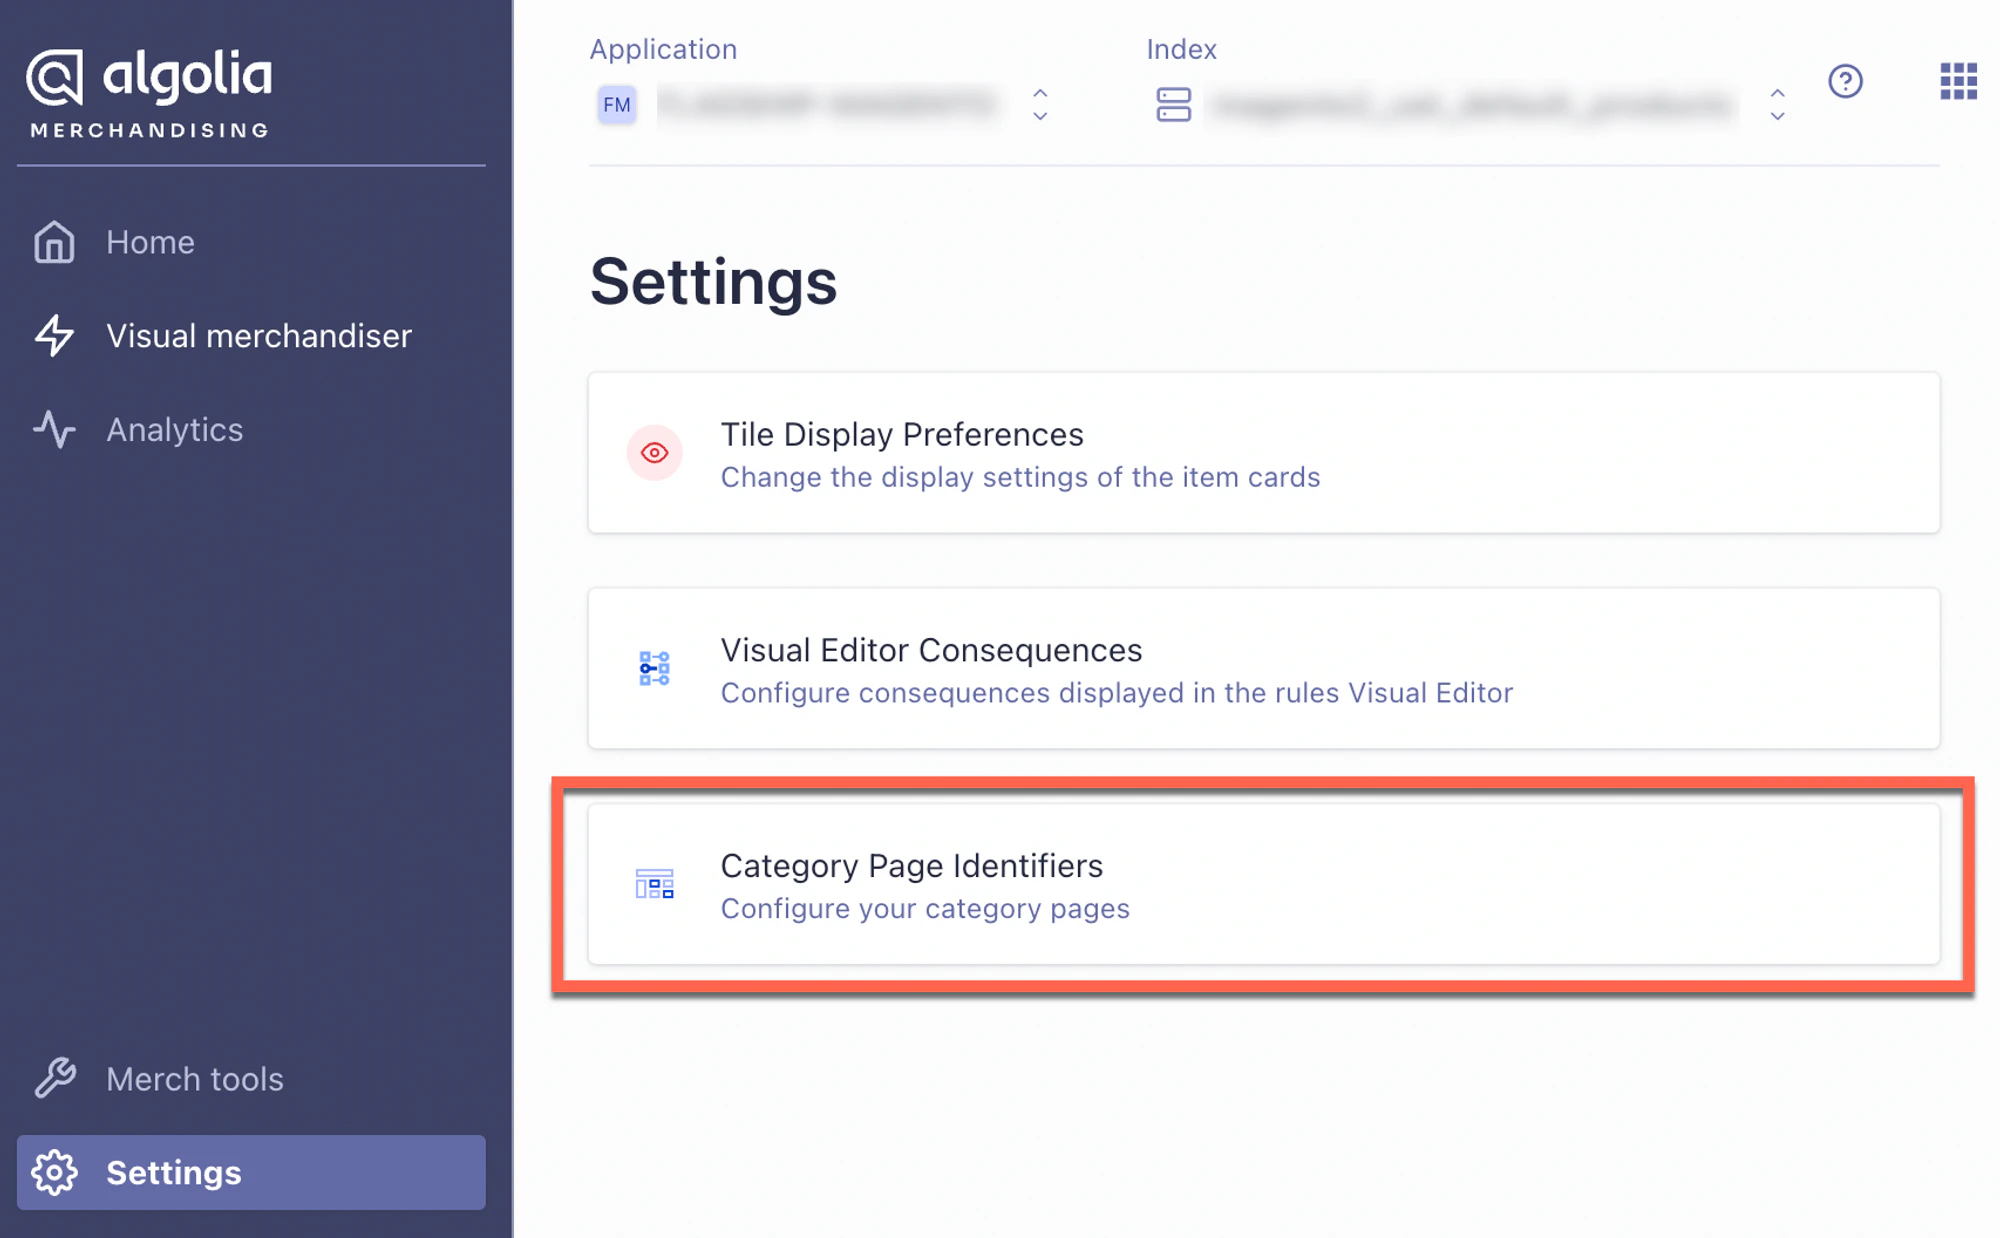
Go to Settings > Category Page Identifiers:
-
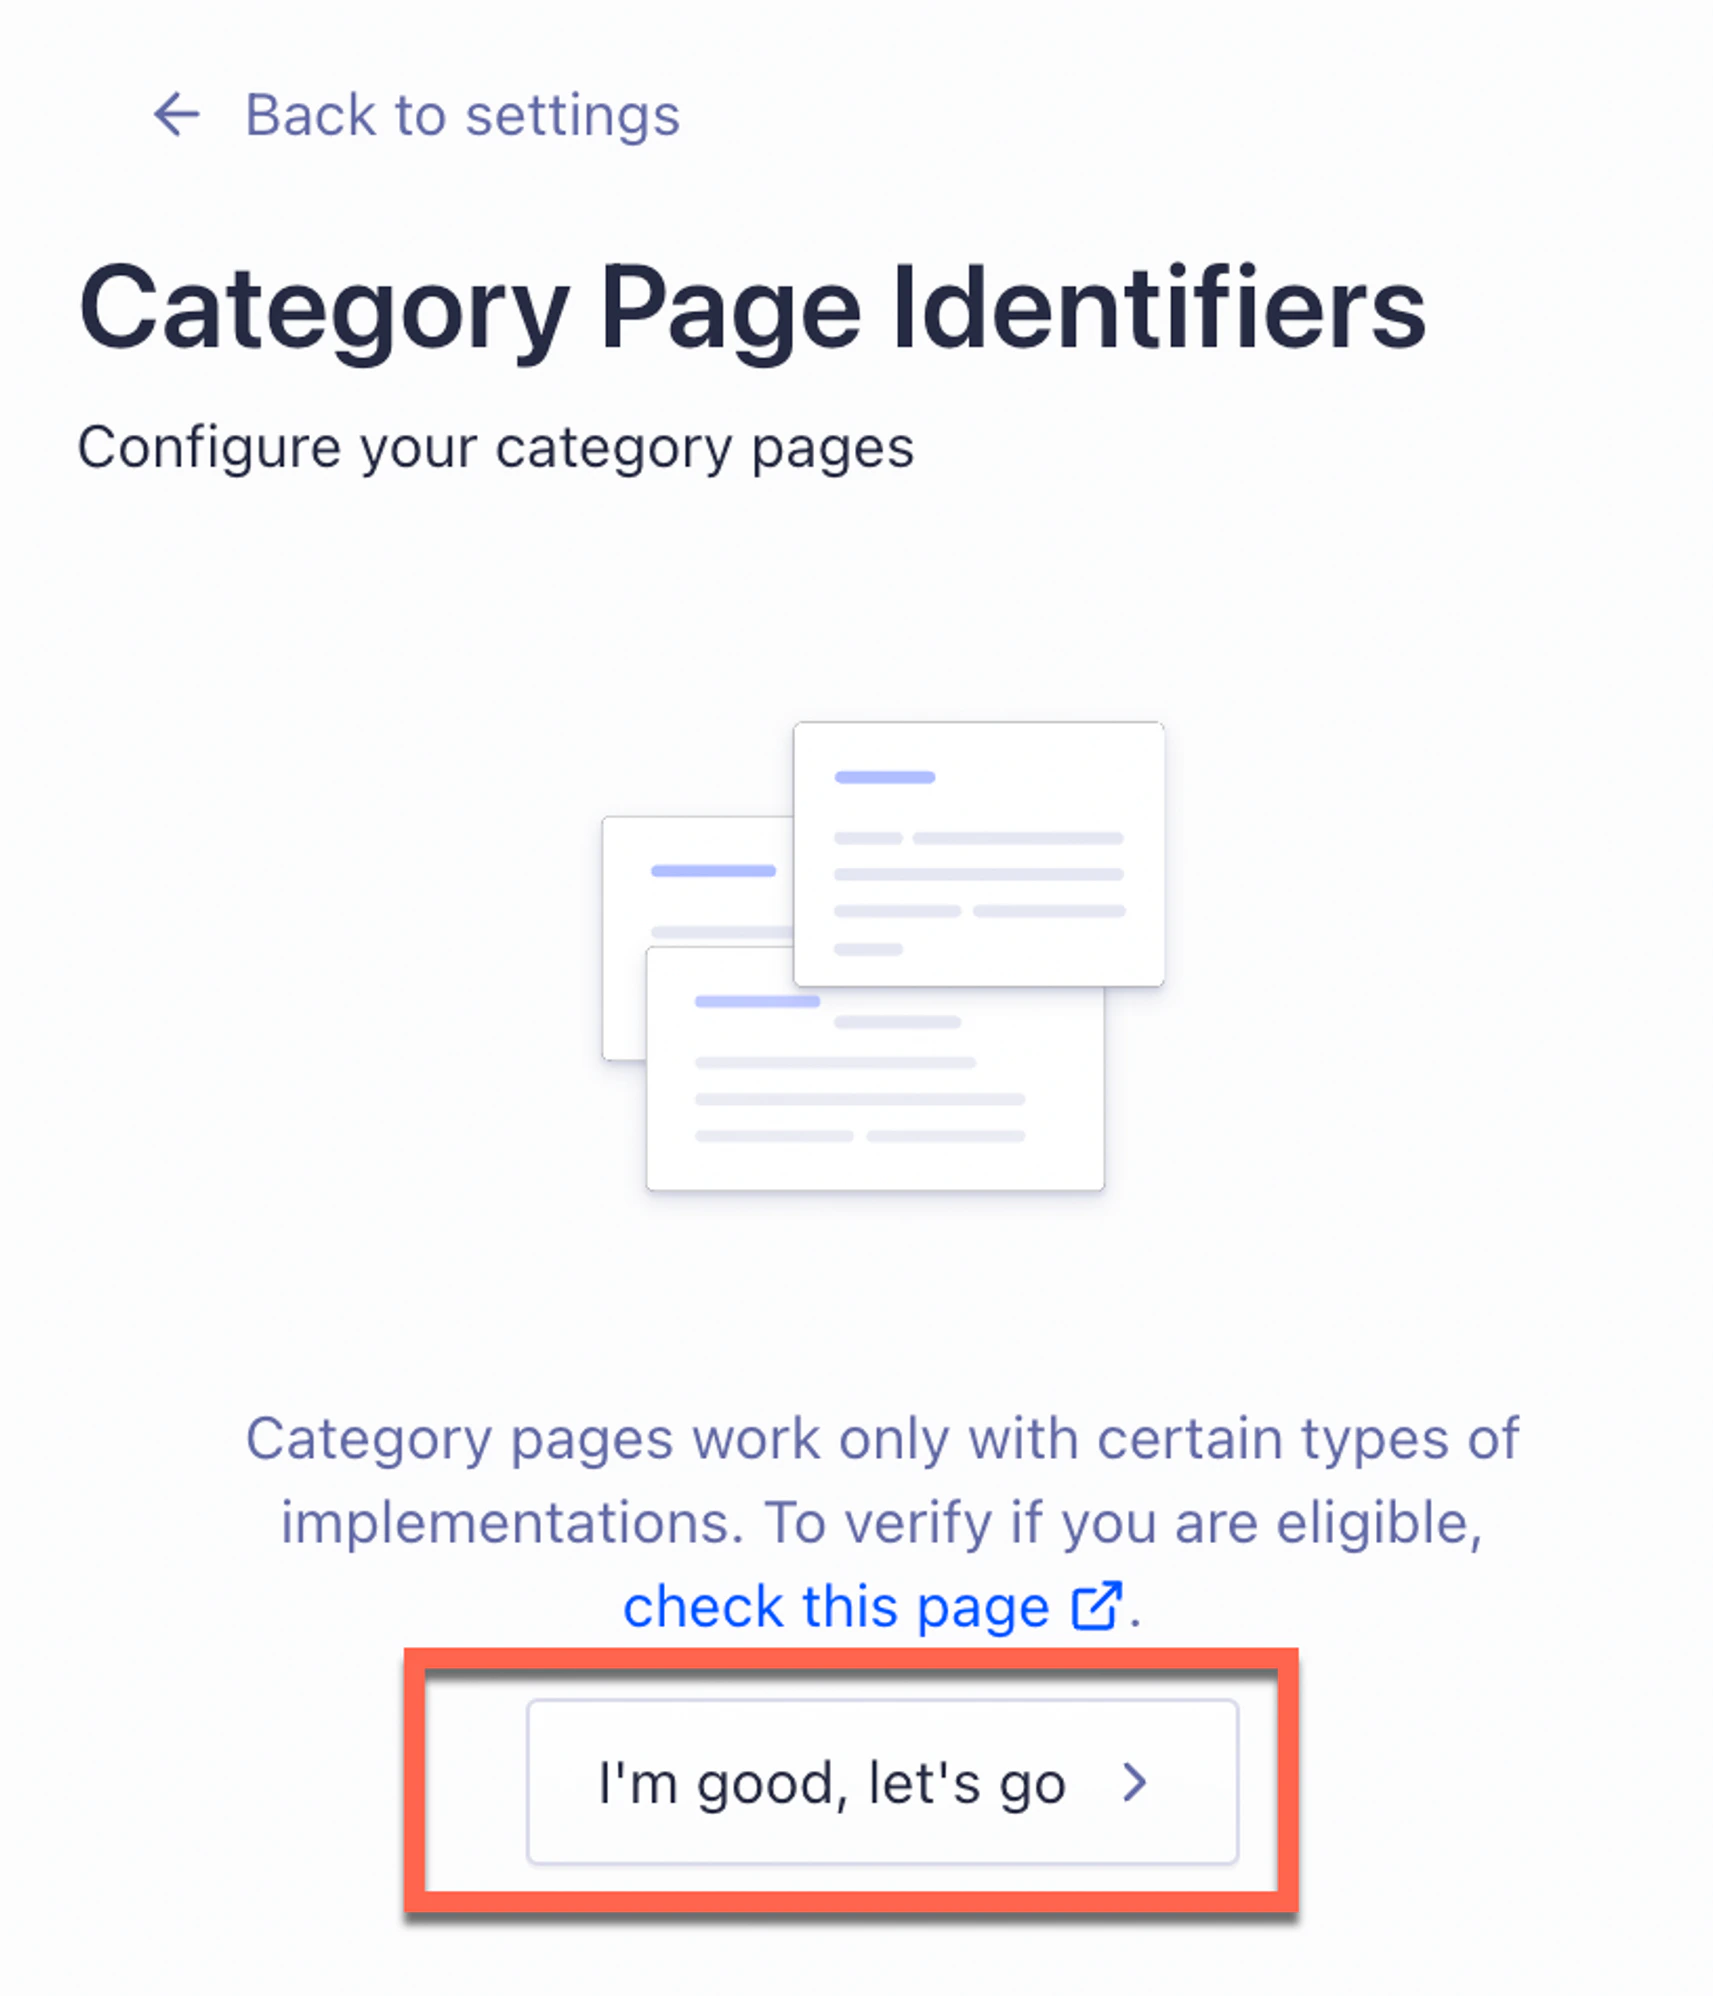
The Magento integration formats your category data
for you. You can ignore the warning “Category pages only
work with certain types of implementations”.
Click I’m good. Let’s go.
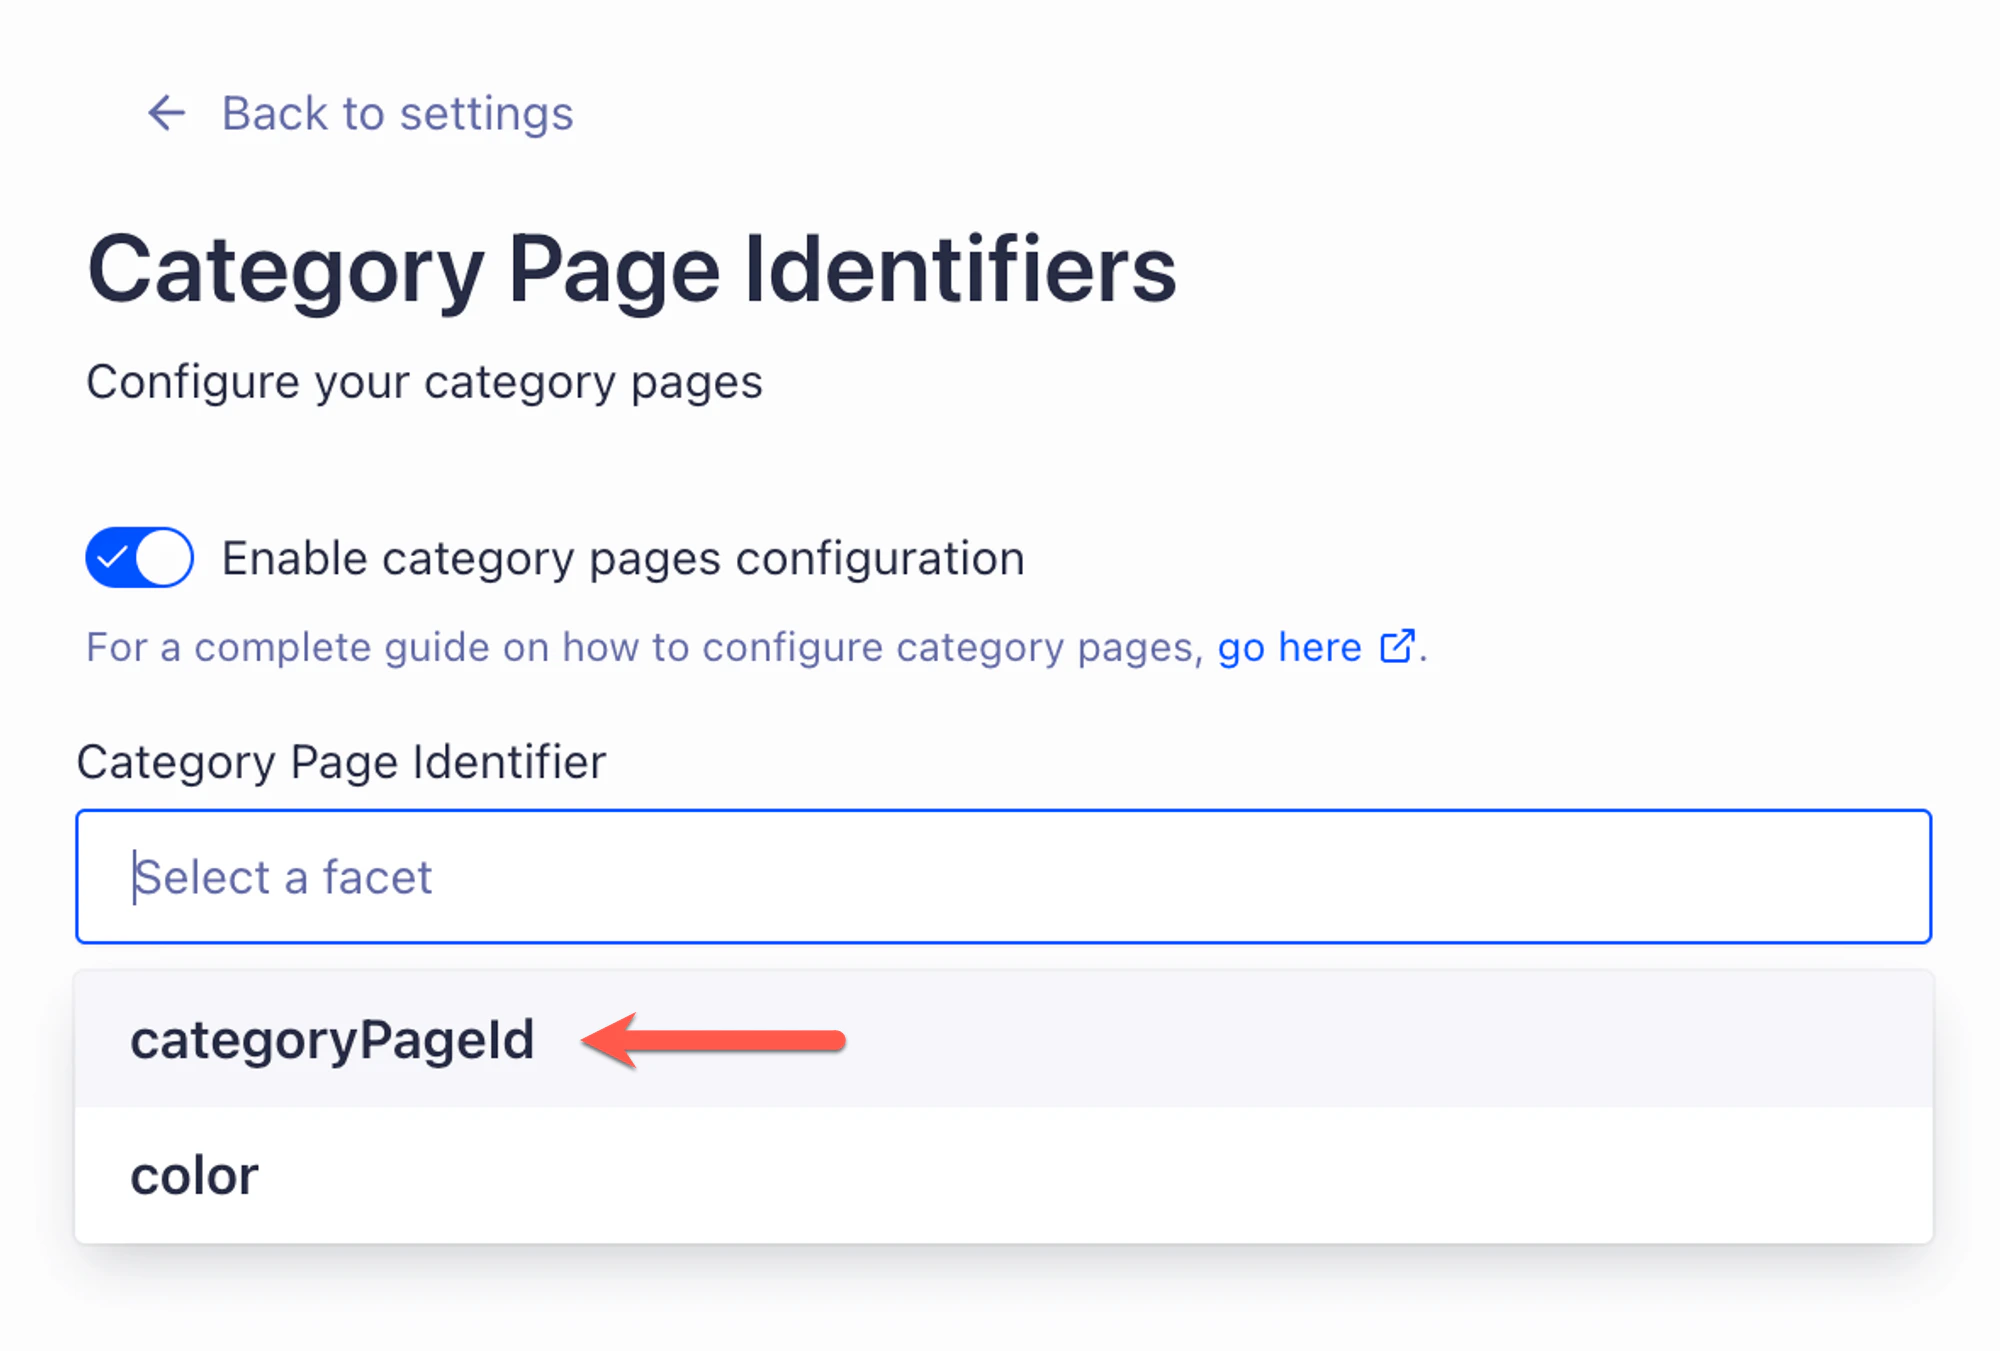
- Select the same category identifier you configured in the Magento admin.
categoryPageId, which is the default attribute name:
Subcategory separator
Even though the Magento extension marks it optional, you must set the Custom subcategory separator. The Magento extension uses/// as the default category separator.
You must configure the Merchandising Studio to match.
This setting is whitespace-sensitive.
Make sure to include leading and trailing spaces:
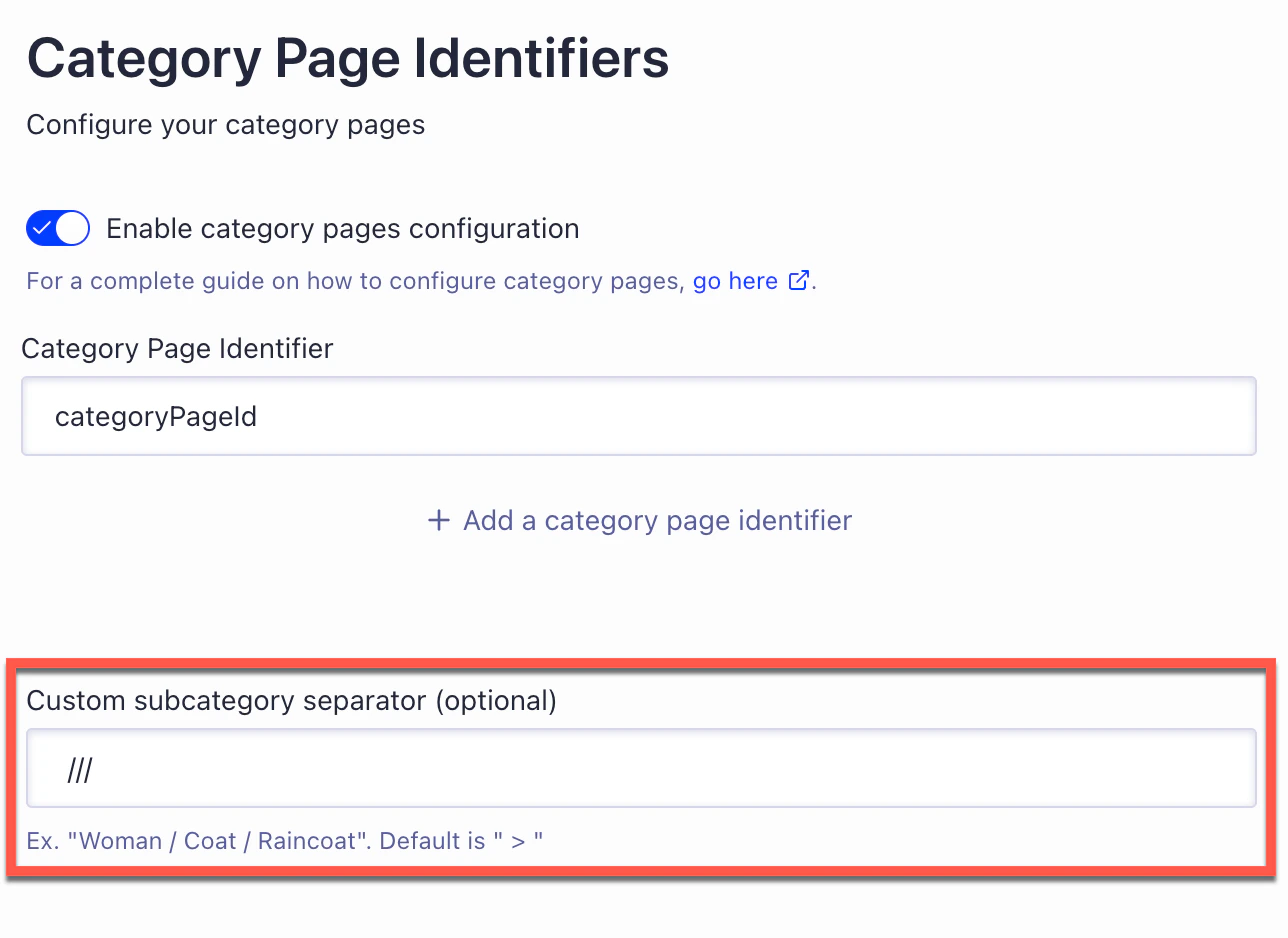
- In Magento, go to Stores > Configuration > Algolia Search > Categories > Category separator. Change the separator there.
- Reindex your products in Algolia.
- Set the custom subcategory separator in Merchandising Studio to the same value.
If you change your category separator in Magento, run a full product reindex.
Otherwise, your category pages won’t render correctly on your store front.
Supported features
The visual merchandising setting in Magento lets you merchandise category pages with Algolia Rules. The Magento integration supports the following features in the Algolia Merchandising Studio: The following features require customizing your frontend libraries: For more information, see Custom frontend events.Dynamic Re-Ranking
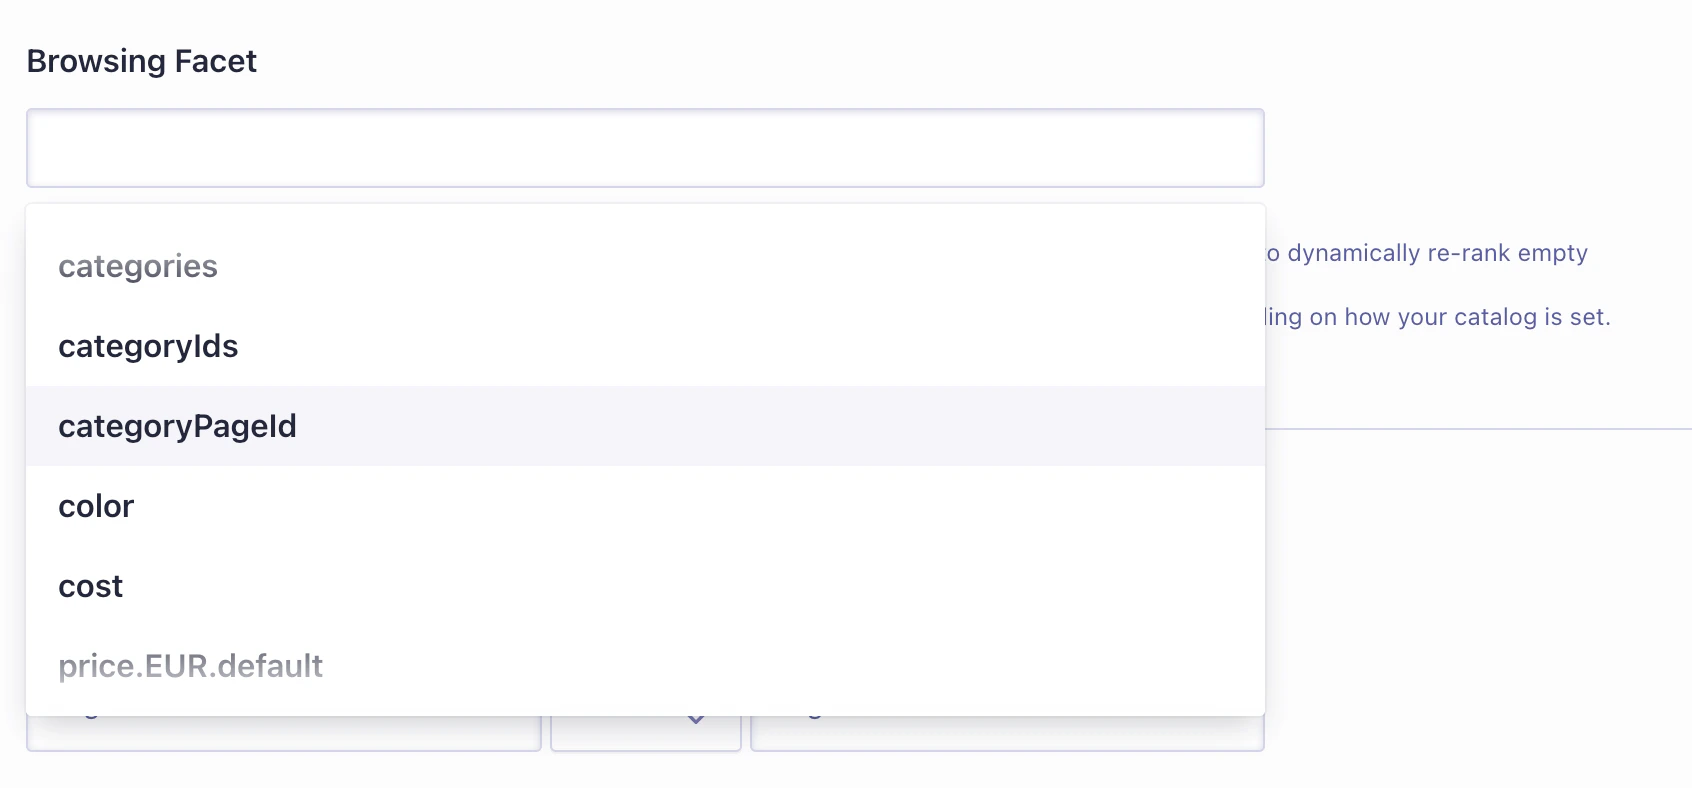
To apply Dynamic Re-Ranking to Magento categories:- In the Algolia dashboard, go to Search > Enhance > Re-Ranking > Settings.
- In the Browse Facet box, enter the category page ID attribute you set up earlier.
categoryPageId:
Dynamic facets
Starting with version 3.16 of the Magento extension, you can use Algolia Rules to adjust facets. This works on both your Magento store’s search results and category pages. Enable this feature from Stores > Configuration > Algolia Search > InstantSearch Results Page > Faceting > Enable dynamic facets. Dynamic facet support in Magento relies on the facet display feature. TherenderingContent parameter controls this feature, which is itself part of Merchandising Studio.
How dynamic faceting works in Magento
The Magento extension sets a default facet display for all product listing pages. It bases this on the attributes you configure under Stores > Configuration > Algolia Search > InstantSearch Results Page > Faceting > Facets. You can use an Algolia rule to override the default facet display. This happens when the user’s query or filters match the rule’s conditions. In the following example, this Magento store defines five facets: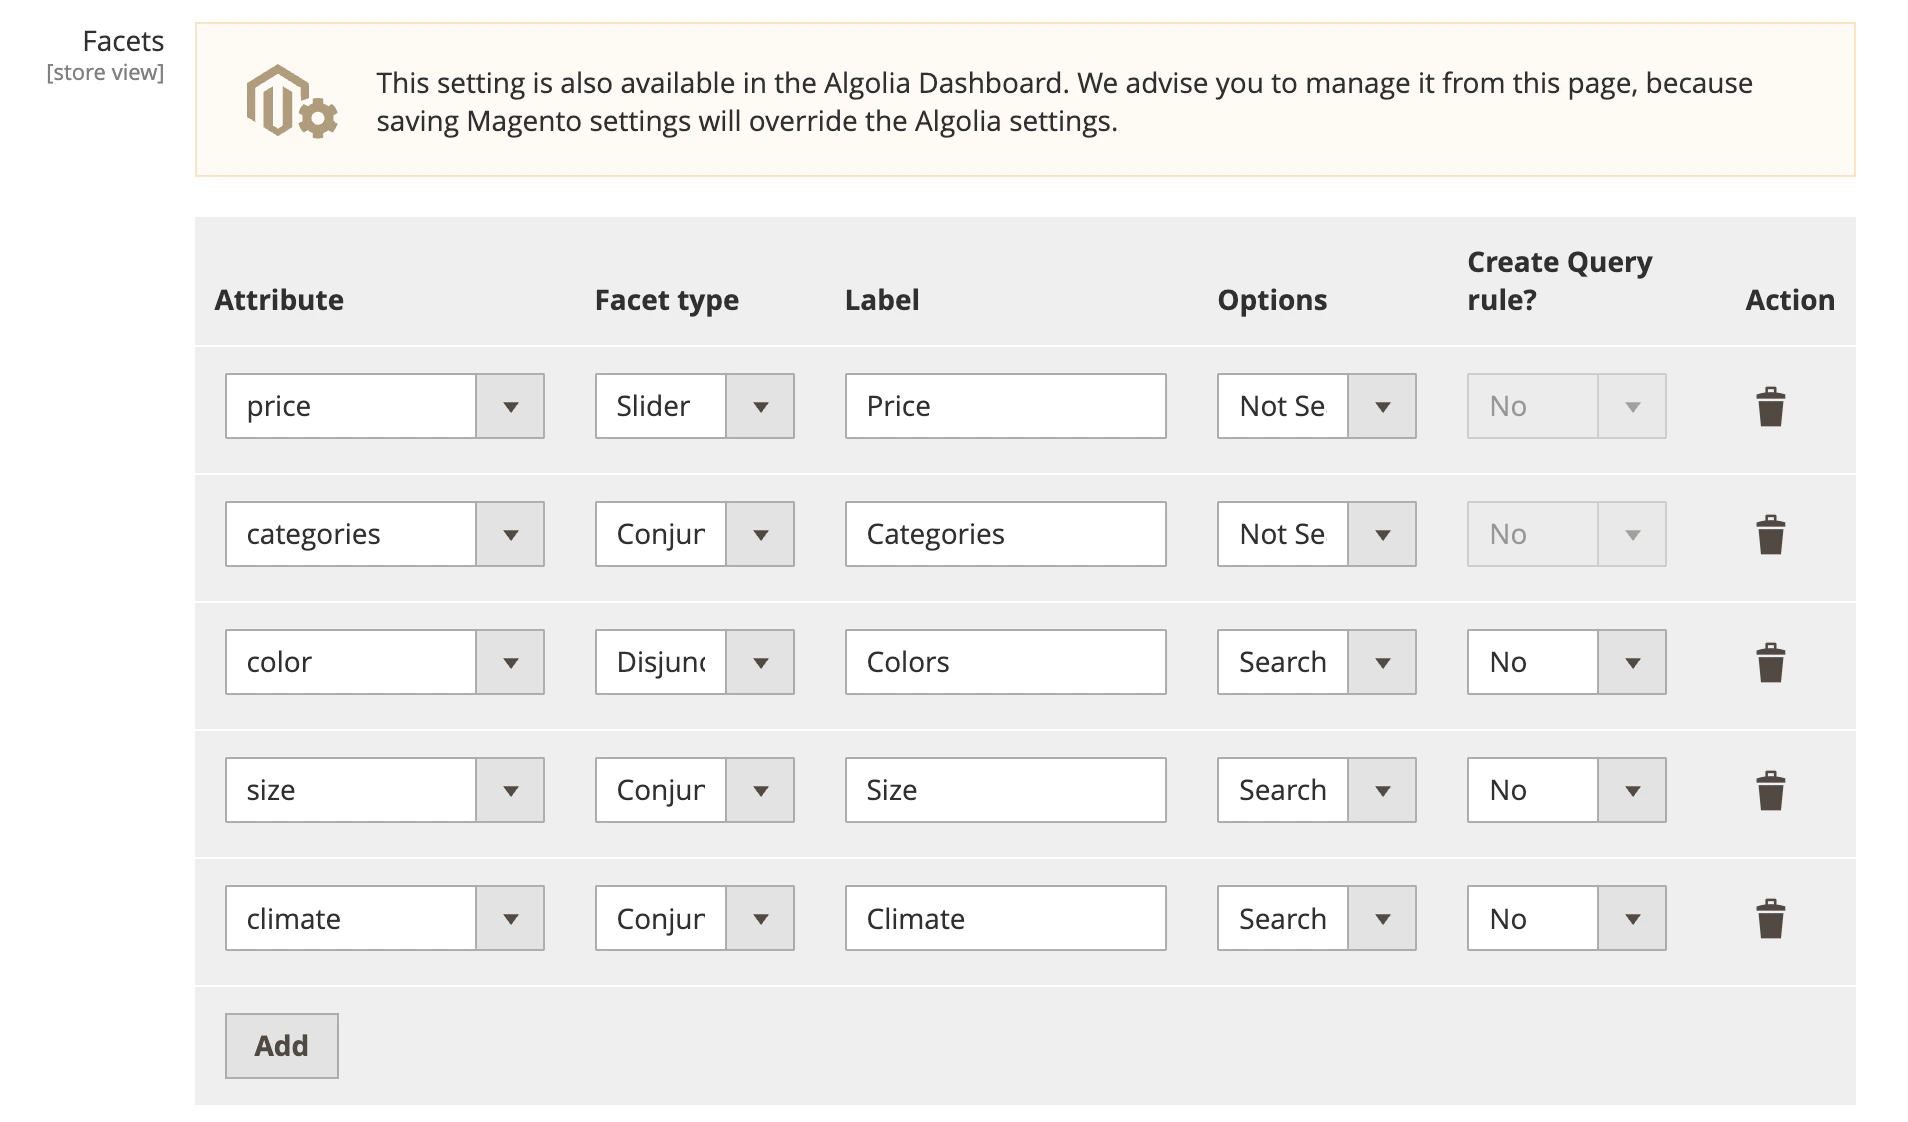
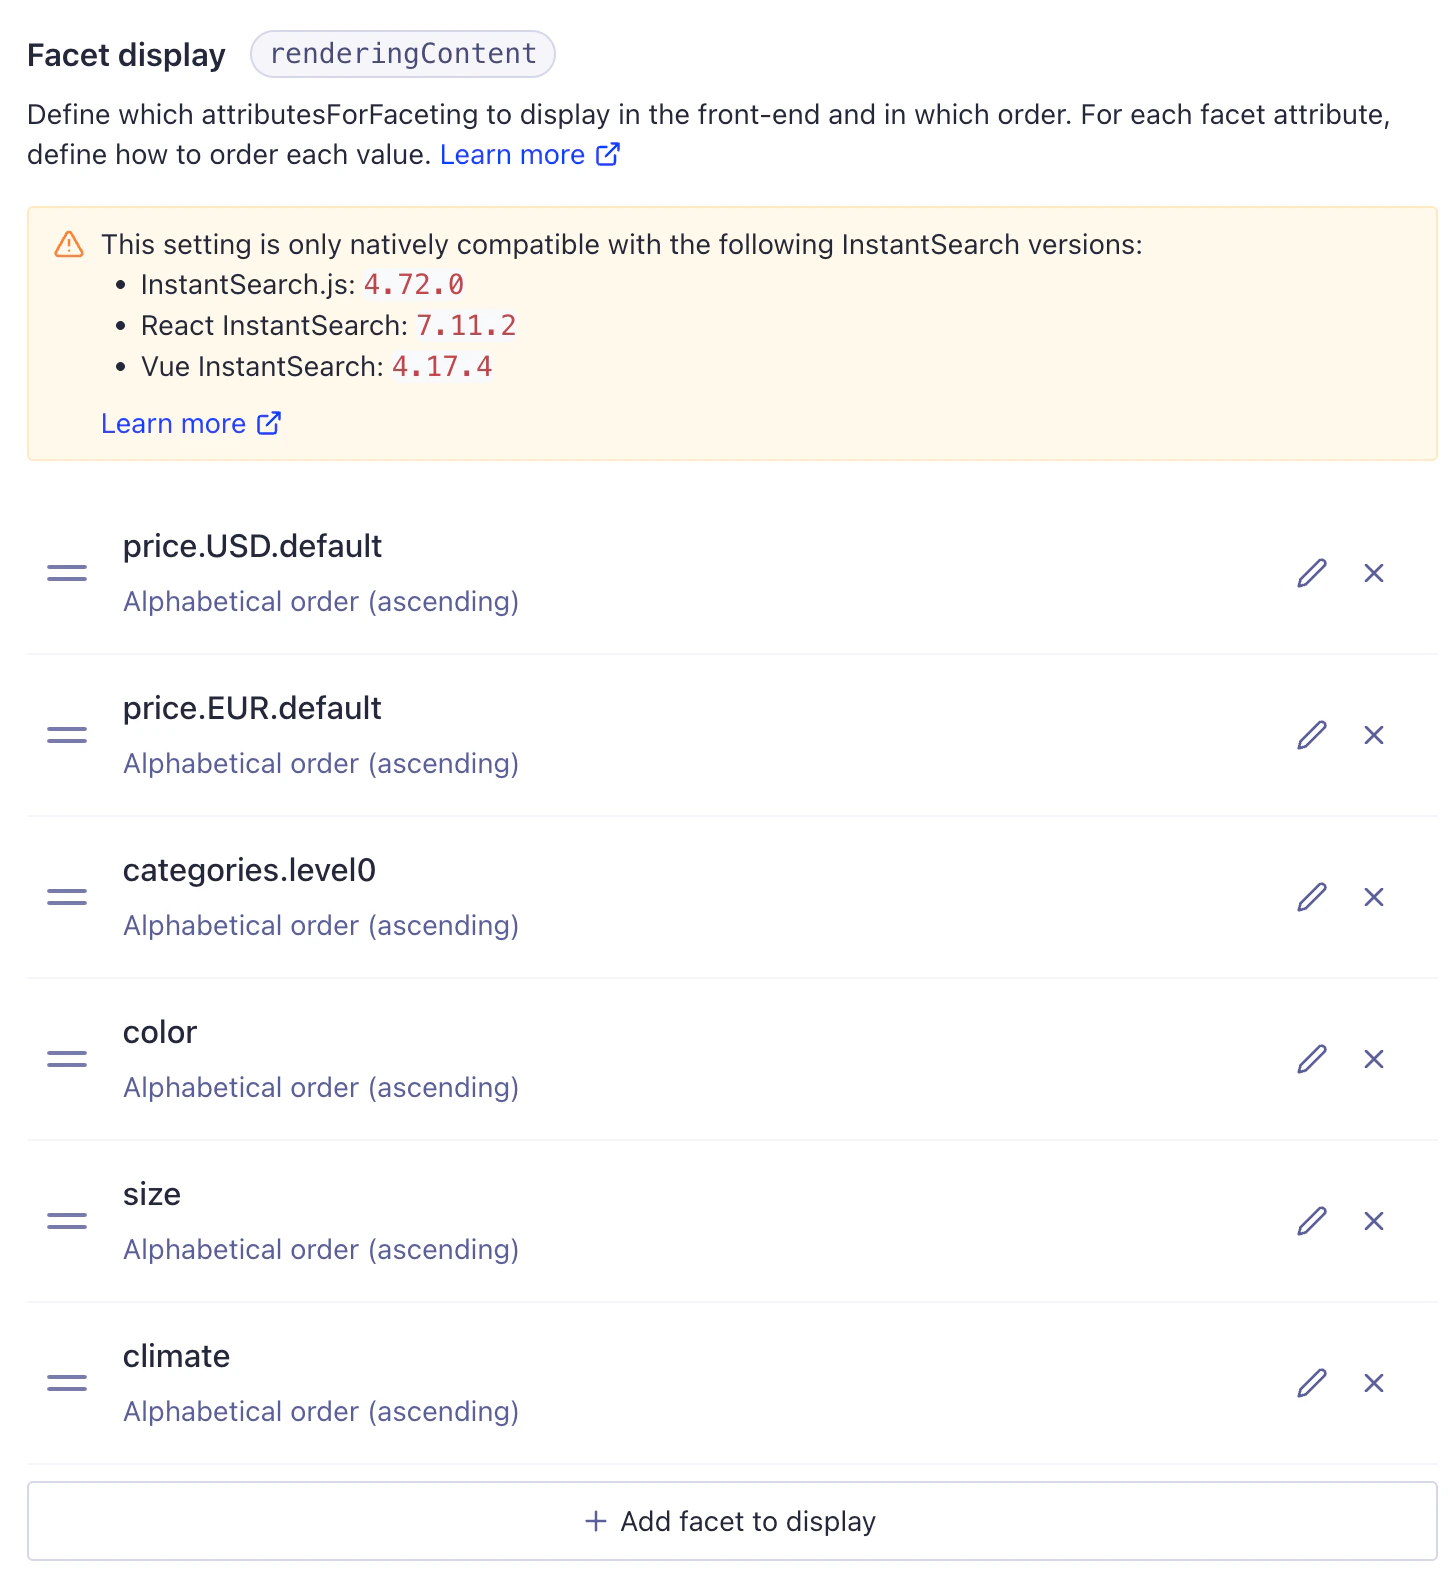
Magento manages the facet display value, so don’t edit it in Algolia.
To change how Magento builds the setting, see Overriding index settings.
Apply dynamic facets with rules
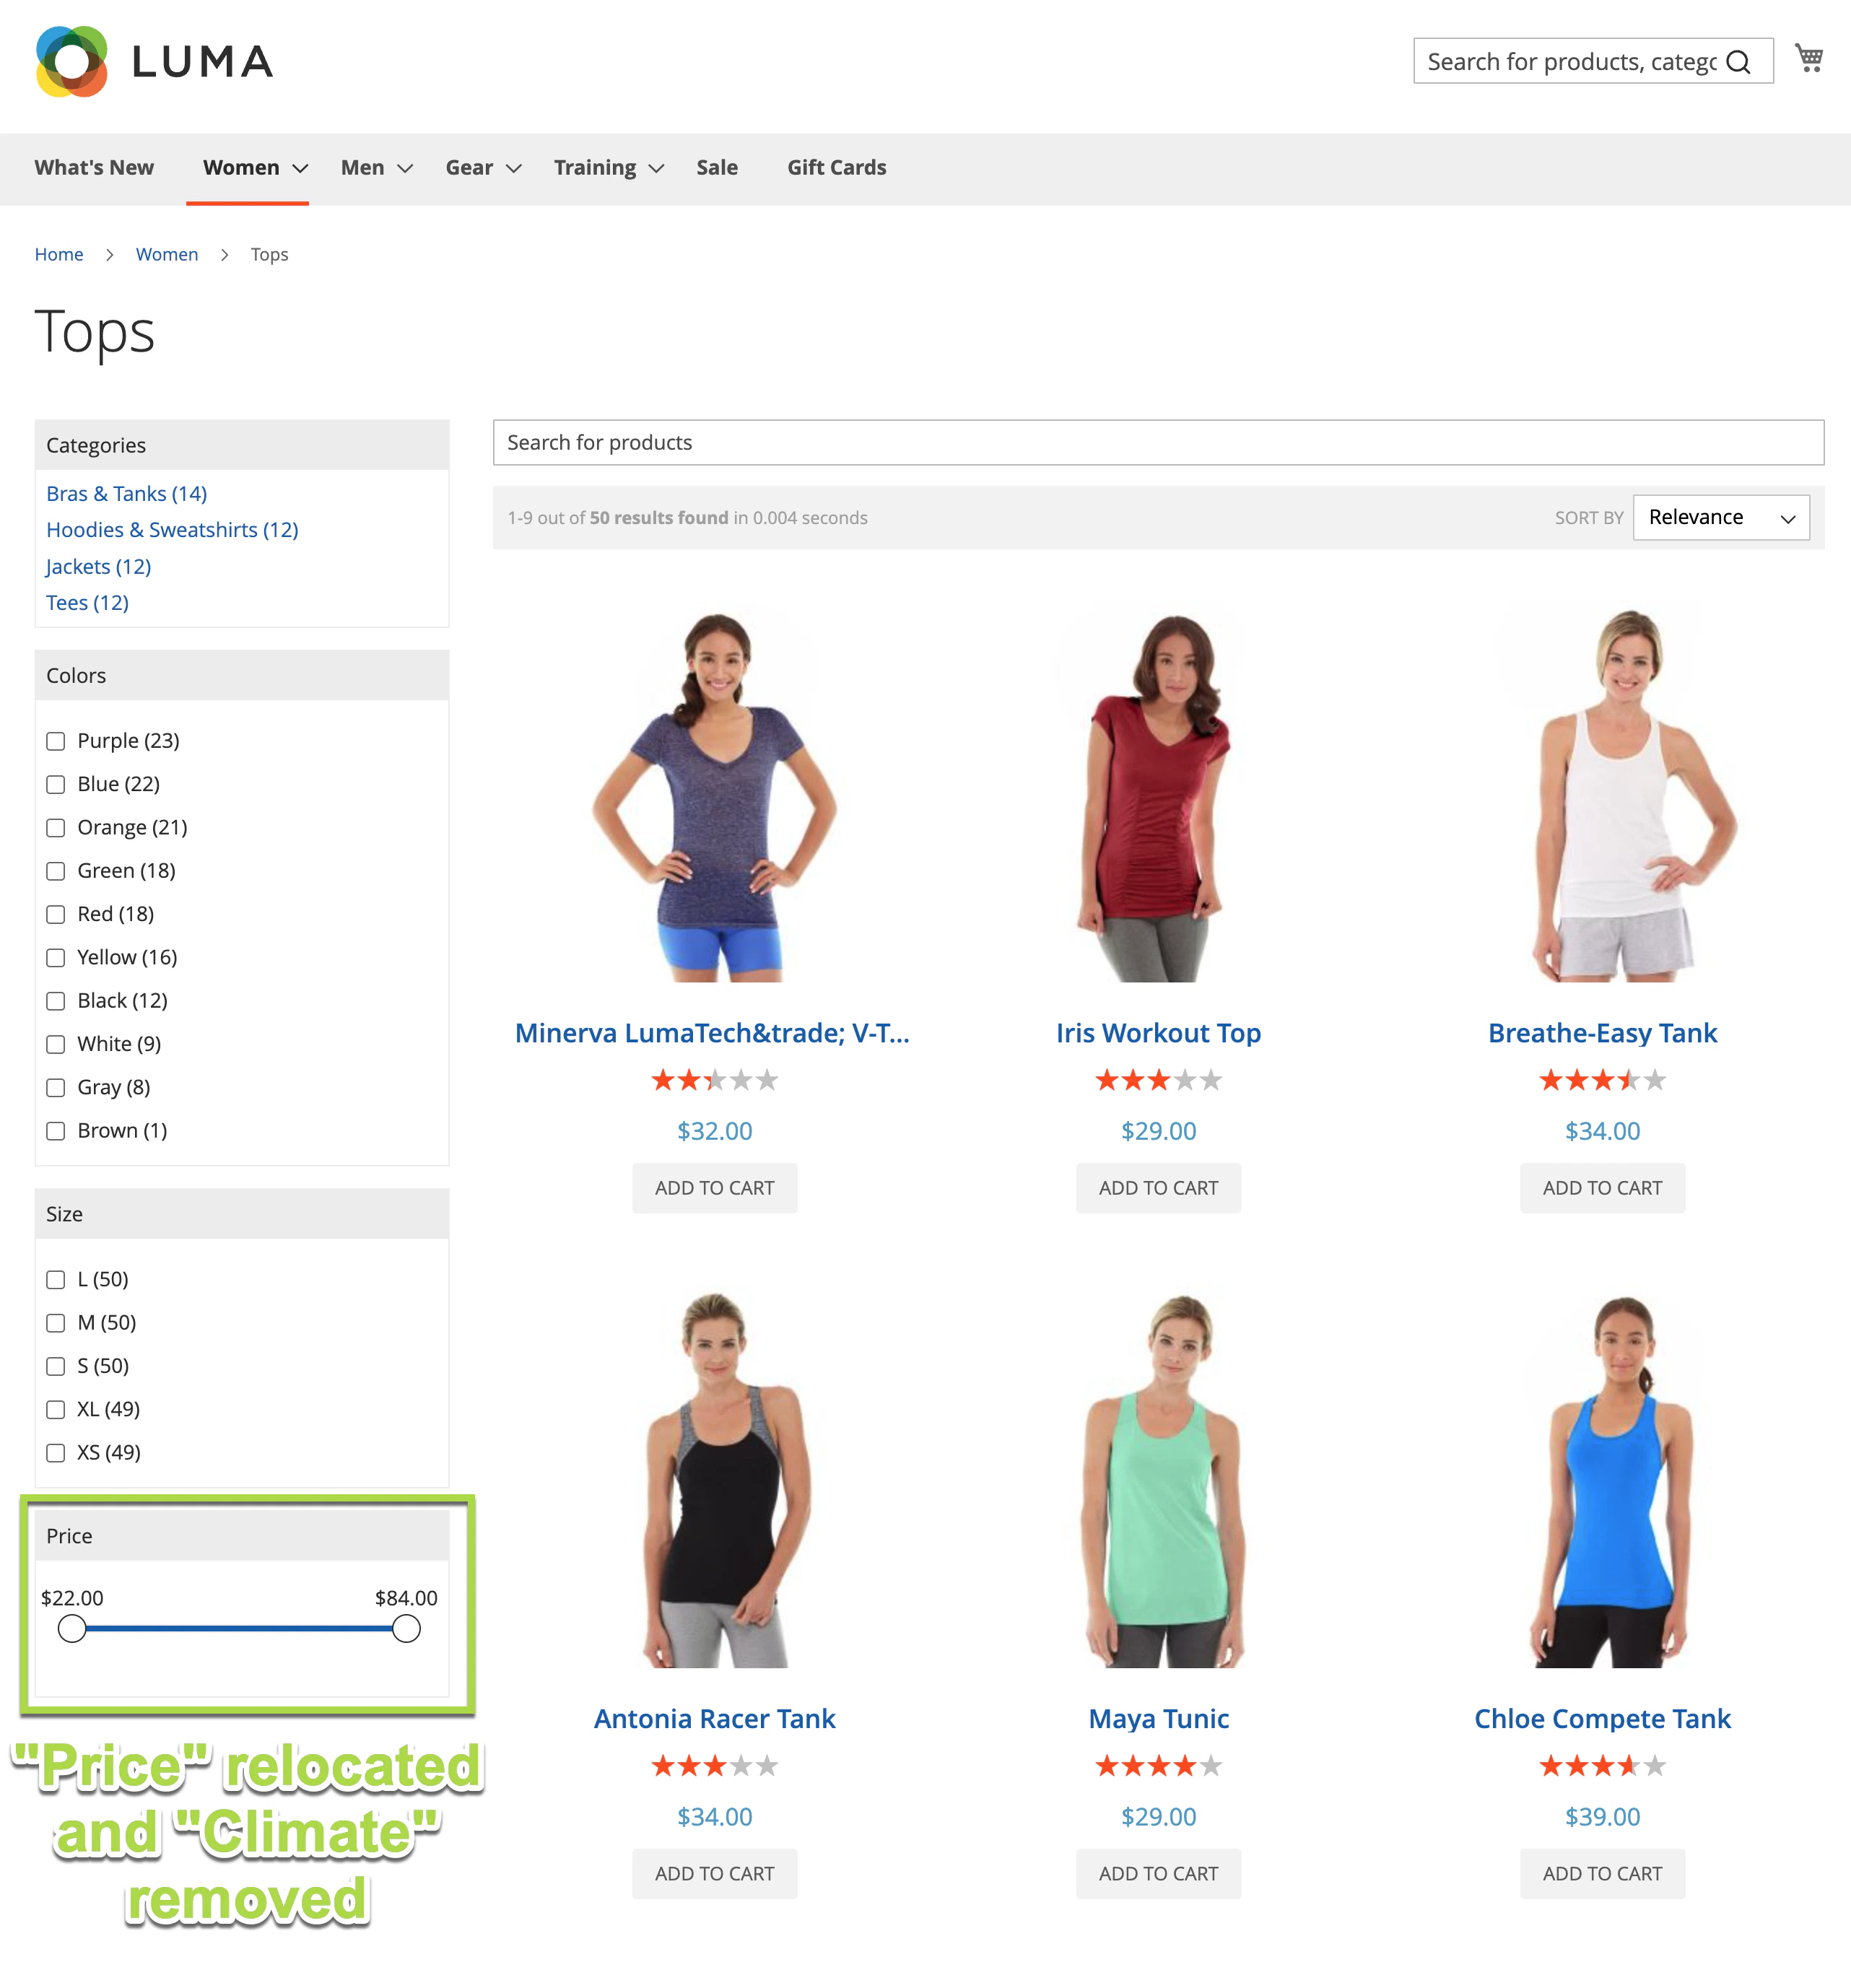
First, check that Magento can update the facet display setting for your store’s product index. Then you can apply dynamic facets. In the following example, a category page shows the five facets applied earlier. For the Women > Tops category, the rule removes “Climate” and moves “Price” to the bottom of the facet list.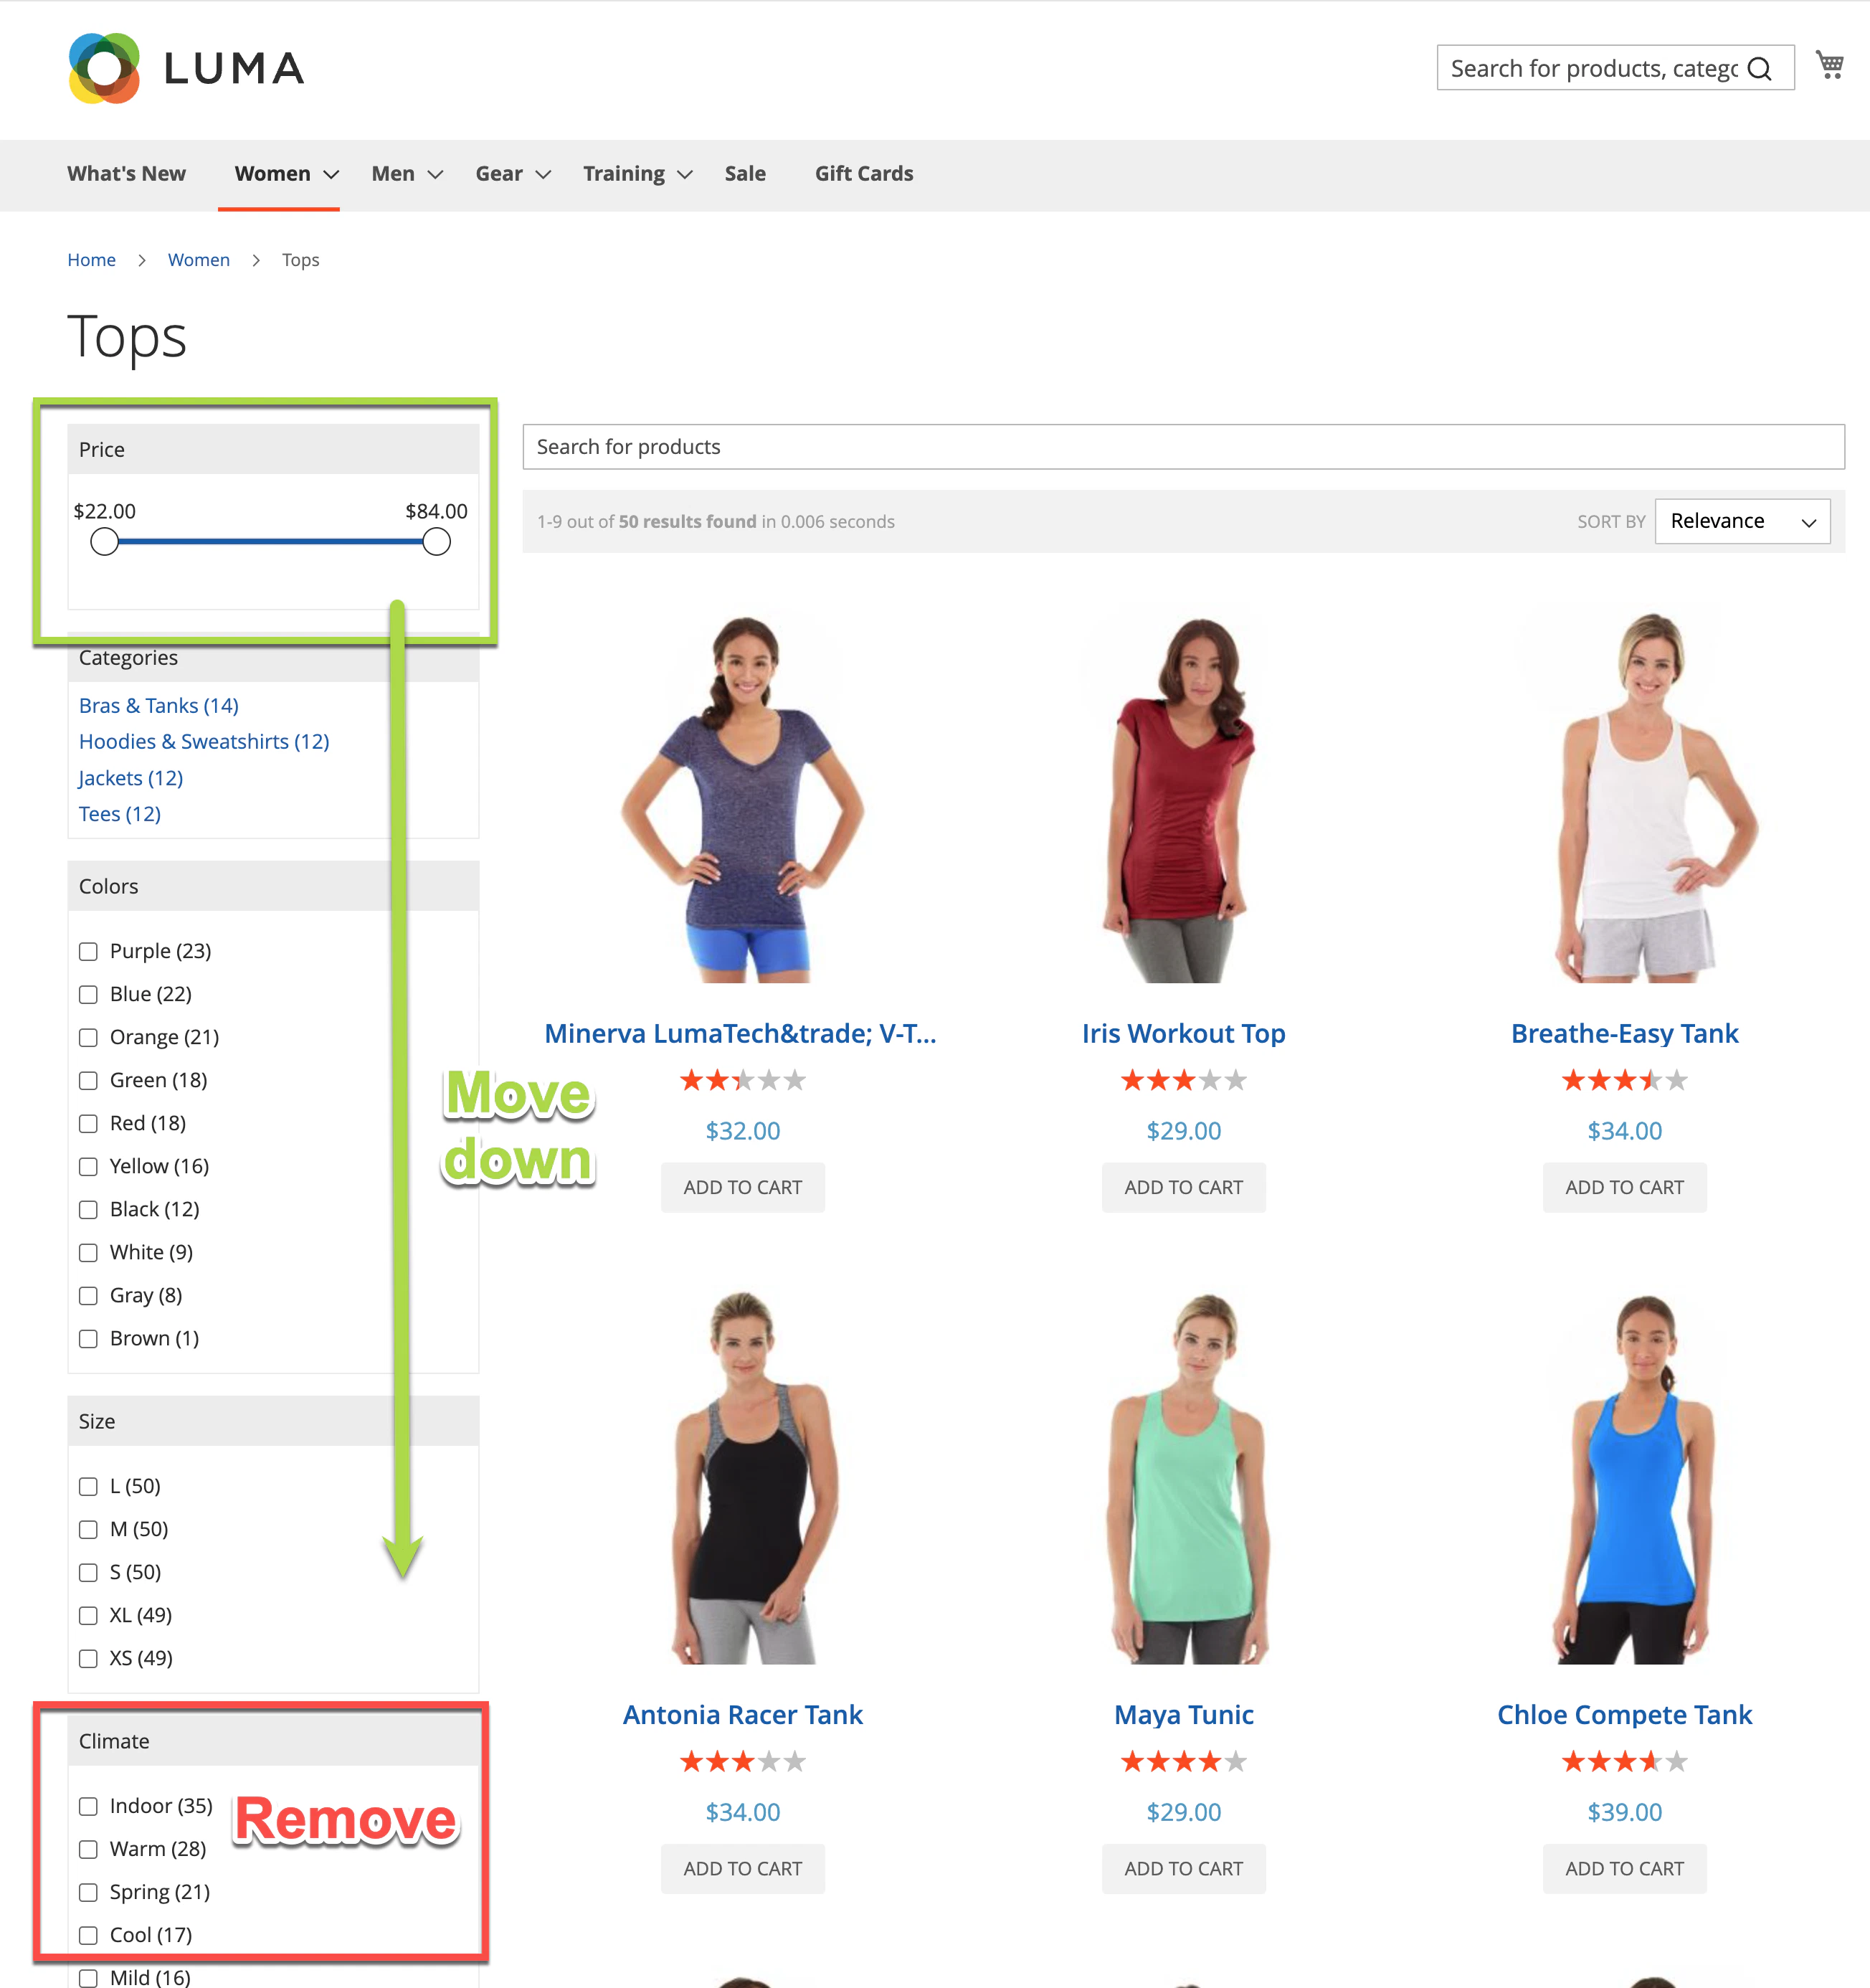

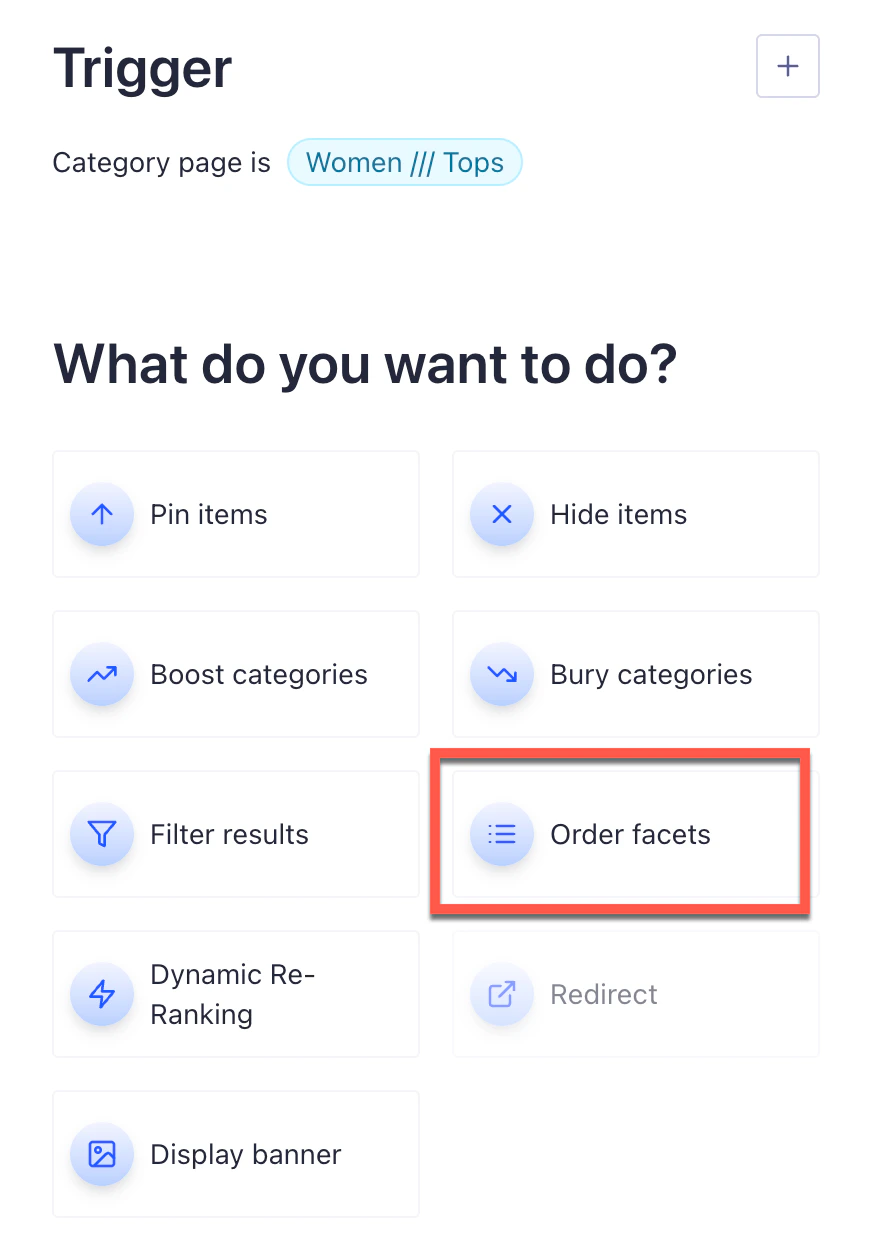
Configure facet display
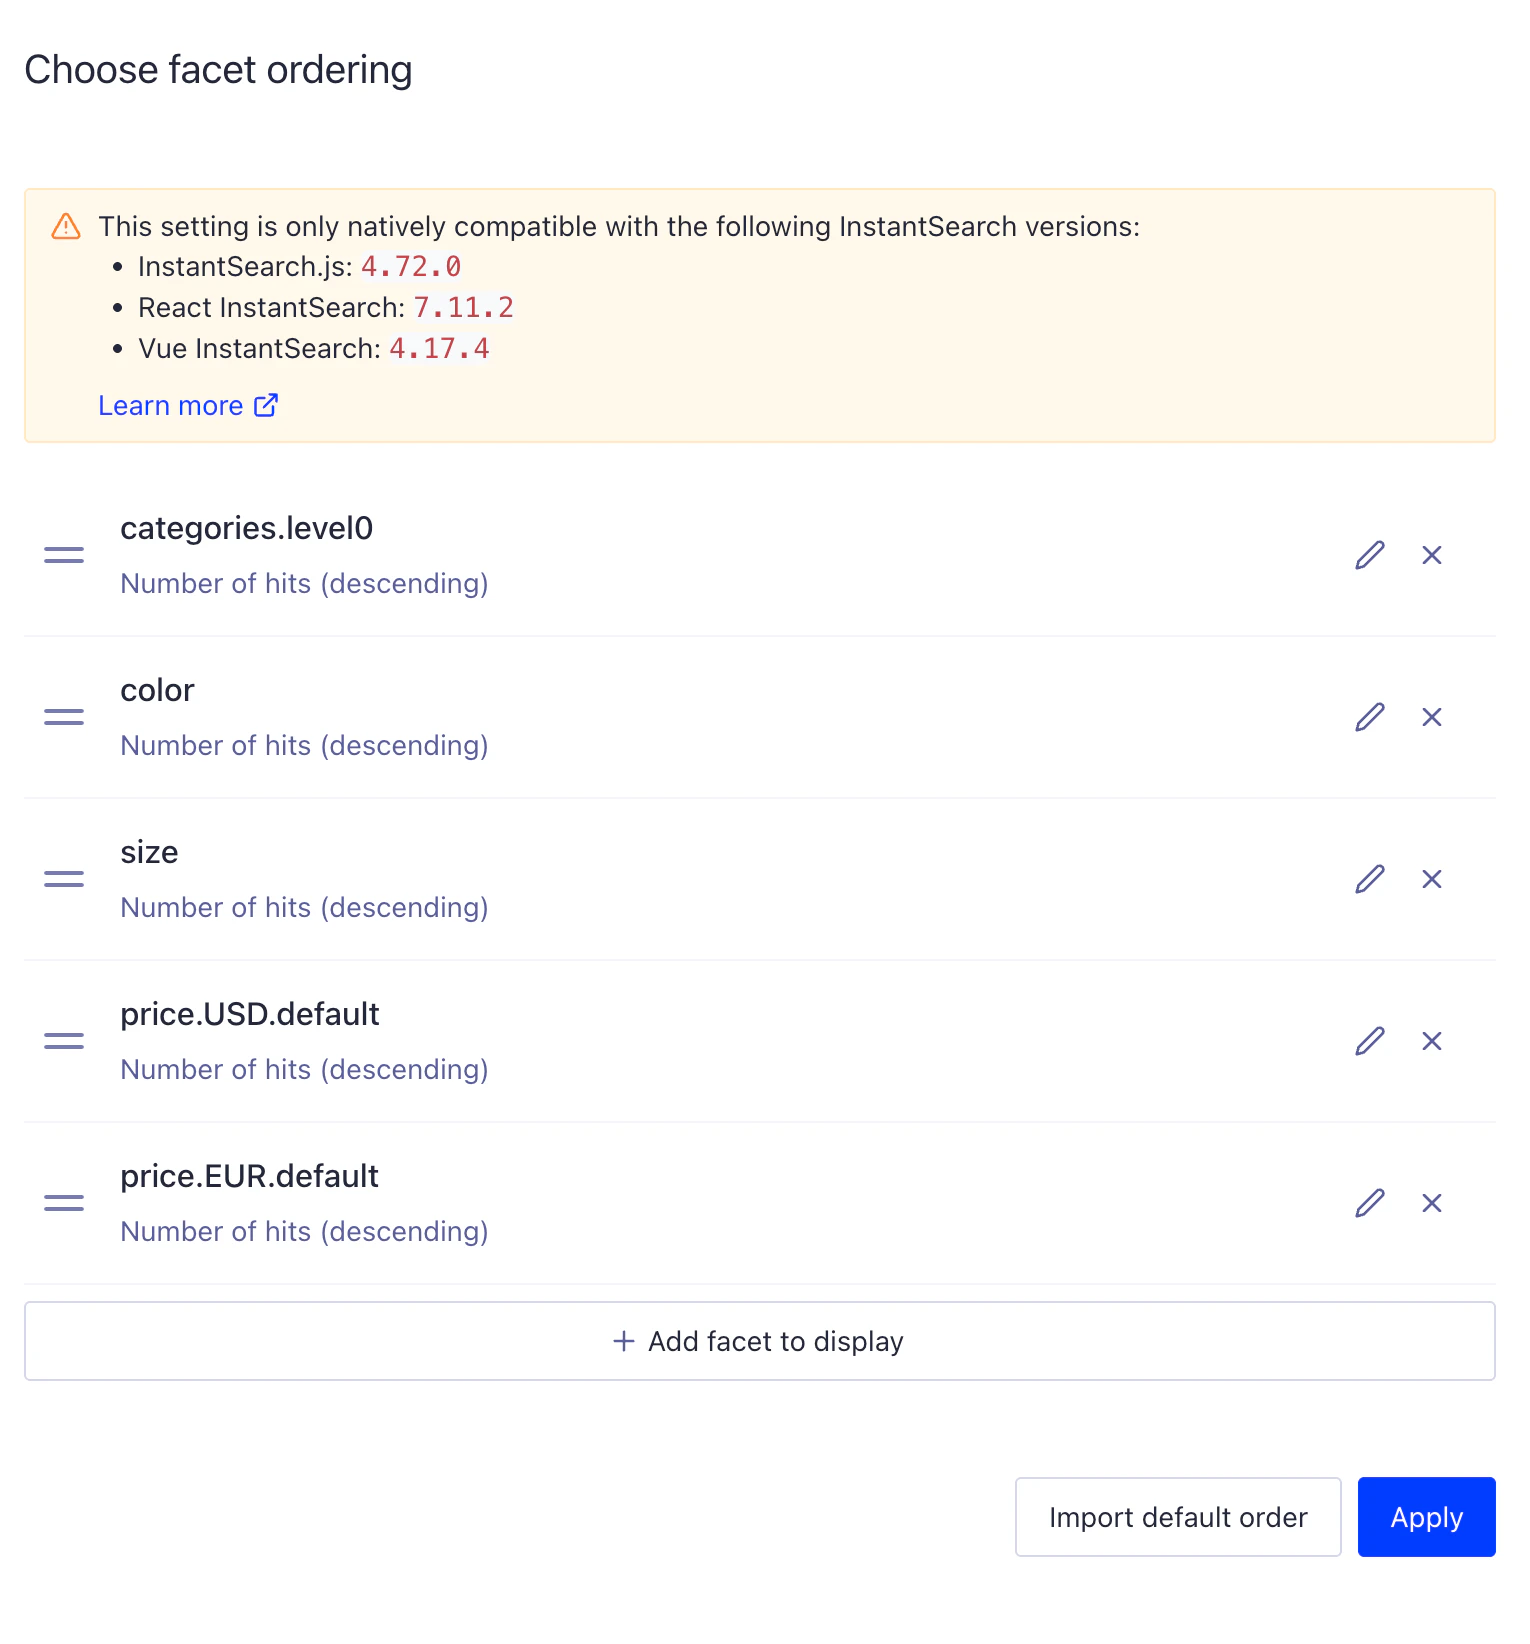
The Facet Display feature only works with scalar values (single, distinct values). It can’t process Magento attributes likecategories and prices directly.
These are objects, not scalar values.
When you add these attributes to your dynamic faceting rule, reference them using nested attributes.
For example:
categoriesmaps tocategories.level0pricemaps toprice.USD.default
Redirects
Starting with version 3.16 of the Magento extension, you can use Algolia Rules to redirect users to a page on your site based on a search query or a filter. Redirect features work with the extension’s Autocomplete and InstantSearch UI libraries. The extension turns on redirect by default for Autocomplete. It turns off redirect by default for InstantSearch.Use redirects with Autocomplete
To use redirects with Autocomplete, enable the feature in the Magento extension. Go to Stores > Configuration > Algolia Search > Autocomplete Menu > Redirects > Enable redirects: Once enabled, the feature works in one of three modes:-
Don’t display the redirect (handle on form submit only).
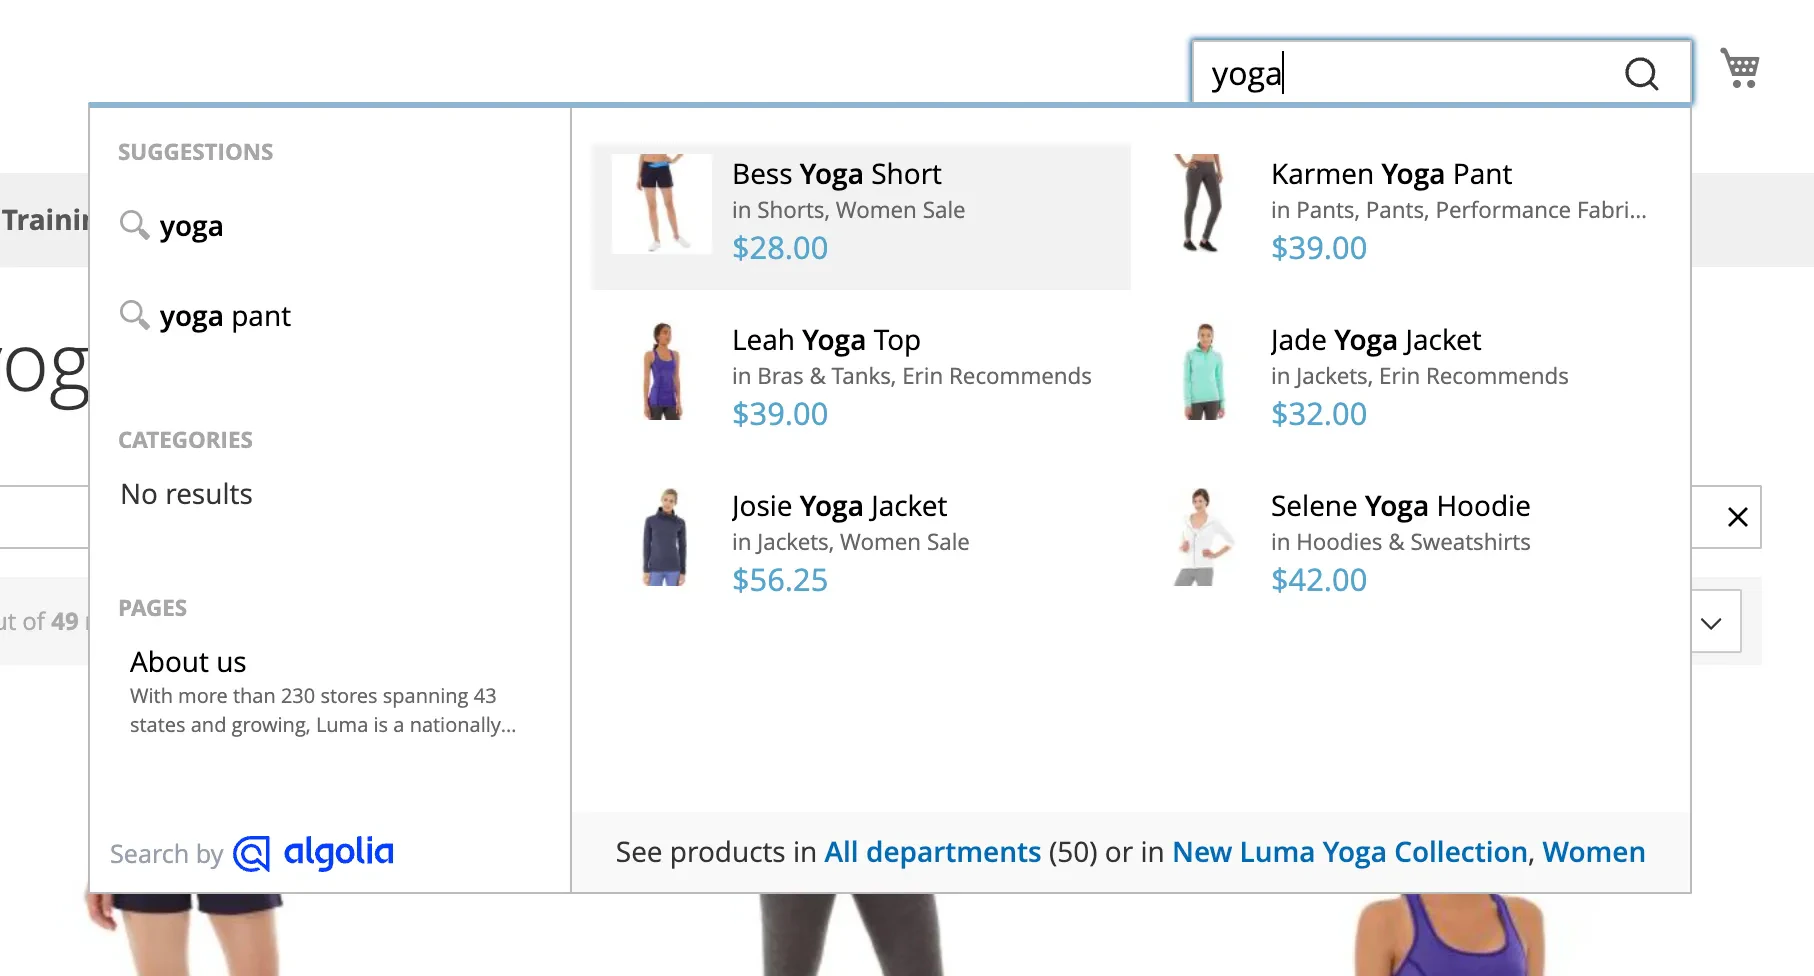
-
Display the redirect as a selectable item in place of search hits.
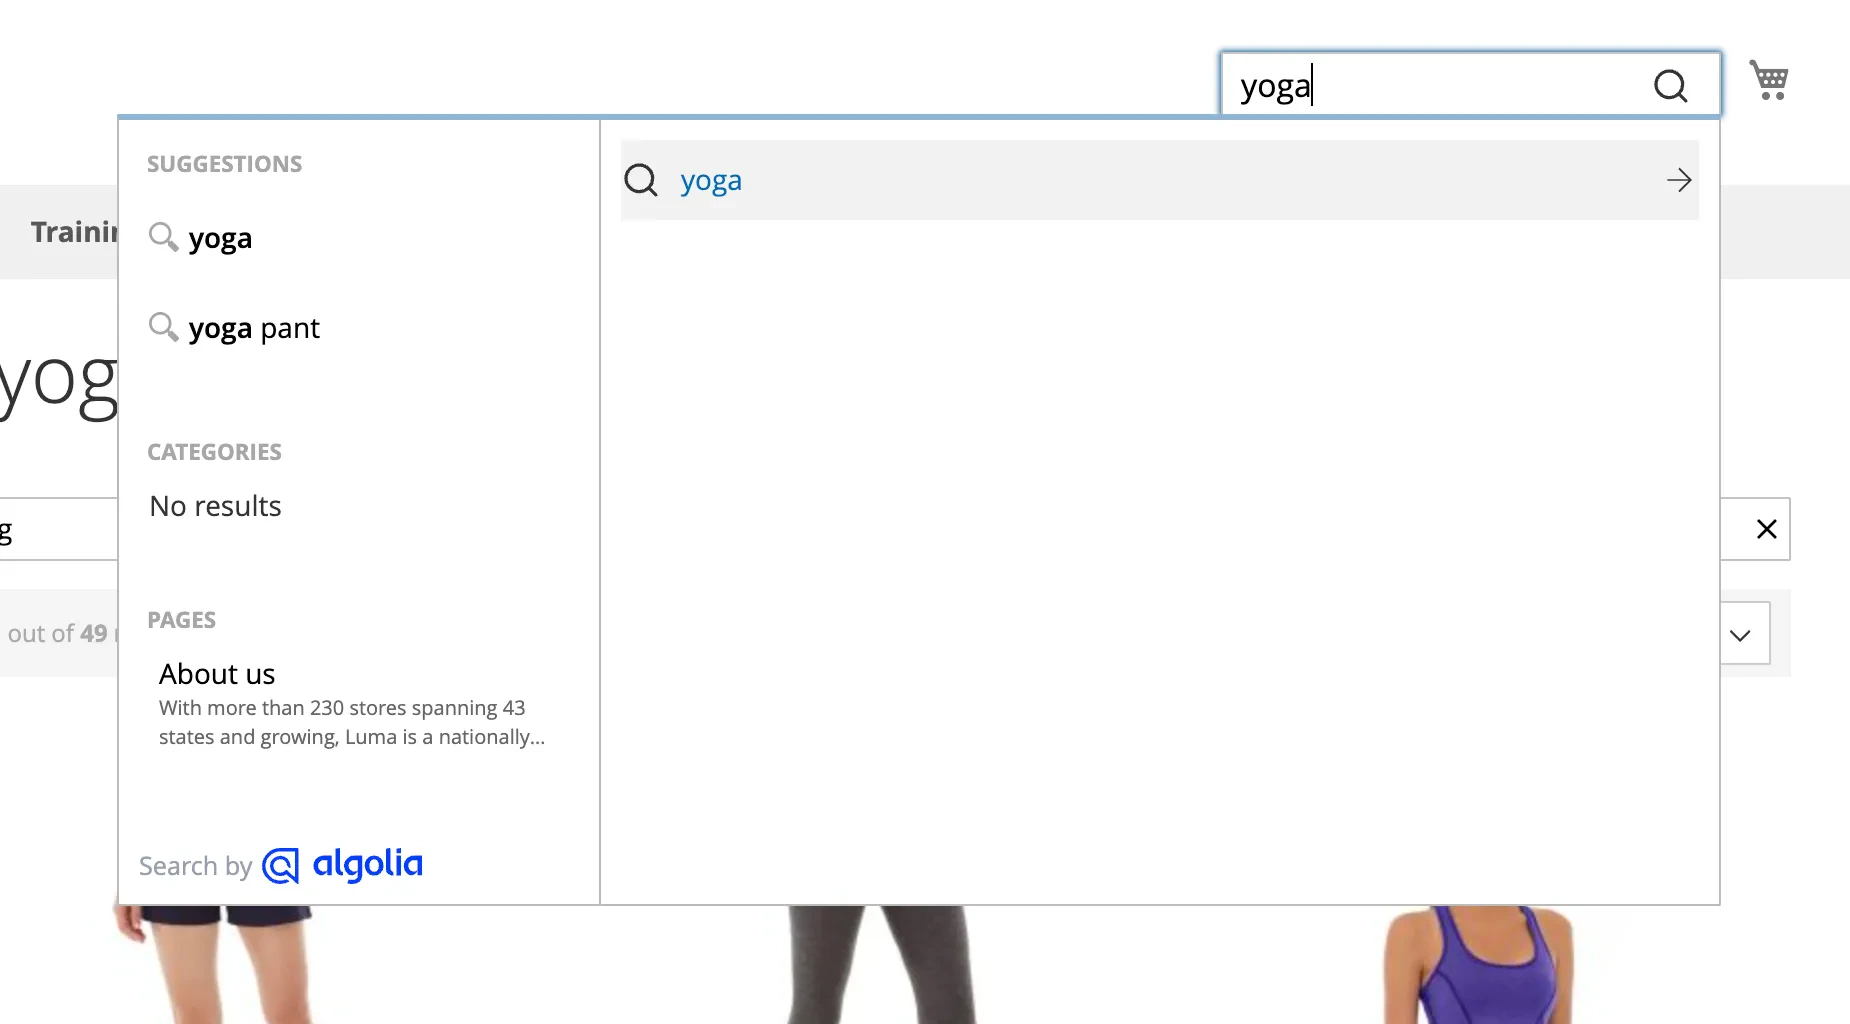
-
Display both search hits and a selectable redirect.
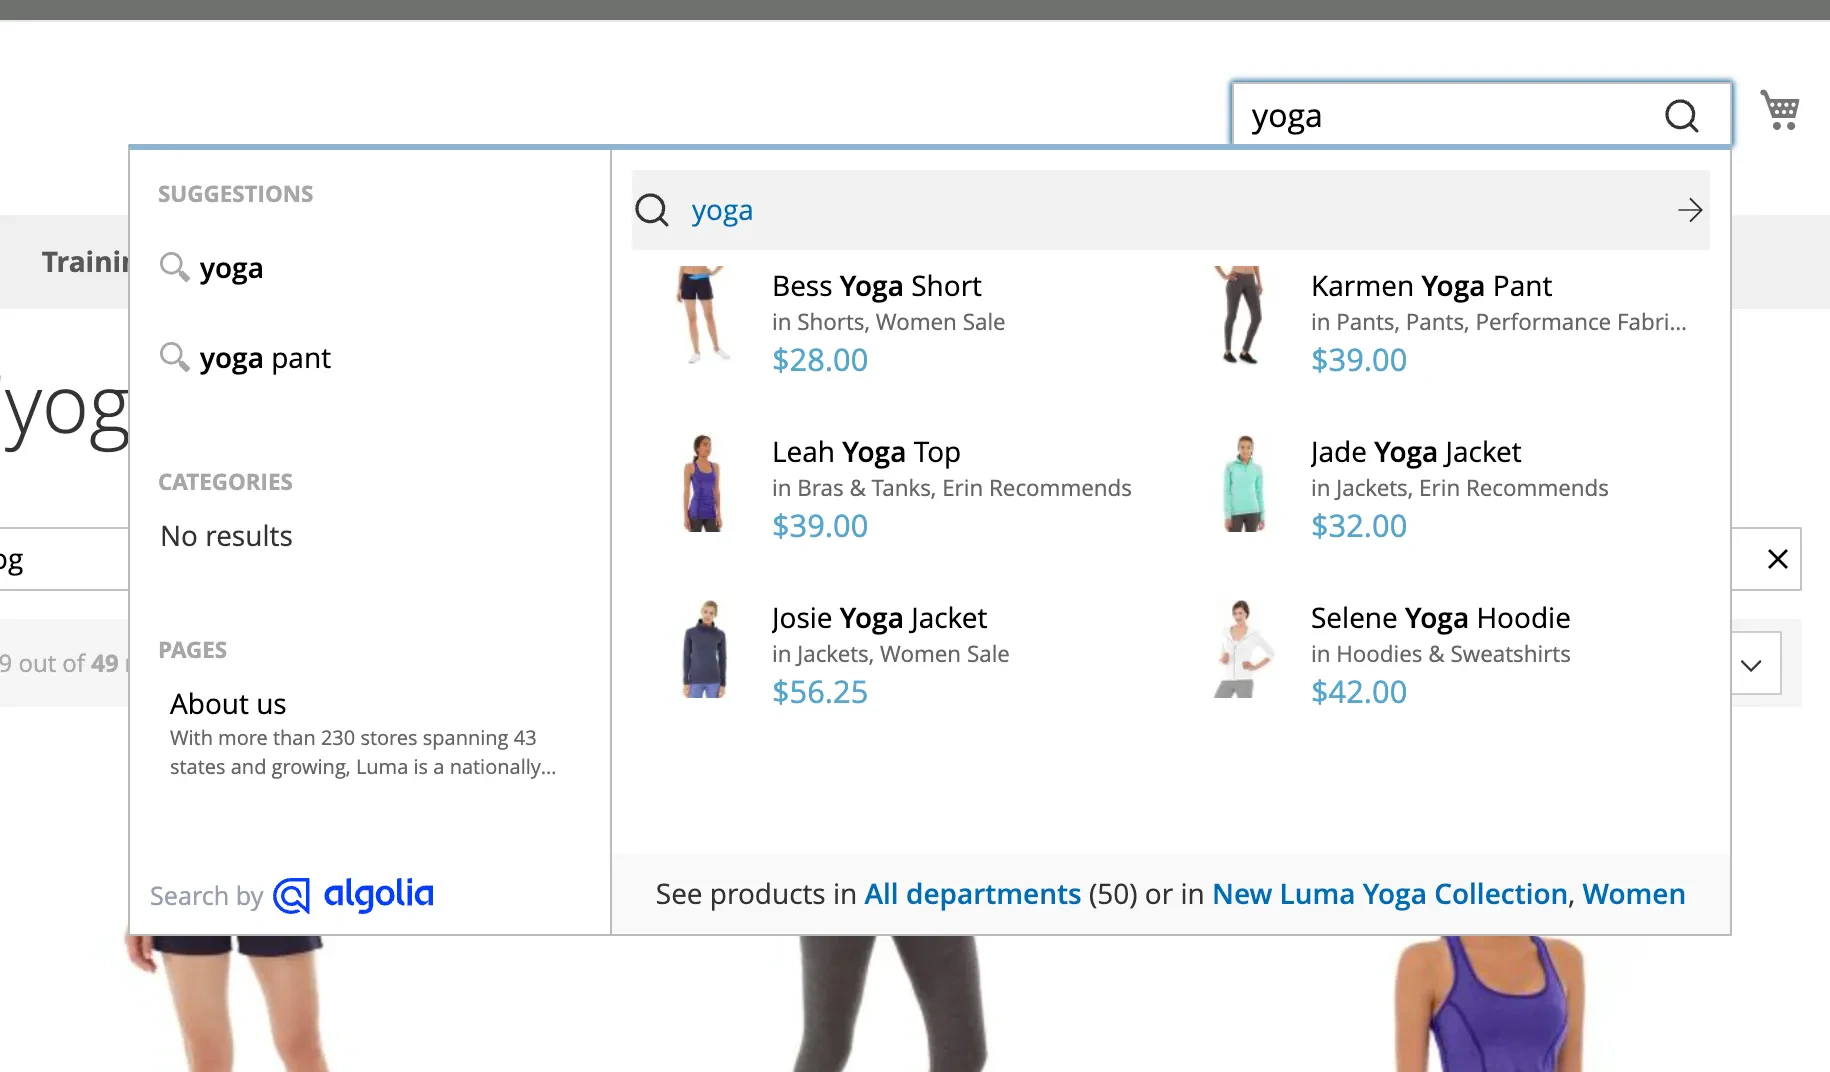
Use redirects with InstantSearch
To use redirects with InstantSearch, enable the feature in the Magento extension. Go to Stores > Configuration > Algolia Search > InstantSearch Results Page > Redirects > Enable redirects: The InstantSearch redirect feature has these options:- Redirect on page load. If InstantSearch loads search results that include a redirect, it sends the user straight there.
-
Trigger redirect on search as you type.
As the user types their query in the
searchBoxwidget, Algolia retrieves matching results as the user types. If a redirect exists for the search query, this setting sends the user to that URL. -
Display redirect as a selectable item.
If a search query has a redirect,
display a clickable link to that URL above the search result hits.
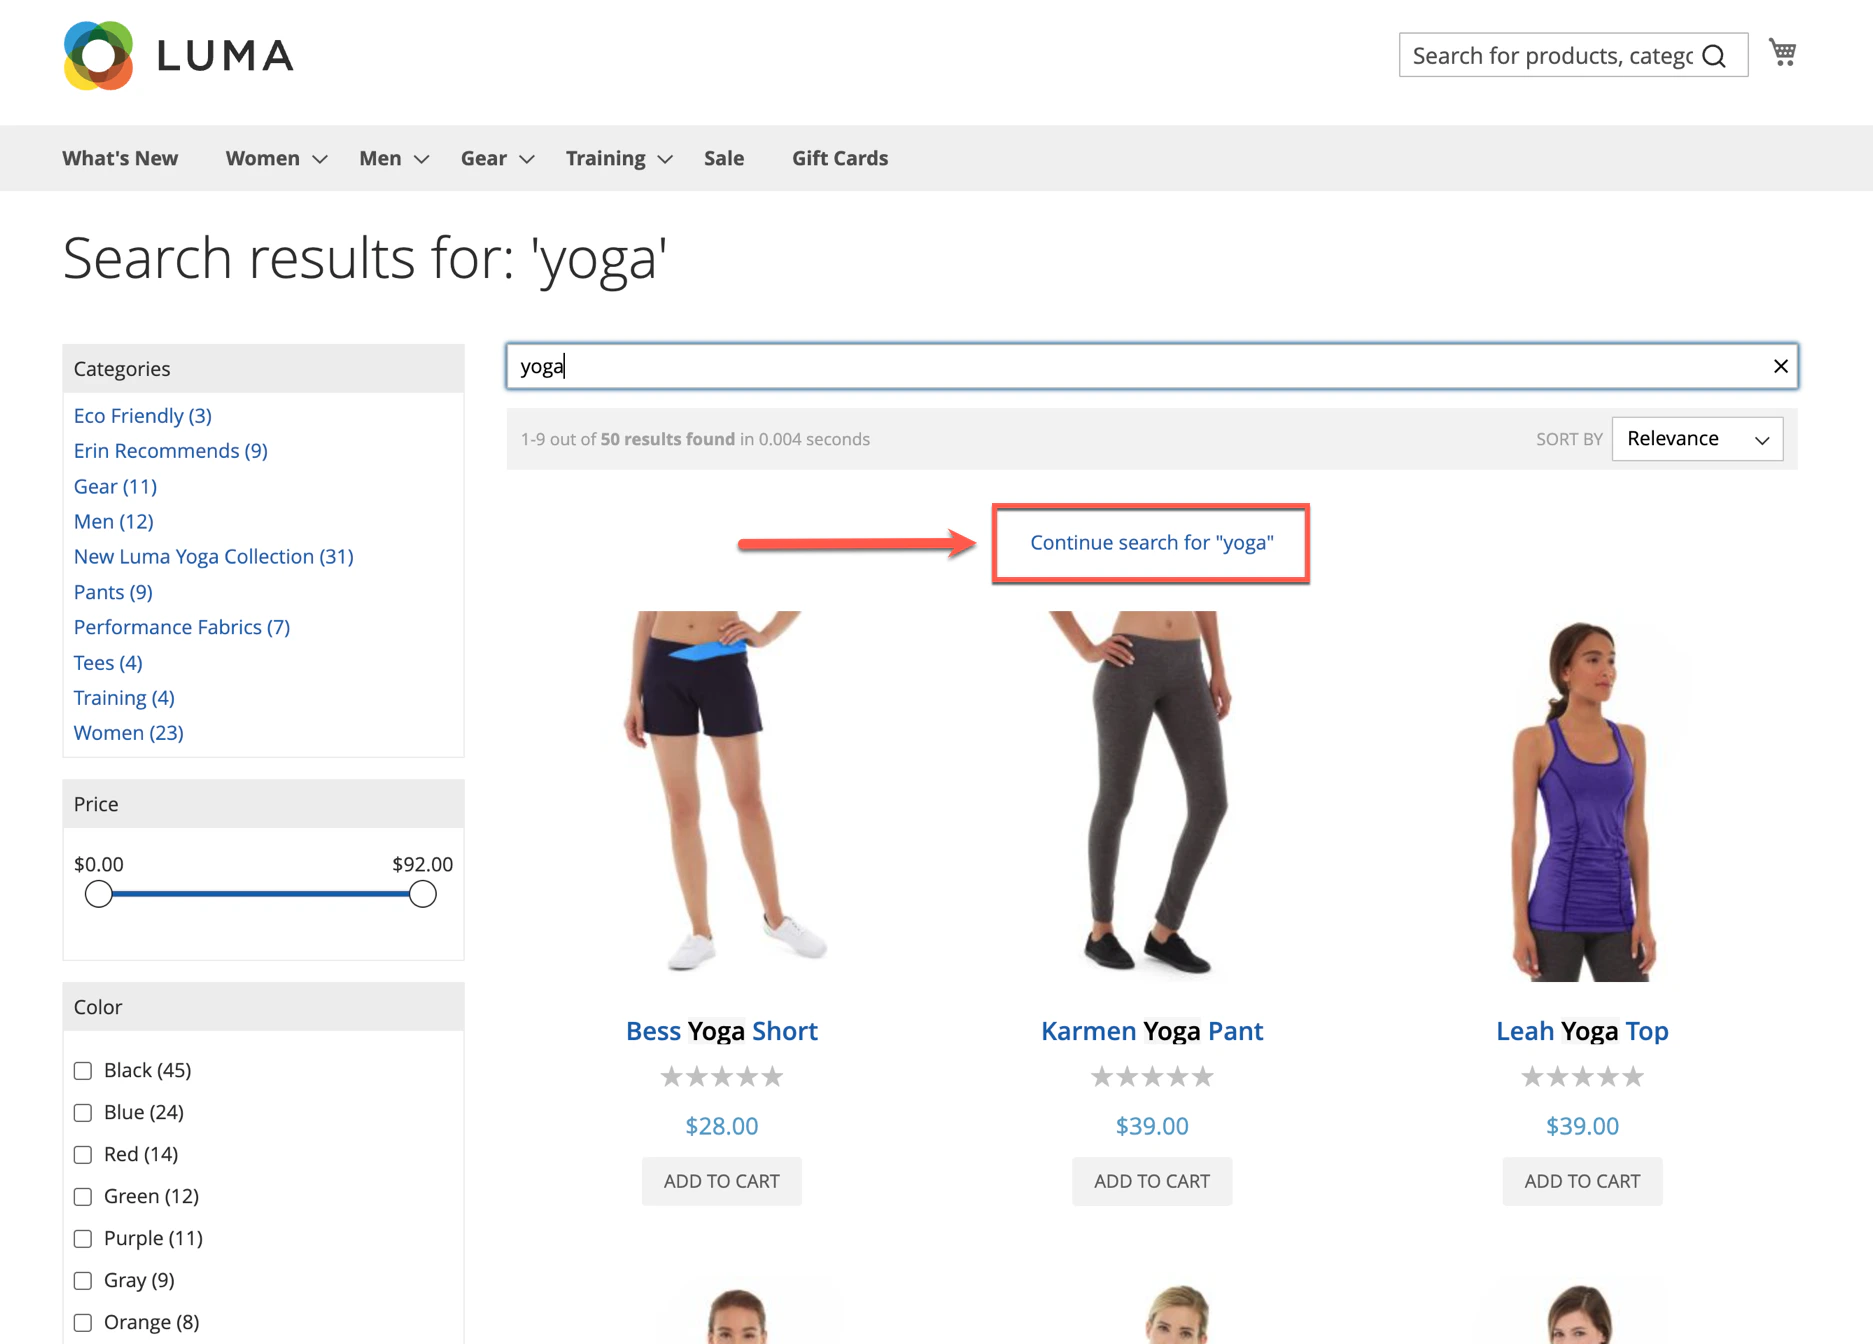
- Open redirect URL in a new window, which only applies to links.