Guides / Building Search UI / Going further

Use React InstantSearch with React Native

This is the React InstantSearch v7 documentation. React InstantSearch v7 is the latest version of React InstantSearch and the stable version of React InstantSearch Hooks.

If you were using React InstantSearch v6, you can upgrade to v7.

If you were using React InstantSearch Hooks, you can still use the React InstantSearch v7 documentation, but you should check the upgrade guide for necessary changes.

If you want to keep using React InstantSearch v6, you can find the archived documentation.

React InstantSearch is compatible with React Native but, since its UI components are designed for the web, they don’t work directly in React Native apps. However, you can use Hooks with the React Native core components or any third-party React Native component library to incorporate InstantSearch features into your React Native app.

This guide covers how to integrate InstantSearch in your React Native application:

  • Adding a search box to send queries
  • Displaying infinite hits and highlighting matches
  • Filtering in a modal to narrow down the results set

Before you begin

This tutorial assumes you have React and React Native knowledge and an existing React Native app with React ≥ 16.8.0 app. If you don’t have a React Native app, create one.

The tutorial also requires an installation of algoliasearch and react-instantsearch-core.

Add InstantSearch to your app

The <InstantSearch> wrapper connects your InstantSearch app to your Algolia application.

1
2
3
4
5
6
7
8
9
10
11
12
13
14
15
16
17
18
19
20
21
22
23
24
25
26
27
28
29
30
31
import React from 'react';
import { SafeAreaView, StatusBar, StyleSheet, Text, View } from 'react-native';
import { liteClient as algoliasearch } from 'algoliasearch/lite';
import { InstantSearch } from 'react-instantsearch-core';

const searchClient = algoliasearch('YourApplicationID', 'YourSearchOnlyAPIKey');

export default function App() {
  return (
    <SafeAreaView style={styles.safe}>
      <StatusBar style="light" />
      <View style={styles.container}>
        <InstantSearch searchClient={searchClient} indexName="INDEX_NAME">
          {/* ... */}
        </InstantSearch>
      </View>
    </SafeAreaView>
  );
}

const styles = StyleSheet.create({
  safe: {
    flex: 1,
    backgroundColor: '#252b33',
  },
  container: {
    flex: 1,
    backgroundColor: '#ffffff',
    flexDirection: 'column',
  },
});

Replace INDEX_NAME with the name of your index.

Add styles using the StyleSheet API from React Native.

The main UI component of a search experience is a search box. It’s often how users discover content in your app.

React InstantSearch provides a useSearchBox() Hook to display an Algolia search box. Use it with the <TextInput> React Native component. Then, add the custom <SearchBox> component to your app.

1
2
3
4
5
6
7
8
9
10
11
12
13
14
15
16
17
18
19
20
21
22
23
24
25
26
27
28
29
30
31
32
33
34
35
36
37
38
39
40
41
42
43
44
45
46
47
48
49
50
51
52
53
54
import React, { useRef, useState } from 'react';
import { StyleSheet, View, TextInput } from 'react-native';
import { useSearchBox } from 'react-instantsearch-core';

export function SearchBox(props) {
  const { query, refine } = useSearchBox(props);
  const [inputValue, setInputValue] = useState(query);
  const inputRef = useRef(null);

  function setQuery(newQuery) {
    setInputValue(newQuery);
    refine(newQuery);
  }

  // Track when the InstantSearch query changes to synchronize it with
  // the React state.
  // Bypass the state update if the input is focused to avoid concurrent
  // updates when typing.
  if (query !== inputValue && !inputRef.current?.isFocused()) {
    setInputValue(query);
  }

  return (
    <View style={styles.container}>
      <TextInput
        ref={inputRef}
        style={styles.input}
        value={inputValue}
        onChangeText={setQuery}
        clearButtonMode="while-editing"
        autoCapitalize="none"
        autoCorrect={false}
        spellCheck={false}
        autoComplete="off"
      />
    </View>
  );
}

const styles = StyleSheet.create({
  container: {
    backgroundColor: '#252b33',
    padding: 18,
  },
  input: {
    height: 48,
    padding: 12,
    fontSize: 16,
    backgroundColor: '#fff',
    borderRadius: 4,
    borderWidth: 1,
    borderColor: '#ddd',
  },
});

Replace INDEX_NAME with the name of your index.

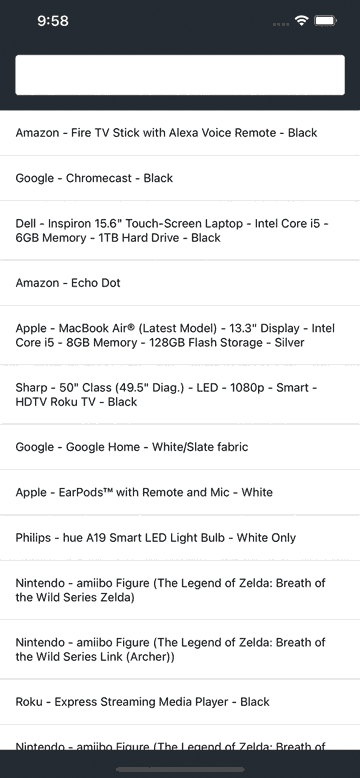
Display infinite hits

When Algolia returns results, you want to list them in the UI. A common way of dealing with lists on mobile devices is to display an “infinite list”: a list that loads more results when users scroll to the bottom of the screen.

To do this, use the useInfiniteHits() Hook with the <FlatList> React Native component. Then, add the custom <InfiniteHits> component in your app and pass it a custom <Hit> component to display each Algolia result.

1
2
3
4
5
6
7
8
9
10
11
12
13
14
15
16
17
18
19
20
21
22
23
24
25
26
27
28
29
30
31
32
33
34
35
36
37
38
import React from 'react';
import { StyleSheet, View, FlatList } from 'react-native';
import { useInfiniteHits } from 'react-instantsearch-core';

export function InfiniteHits({ hitComponent: Hit, ...props }) {
  const { items, isLastPage, showMore } = useInfiniteHits({
    ...props,
    escapeHTML: false,
  });

  return (
    <FlatList
      data={items}
      keyExtractor={(item) => item.objectID}
      ItemSeparatorComponent={() => <View style={styles.separator} />}
      onEndReached={() => {
        if (!isLastPage) {
          showMore();
        }
      }}
      renderItem={({ item }) => (
        <View style={styles.item}>
          <Hit hit={item} />
        </View>
      )}
    />
  );
};

const styles = StyleSheet.create({
  separator: {
    borderBottomWidth: 1,
    borderColor: '#ddd',
  },
  item: {
    padding: 18,
  },
});

Replace INDEX_NAME with the name of your index.

Load more results as users scroll

Load more results as users scroll

The search box remains visible, so users can update their query without manually scrolling back up. When users do this, reset the scroll position of the list so they can see the top results first.

To do this:

  1. Assign a reference (ref) to the list for later use in your app.
  2. Wrap the <InfiniteHits> component in forwardRef. This lets you pass ref from the app to the list.
  3. Listen for the query to change by waiting for an onChange callback on the custom <SearchBox>.
  4. When the query changes, call FlatList.scrollToOffset() to scroll the list to the correct position.
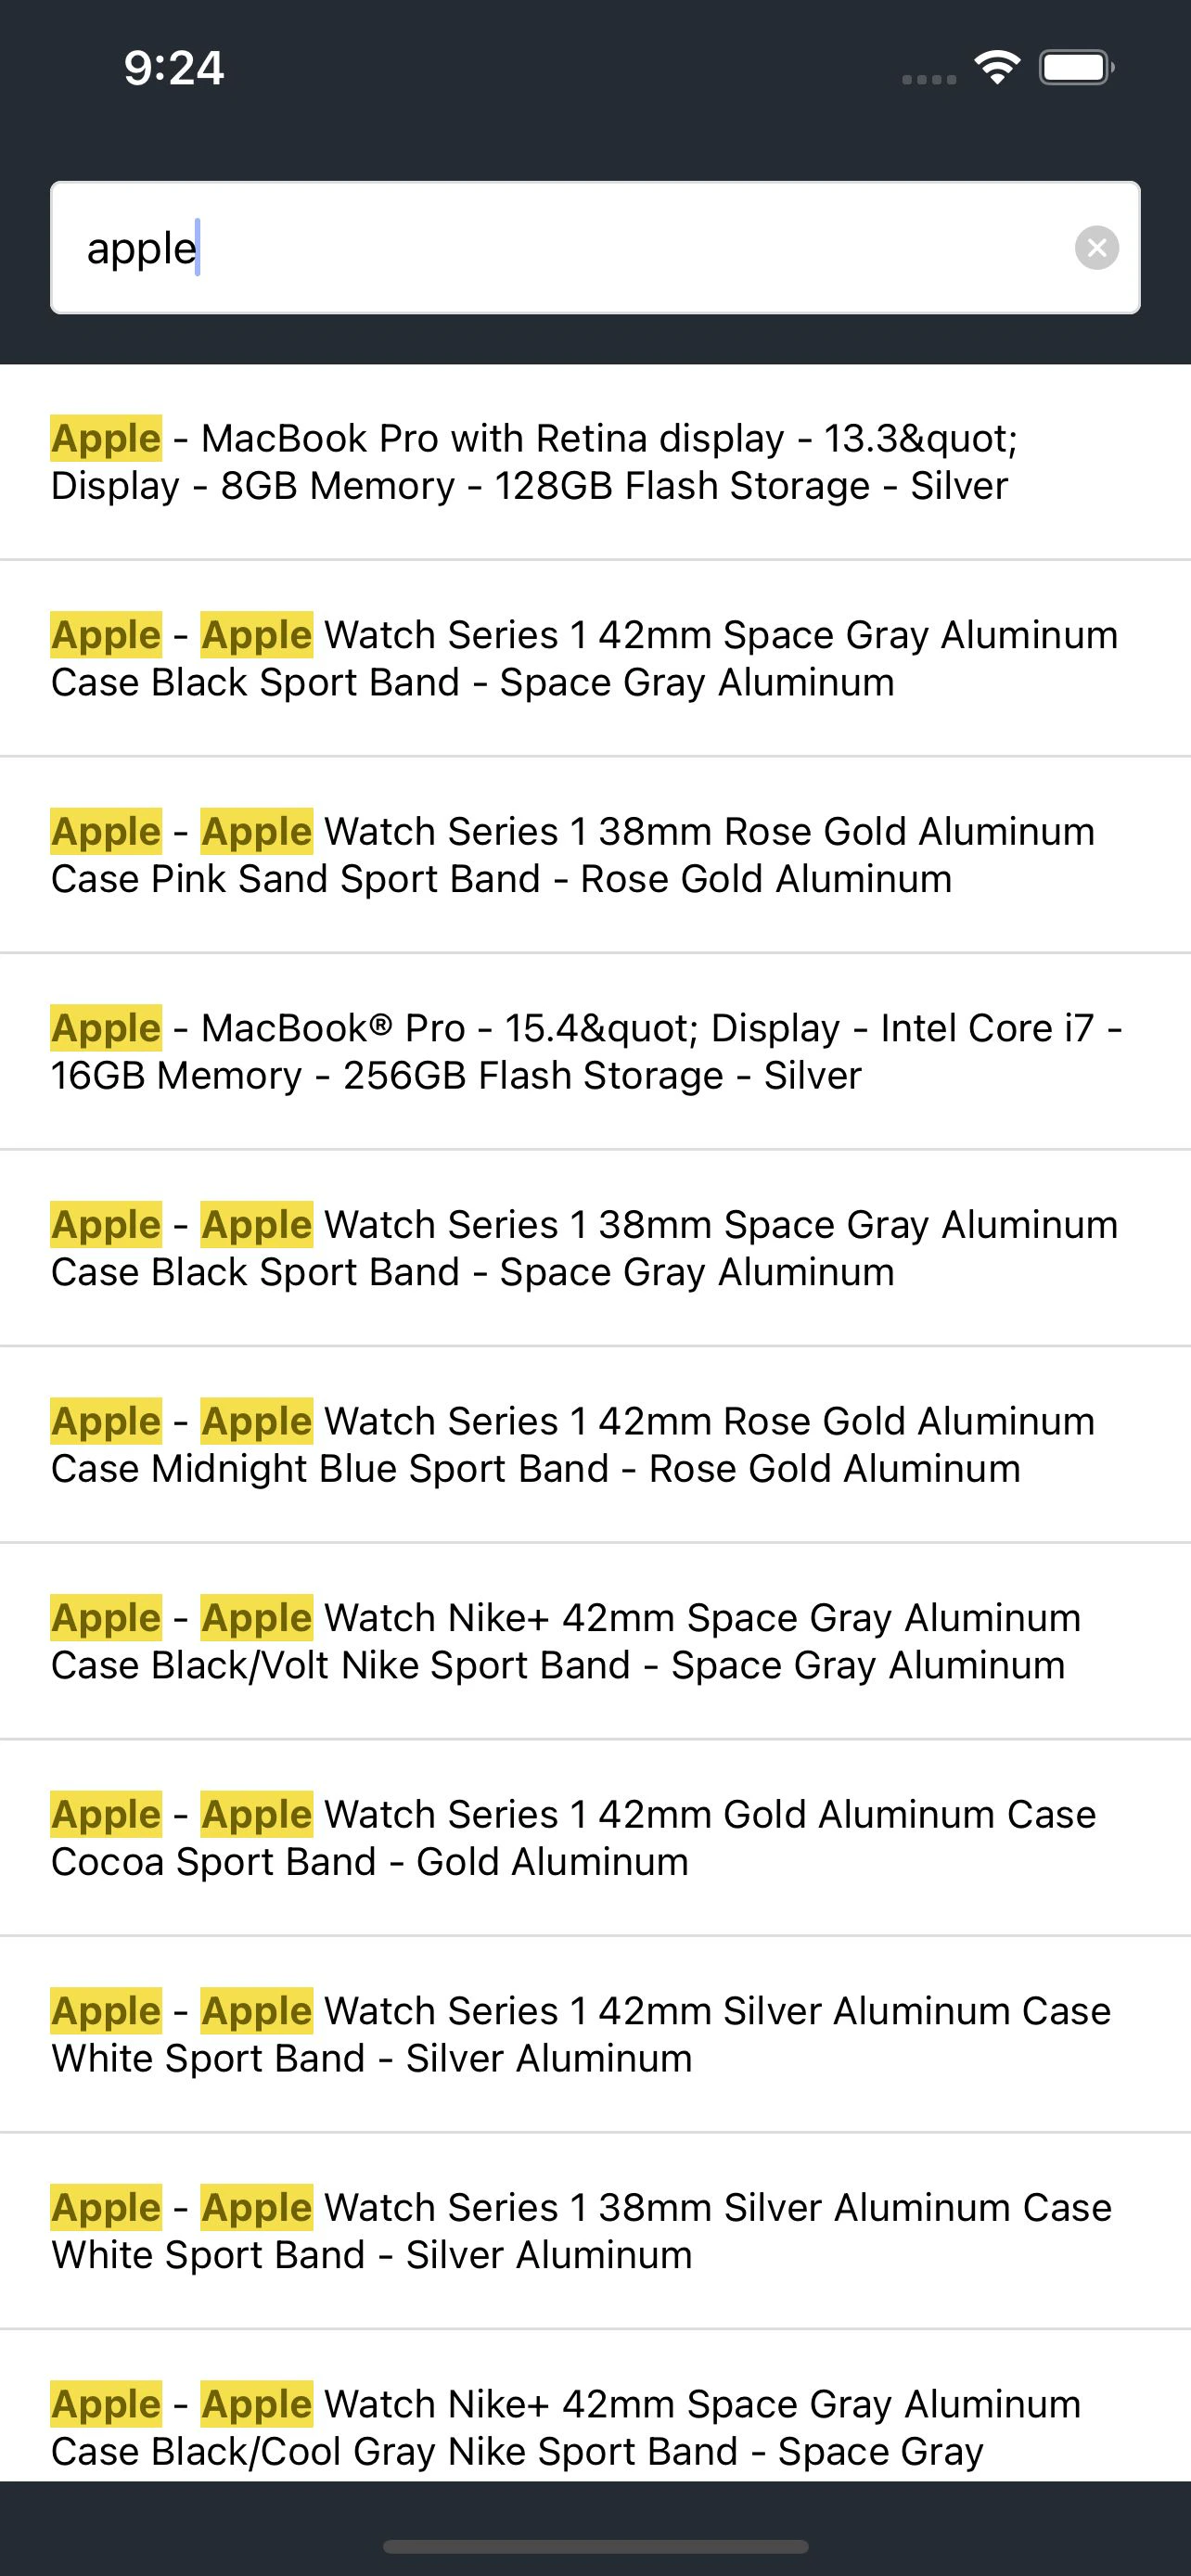
1
2
3
4
5
6
7
8
9
10
11
12
13
14
15
16
17
import React, { forwardRef } from 'react';
// ...

export const InfiniteHits = forwardRef(
  ({ hitComponent: Hit, ...props }, ref) => {
    // ...

    return (
      <FlatList
        ref={ref}
        // ...
      />
    );
  }
);

// ...

Highlight matches

Algolia supports highlighting and returns the highlighted parts of a result in the response. Build a custom <Highlight> component to highlight matches in each attribute.

The instantsearch.js library provides the necessary utilities to parse the highlighted parts from the Algolia response. React InstantSearch uses InstantSearch.js behind the scenes, so you don’t need to include it as a separate dependency.

Use the <Text> component from React Native to represent each highlighted and non-highlighted part. Then, use the custom <Highlight> component in your custom <Hit> component.

1
2
3
4
5
6
7
8
9
10
11
12
13
14
15
16
17
18
19
20
21
22
23
24
25
26
27
28
29
30
31
32
33
34
35
36
37
38
39
40
41
42
43
44
45
46
47
48
49
50
51
52
53
54
55
56
57
58
59
60
61
62
63
64
import React, { Fragment } from 'react';
import { StyleSheet, Text } from 'react-native';
import {
  getHighlightedParts,
  getPropertyByPath,
} from 'instantsearch.js/es/lib/utils';

function HighlightPart({ children, isHighlighted }) {
  return (
    <Text style={isHighlighted ? styles.highlighted : styles.nonHighlighted}>
      {children}
    </Text>
  );
}

export function Highlight({ hit, attribute, separator = ', ' }) {
  const { value: attributeValue = '' } =
    getPropertyByPath(hit._highlightResult, attribute) || {};
  const parts = getHighlightedParts(attributeValue);

  return (
    <>
      {parts.map((part, partIndex) => {
        if (Array.isArray(part)) {
          const isLastPart = partIndex === parts.length - 1;

          return (
            <Fragment key={partIndex}>
              {part.map((subPart, subPartIndex) => (
                <HighlightPart
                  key={subPartIndex}
                  isHighlighted={subPart.isHighlighted}
                >
                  {subPart.value}
                </HighlightPart>
              ))}

              {!isLastPart && separator}
            </Fragment>
          );
        }

        return (
          <HighlightPart key={partIndex} isHighlighted={part.isHighlighted}>
            {part.value}
          </HighlightPart>
        );
      })}
    </>
  );
}

const styles = StyleSheet.create({
  highlighted: {
    fontWeight: 'bold',
    backgroundColor: '#f5df4d',
    color: '#6f6106',
  },
  nonHighlighted: {
    fontWeight: 'normal',
    backgroundColor: 'transparent',
    color: 'black',
  },
});

Replace INDEX_NAME with the name of your index.

When users type a query, the UI highlights matches in each search result.
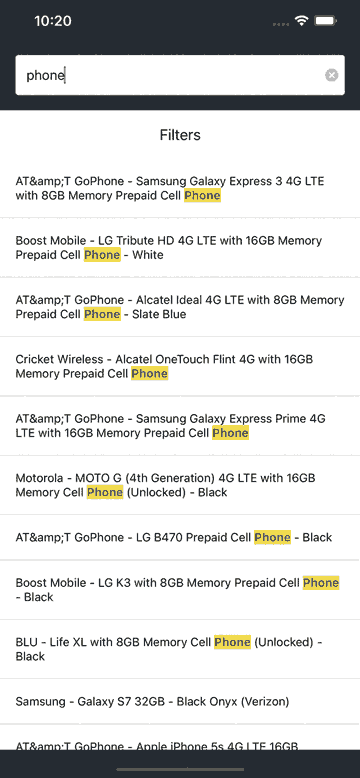
Search results for the query apple

Search results for the query “apple”

Add a filter

A search box is a great way to refine a search experience, but sometimes users need to narrow down the results to find what they’re looking for in a specific category. Use the useRefinementList() Hook to filter items based on attributes such as brand, size, or color.

Mobile devices have limited screen real estate. Instead of displaying filters near the list of hits as you would on a desktop website, mobile apps commonly set filters inside a modal. With React Native, use the <Modal> component.

1
2
3
4
5
6
7
8
9
10
11
12
13
14
15
16
17
18
19
20
21
22
23
24
25
26
27
28
29
30
31
32
33
34
35
36
37
38
39
40
41
42
43
44
45
46
47
48
49
50
51
52
53
54
55
56
57
58
59
60
61
62
63
64
65
66
67
68
69
70
71
72
73
74
75
76
77
78
79
80
81
82
83
84
85
86
87
88
89
90
91
92
93
94
95
96
97
98
99
100
101
102
103
104
105
106
107
108
109
110
111
112
113
114
115
116
117
118
119
120
121
122
123
124
125
126
127
128
129
130
131
132
133
134
135
136
137
138
139
140
141
142
143
144
145
146
147
148
149
150
151
import React from 'react';
import {
  Button,
  StyleSheet,
  SafeAreaView,
  Modal,
  Text,
  TouchableOpacity,
  View,
} from 'react-native';
import {
  useClearRefinements,
  useCurrentRefinements,
  useRefinementList,
} from 'react-instantsearch-core';

export function Filters({ isModalOpen, onToggleModal, onChange }) {
  const { items, refine } = useRefinementList({ attribute: 'brand' });
  const { canRefine: canClear, refine: clear } = useClearRefinements();
  const { items: currentRefinements } = useCurrentRefinements();
  const totalRefinements = currentRefinements.reduce(
    (acc, { refinements }) => acc + refinements.length,
    0
  );

  return (
    <>
      <TouchableOpacity style={styles.filtersButton} onPress={onToggleModal}>
        <Text style={styles.filtersButtonText}>Filters</Text>
        {totalRefinements > 0 && (
          <View style={styles.itemCount}>
            <Text style={styles.itemCountText}>{totalRefinements}</Text>
          </View>
        )}
      </TouchableOpacity>

      <Modal animationType="slide" visible={isModalOpen}>
        <SafeAreaView>
          <View style={styles.container}>
            <View style={styles.title}>
              <Text style={styles.titleText}>Brand</Text>
            </View>
            <View style={styles.list}>
              {items.map((item) => {
                return (
                  <TouchableOpacity
                    key={item.value}
                    style={styles.item}
                    onPress={() => {
                      refine(item.value);
                      onChange();
                    }}
                  >
                    <Text
                      style={{
                        ...styles.labelText,
                        fontWeight: item.isRefined ? '800' : '400',
                      }}
                    >
                      {item.label}
                    </Text>
                    <View style={styles.itemCount}>
                      <Text style={styles.itemCountText}>{item.count}</Text>
                    </View>
                  </TouchableOpacity>
                );
              })}
            </View>
          </View>
          <View style={styles.filterListButtonContainer}>
            <View style={styles.filterListButton}>
              <Button
                title="Clear all"
                color="#252b33"
                disabled={!canClear}
                onPress={() => {
                  clear();
                  onChange();
                  onToggleModal();
                }}
              />
            </View>
            <View style={styles.filterListButton}>
              <Button
                onPress={onToggleModal}
                title="See results"
                color="#252b33"
              />
            </View>
          </View>
        </SafeAreaView>
      </Modal>
    </>
  );
}

const styles = StyleSheet.create({
  container: {
    padding: 18,
    backgroundColor: '#ffffff',
  },
  title: {
    alignItems: 'center',
  },
  titleText: {
    fontSize: 32,
  },
  list: {
    marginTop: 32,
  },
  item: {
    paddingVertical: 12,
    flexDirection: 'row',
    justifyContent: 'space-between',
    borderBottomWidth: 1,
    borderColor: '#ddd',
    alignItems: 'center',
  },
  itemCount: {
    backgroundColor: '#252b33',
    borderRadius: 24,
    paddingVertical: 4,
    paddingHorizontal: 8,
    marginLeft: 4,
  },
  itemCountText: {
    color: '#ffffff',
    fontWeight: '800',
  },
  labelText: {
    fontSize: 16,
  },
  filterListButtonContainer: {
    flexDirection: 'row',
  },
  filterListButton: {
    flex: 1,
    alignItems: 'center',
    marginTop: 18,
  },
  filtersButton: {
    paddingVertical: 18,
    flexDirection: 'row',
    justifyContent: 'center',
    alignItems: 'center',
  },
  filtersButtonText: {
    fontSize: 18,
    textAlign: 'center',
  },
});

Replace INDEX_NAME with the name of your index. Replace the brand attributes with one of your index’s faceting attributes.

Filters in a modal

Filters in a modal

The Filters button reveals filters in a modal that slides from the bottom. It also uses the useCurrentRefinements() and useClearRefinements() Hooks to display how many refinements are applied and let users clear them all at once.

Next steps

With this tutorial, you’ve got a solid starting point for building dynamic search interfaces. Improve the app by:

Did you find this page helpful?